Yamaha MT4X Multitrack Cassette Recorder: Disassembly & Service
I’ve recently serviced a couple of Yamaha mt4x four track cassette recorders. Here I overview the process that I took and try to share info that I couldn’t easily find online myself.
The images used are mostly from the restoration of a 100V machine I picked up on eBay. When I got it it wouldn’t power on and was very dirty inside and out. I have added images from another (240v) machine in some places to show differences or where I missed photographing something originally.
There are probably some approaches that could be improved or things to know, so if you have any experience with these I’d be keen to hear your experience.
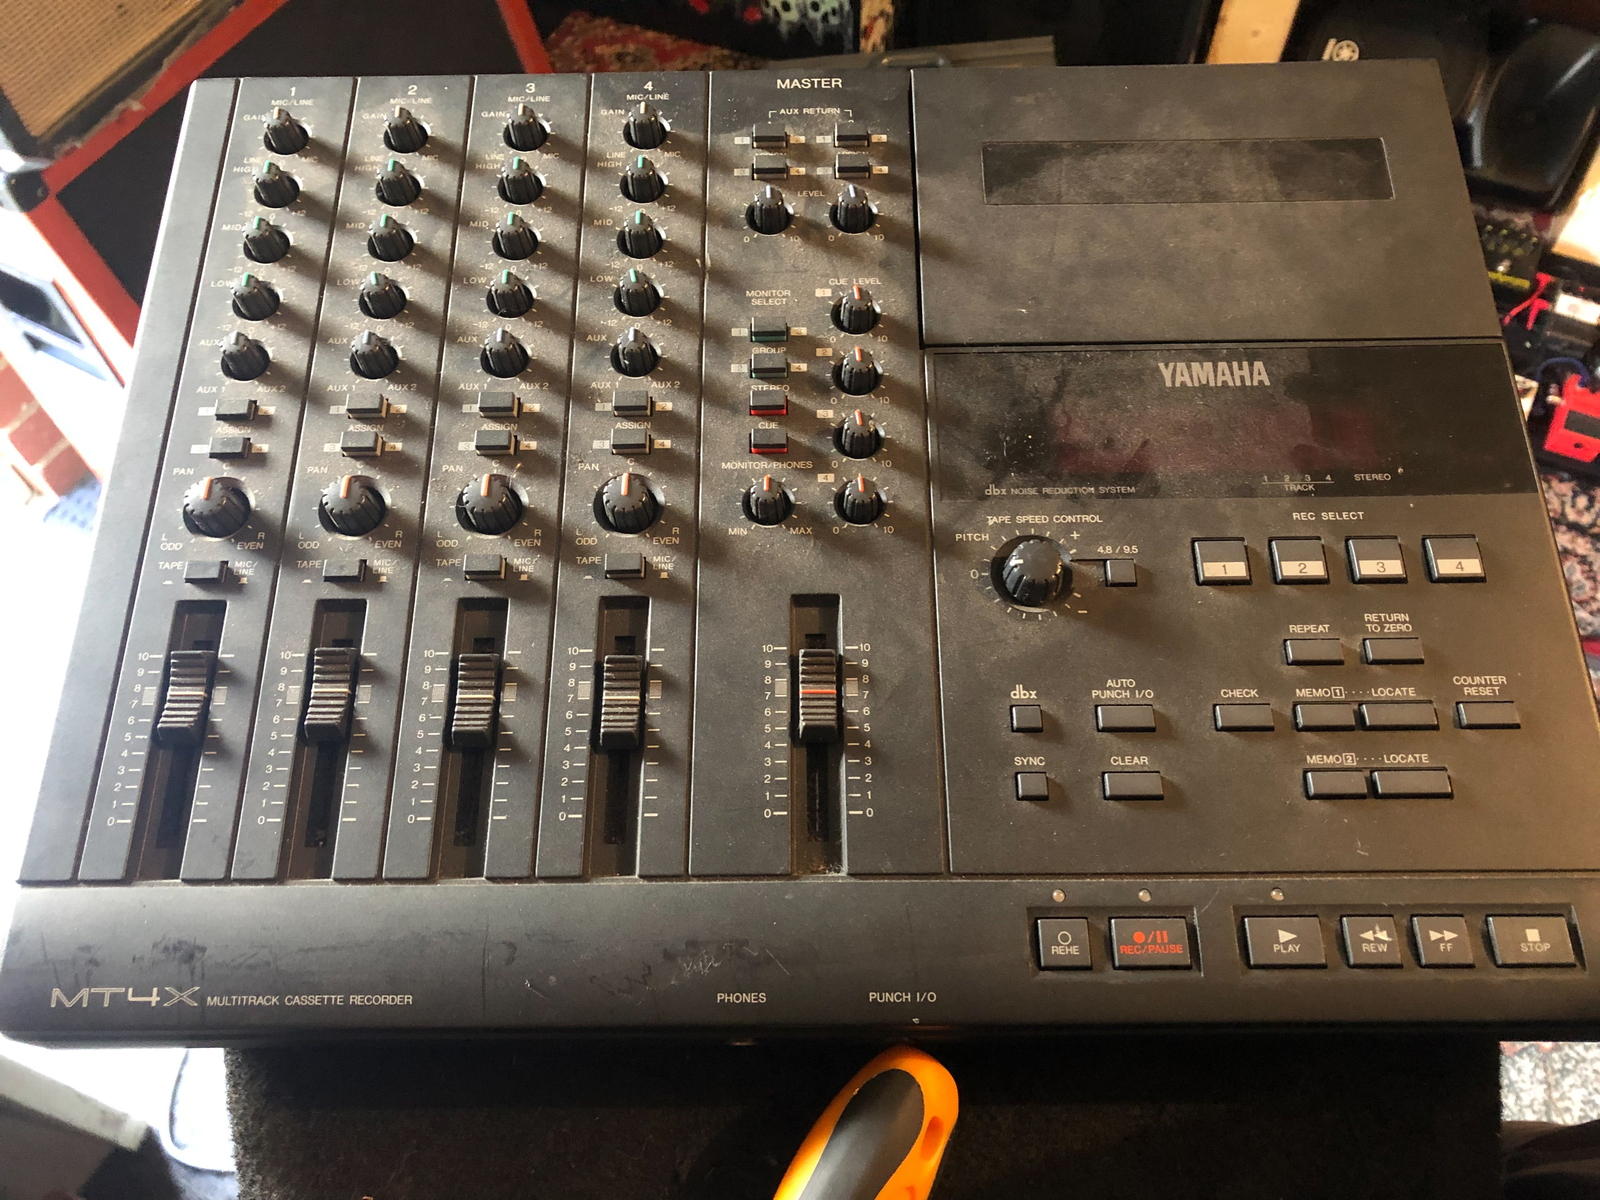 Starting Point: Dead & Dirty MT4X
Gather Tools & Hardware
Before unscrewing anything, you’ll want to make sure you’ve got a few things ready. I make sure I have the following available.
- 2x Phillips Screwdrivers. A little one, and a bigger one.
- Tweezers. I prefer to have both a bent and straight set on hand, but one will do.
- Needle Nose Pliers.
- A marker or two.
- Plastic pry Tool. I have a cheap phone openining tool, but a public transport card usually works too.
- Cotton/Q Tips. Best to have quite a few on hand.
- Vernier Calipers are an optional which can help with measuring belts if you don’t know exactly what you need or have.
- A toothbrush and/or stiff brush for cleaning plastic parts.
- Electronic cleaning & lubricating solutions. I use:
-
- a solvent spray for jacks.
-
- ‘clean & lubricant’ with a spray nozzle adapter for pots & switches.
-
- oil for motors & mechanical parts. Often I’ll use a sewing machine or motor oil but here am trying out inox mx3.
-
- Isopropyl.
- Something to keep screws organised. Small plastic pots, jar lids etc are good options.
- A toothpick or similar for applying oil.
- A cassette tape for testing. A Chrome Type-II type is recommended.
- A clear space to work. I like to utilise my standing desk and lay down a sheet of card - if someone wants to buy me an anti static mat, both xmas and my birthday are near at the time of writing this ;)
- Time & patience! This stuff can get fiddly and frustrating, you want enough time to not rush things, and space to be able to leave the unit disassembled and come back to it if you hit a snag.
I’m noting the ratings of fuses, servo and belts which are from my observations and measurements. I have been unable to find any values for these online and am yet to get hold of a service manual. I would greatly appreciate comments of official values, or your observed values if you are taking a unit apart.
- 1x 70mm x 1mm square belt
- 1x 115mm x 4.7mm flat belt
- 1x Sankyo SHU2L 12v motor
- 1x 240v 500mA 20mm fast blow fuse (100v model)
- 1x 240v 120mA 20mm fast blow fuse (240v model)
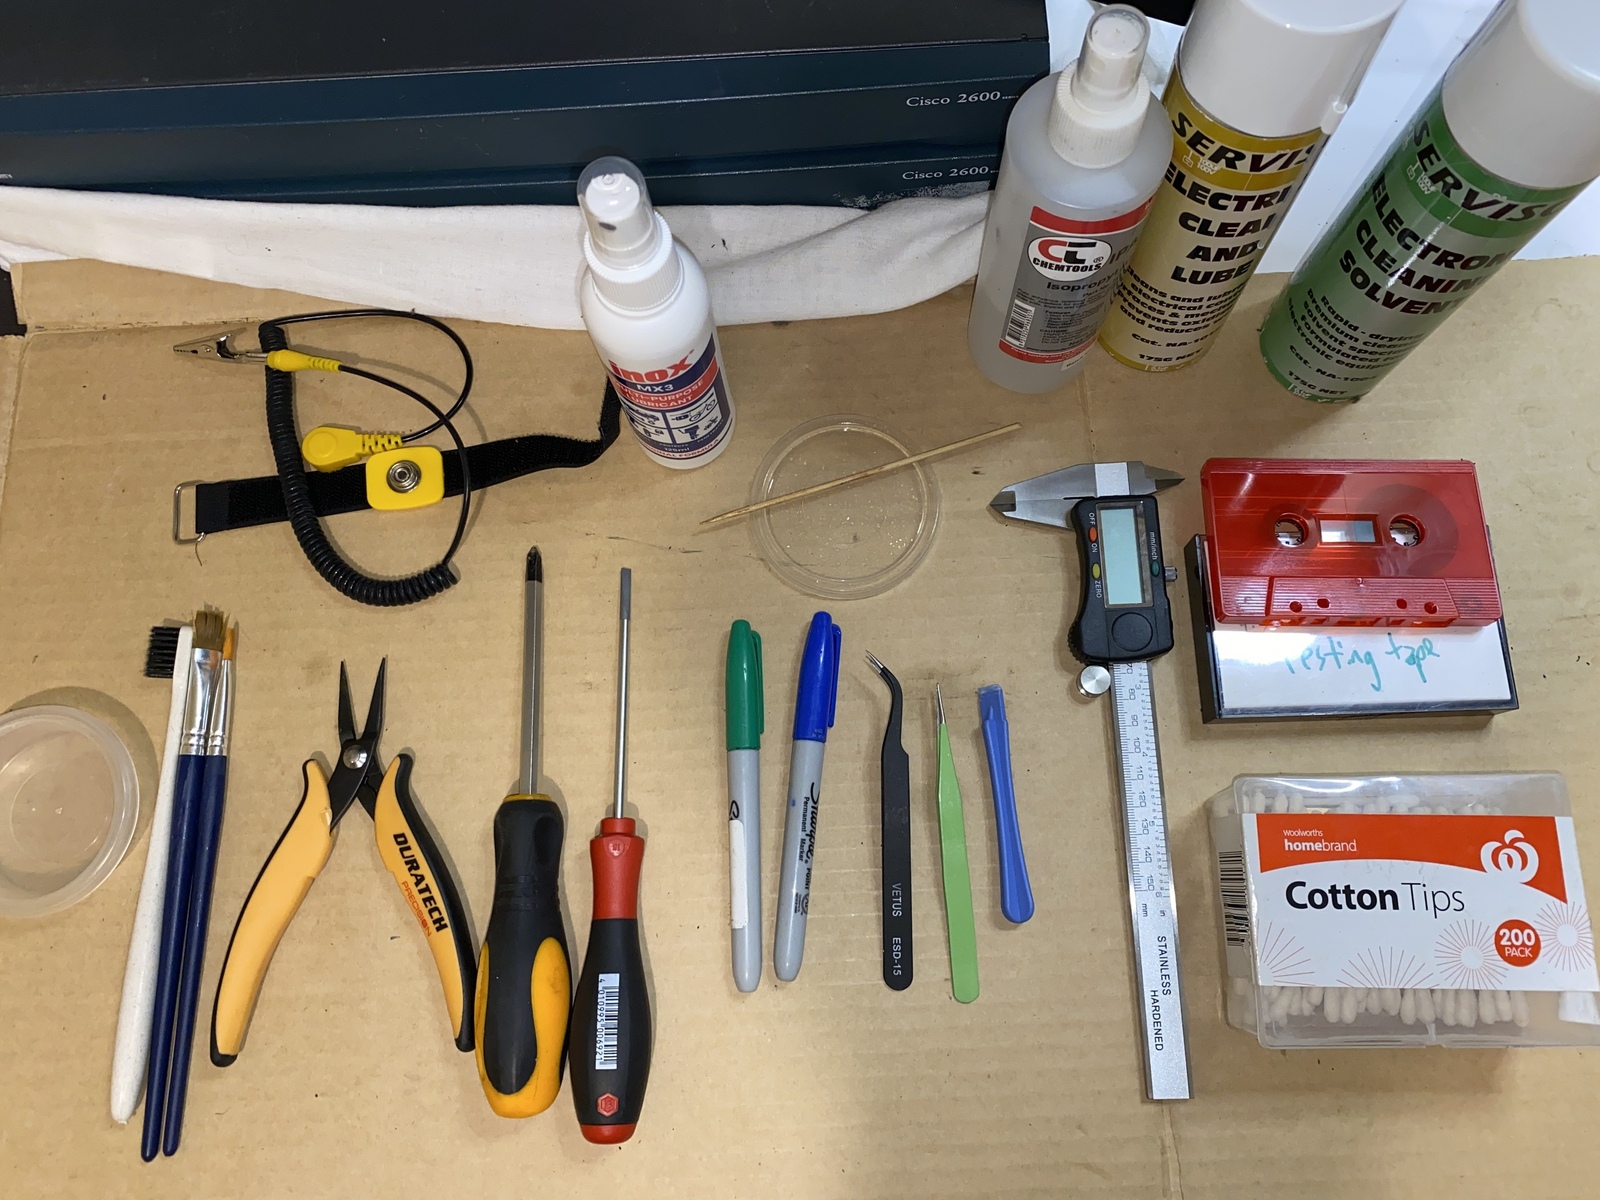 Gather your tools
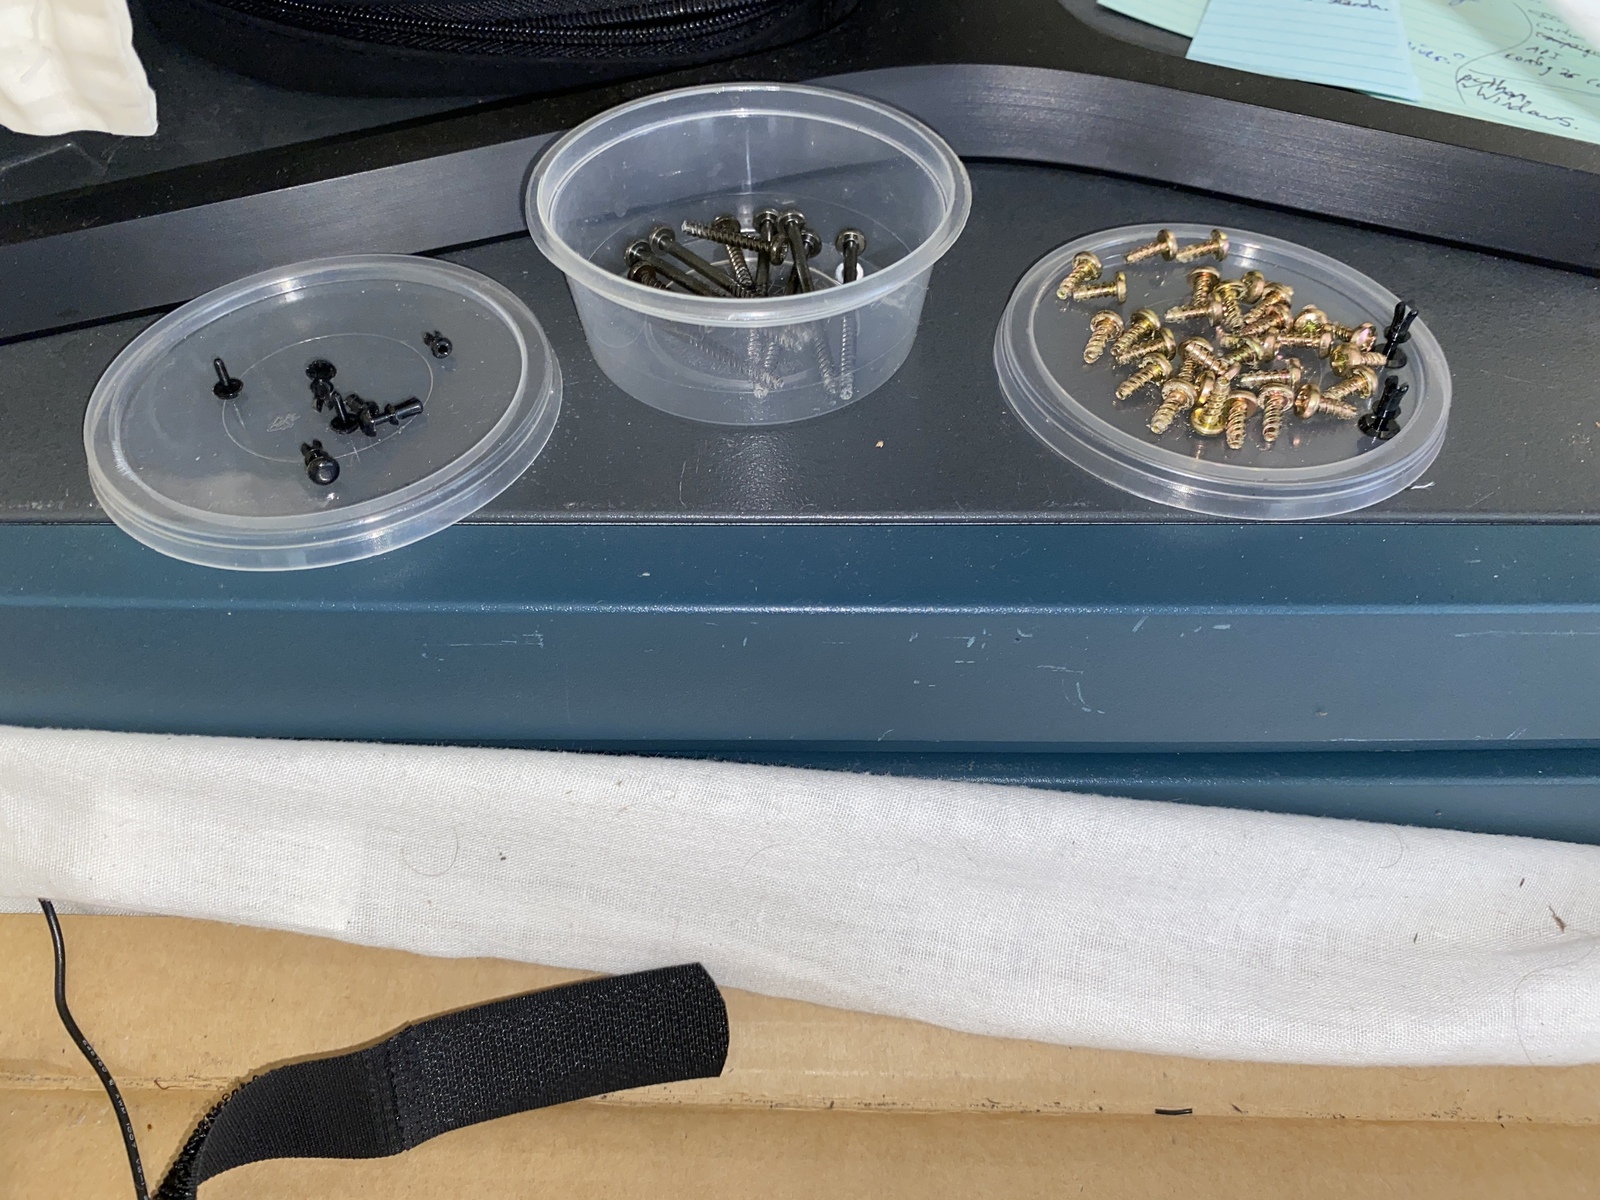 Keeping fixings tidy saves a headache later on
Disassembly
Now that we have a space to work and appropriate tools for the job, let’s get into the fun and pull this thing apart.
The first thing you want to do - which I neglected to photograph - is remove all of the knobs. All knobs, and all mixer sliders will pull off. Some might be a bit sticky but just pull straight up and it will come off. Don’t try to remove the push buttons, they’re affixed from the inside.
Once the knobs are removed, flip the unit over. Be careful of the exposed knobs, you don’t want to break these (or scratch your desk). I find as long as you lay it down gently you’ll be fine, placing a clean rag (tea towels work well) first is helpful.
There are 10 screws to remove here. 7 long, 3 short.
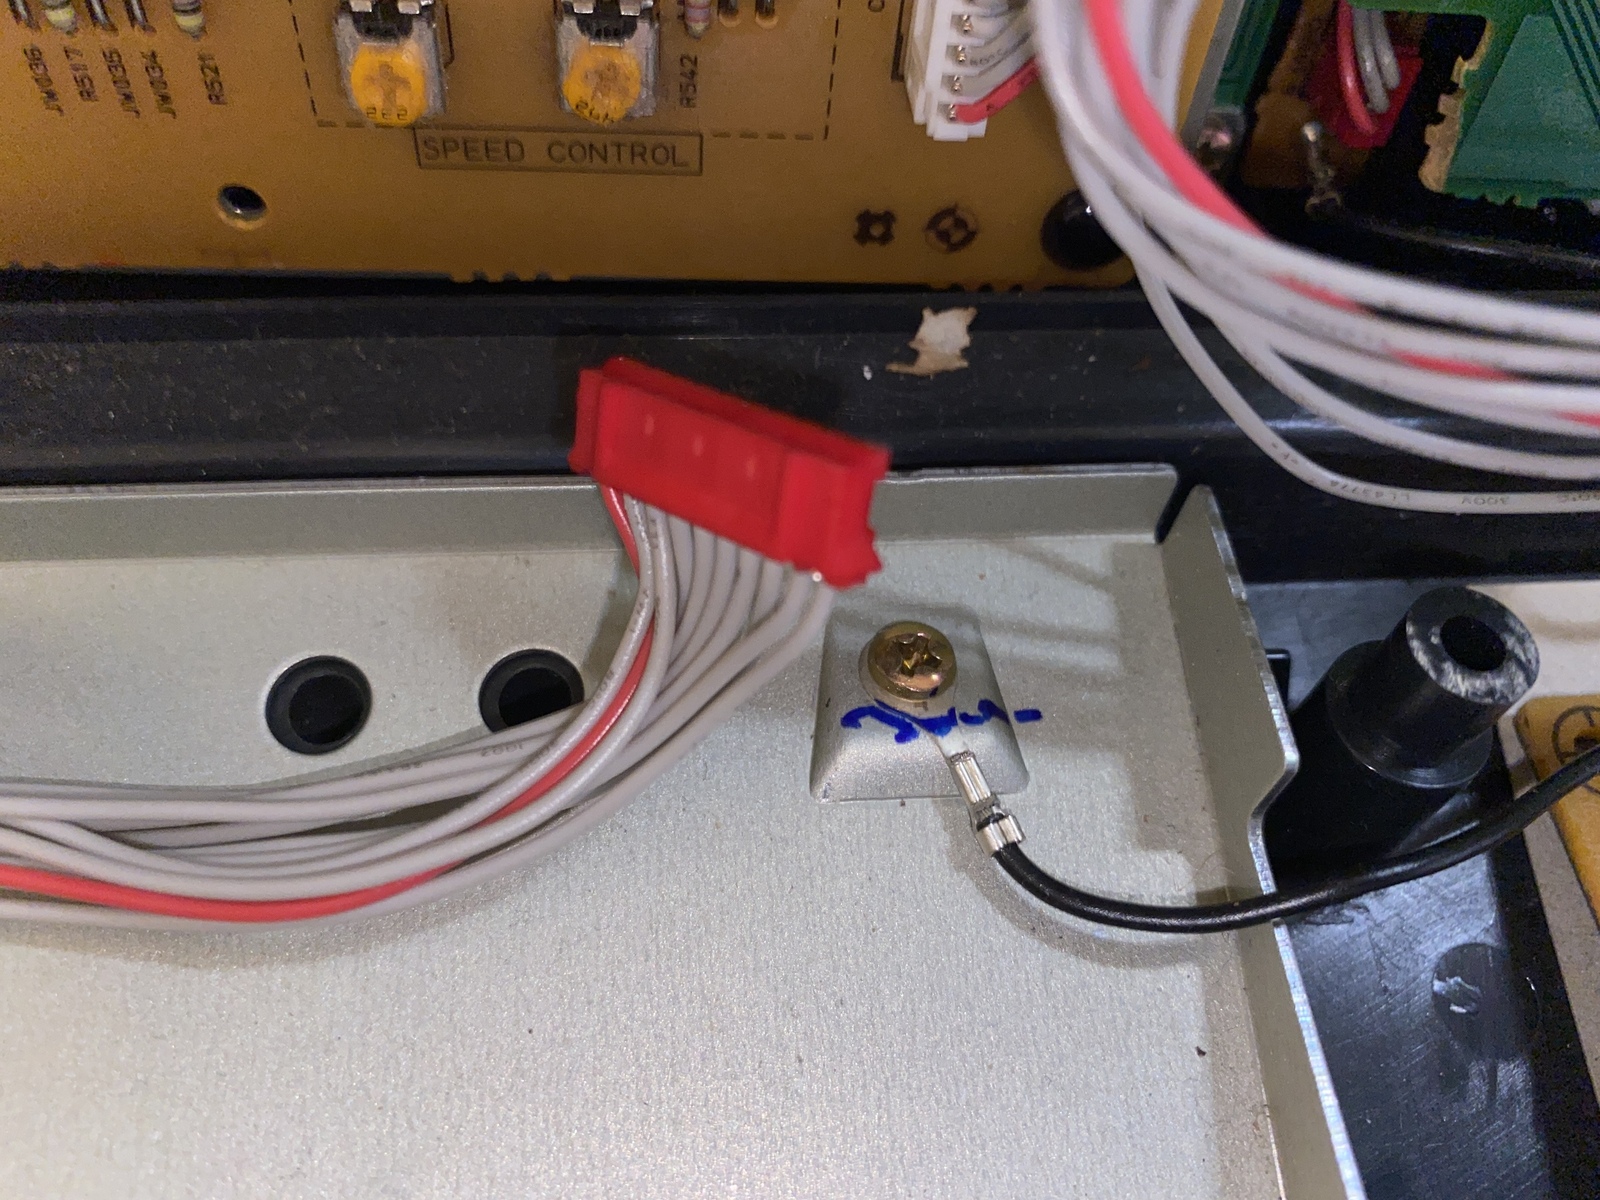
Once those are out, flip it over with the rear facing you. Gently lift the top from the rear. You will find here a ground wire connected to the cassette mechanism. This needs to be removed before lifting the top further. Take the screw out and set it aside. A really nice thing about the mtx units is that the screws are generally all the same, so you can just keep all of these gold screws together.
Although usually it is obvious where grounding wires connect when putting the mt4x back together, this is where I tend to use a marker. I will usually draw a coloured line across the grounding connection before removal so that it is easy to find the connection point later.
 Remove the mechanism grounding wire before opening fully
With that wire out of the way we can proceed to open the unit. Carefully pivit from the rear to open. There is another ground - this time a pin connector - that you’ll find starting to pull. Slip this off before opening further. You can choose to fully open the unit if you have space, or like me lean the top back against something. Always be careful not to pinch wires or apply too much pressure to connection points.
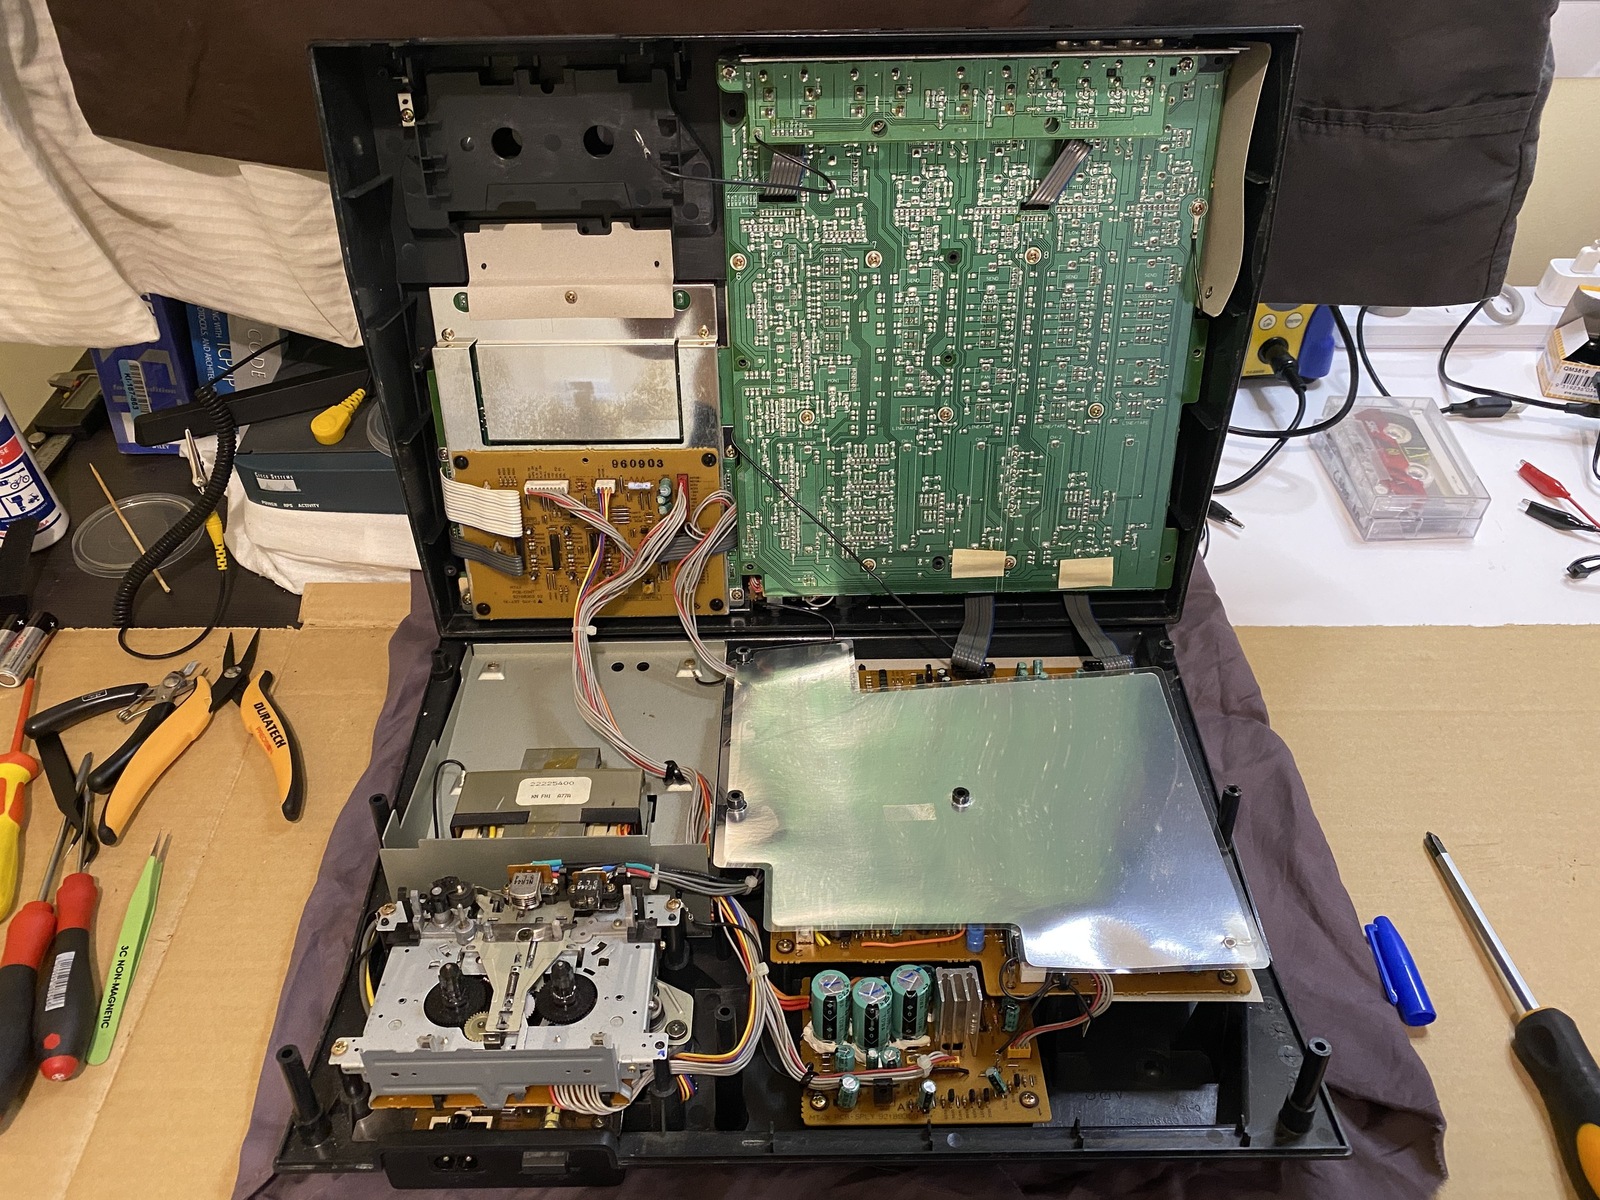 The open mt4x
 Marking grounding points can prevent later confusion
With the unit open, lift the shielding layer from the PCB (no need to fully disconnect it), and remove the connections between the top and base. For the grey and blue ribbon connectors there is a black terminal block that can be pulled up to release. The white and red connectors can be pulled straight up. If something feels very stuck, double check what you’re doing before proceeding.
 Disconnect the ribbon cables between from base circuit board
Clean, Lube & Replace Parts
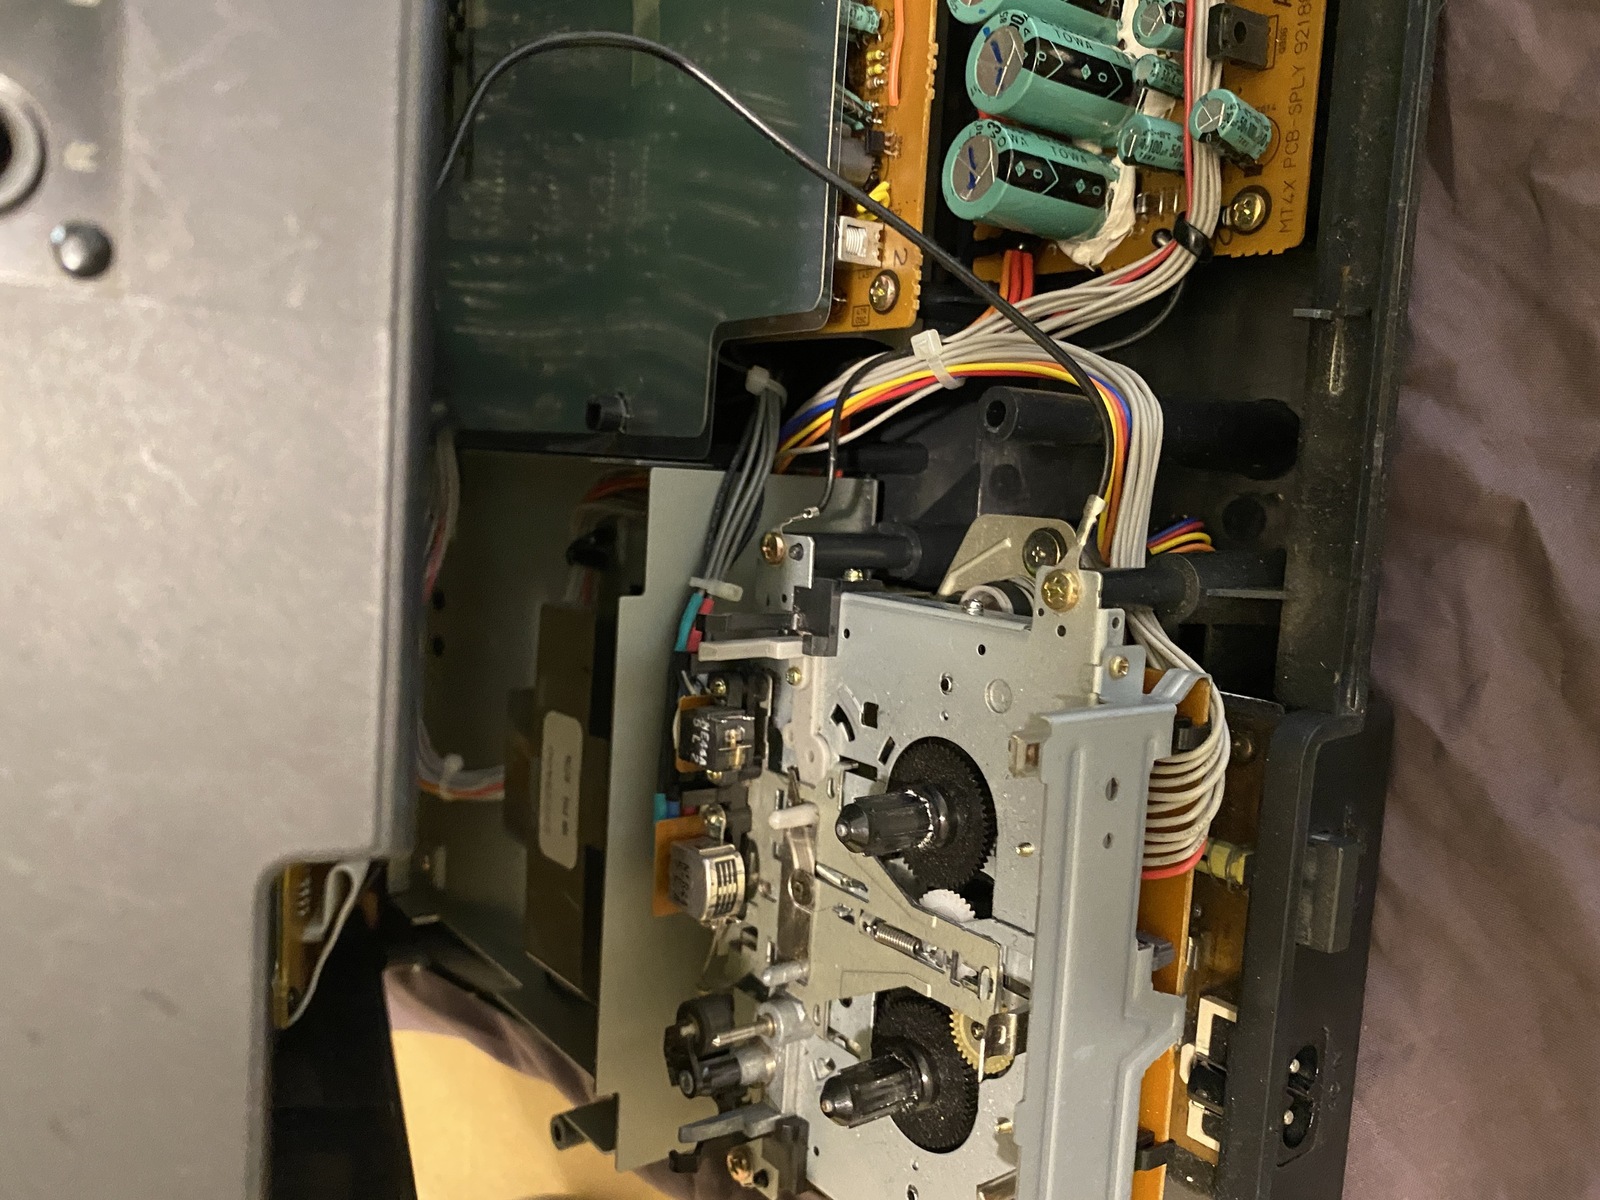
With the unit top and base seperated, set the top aside somewhere safe, and we will work through servicing the base parts. First take some time to familiarise yourself with what you’ve got in front of you and look for any damage, fluff, signs of past water spills etc. Then before continuing, fit the shield back over the PCB. Have you spotted the fuse yet? It is not the most convenient place, hidden away under the cassette mechanism.
 mt4x base guts exposed
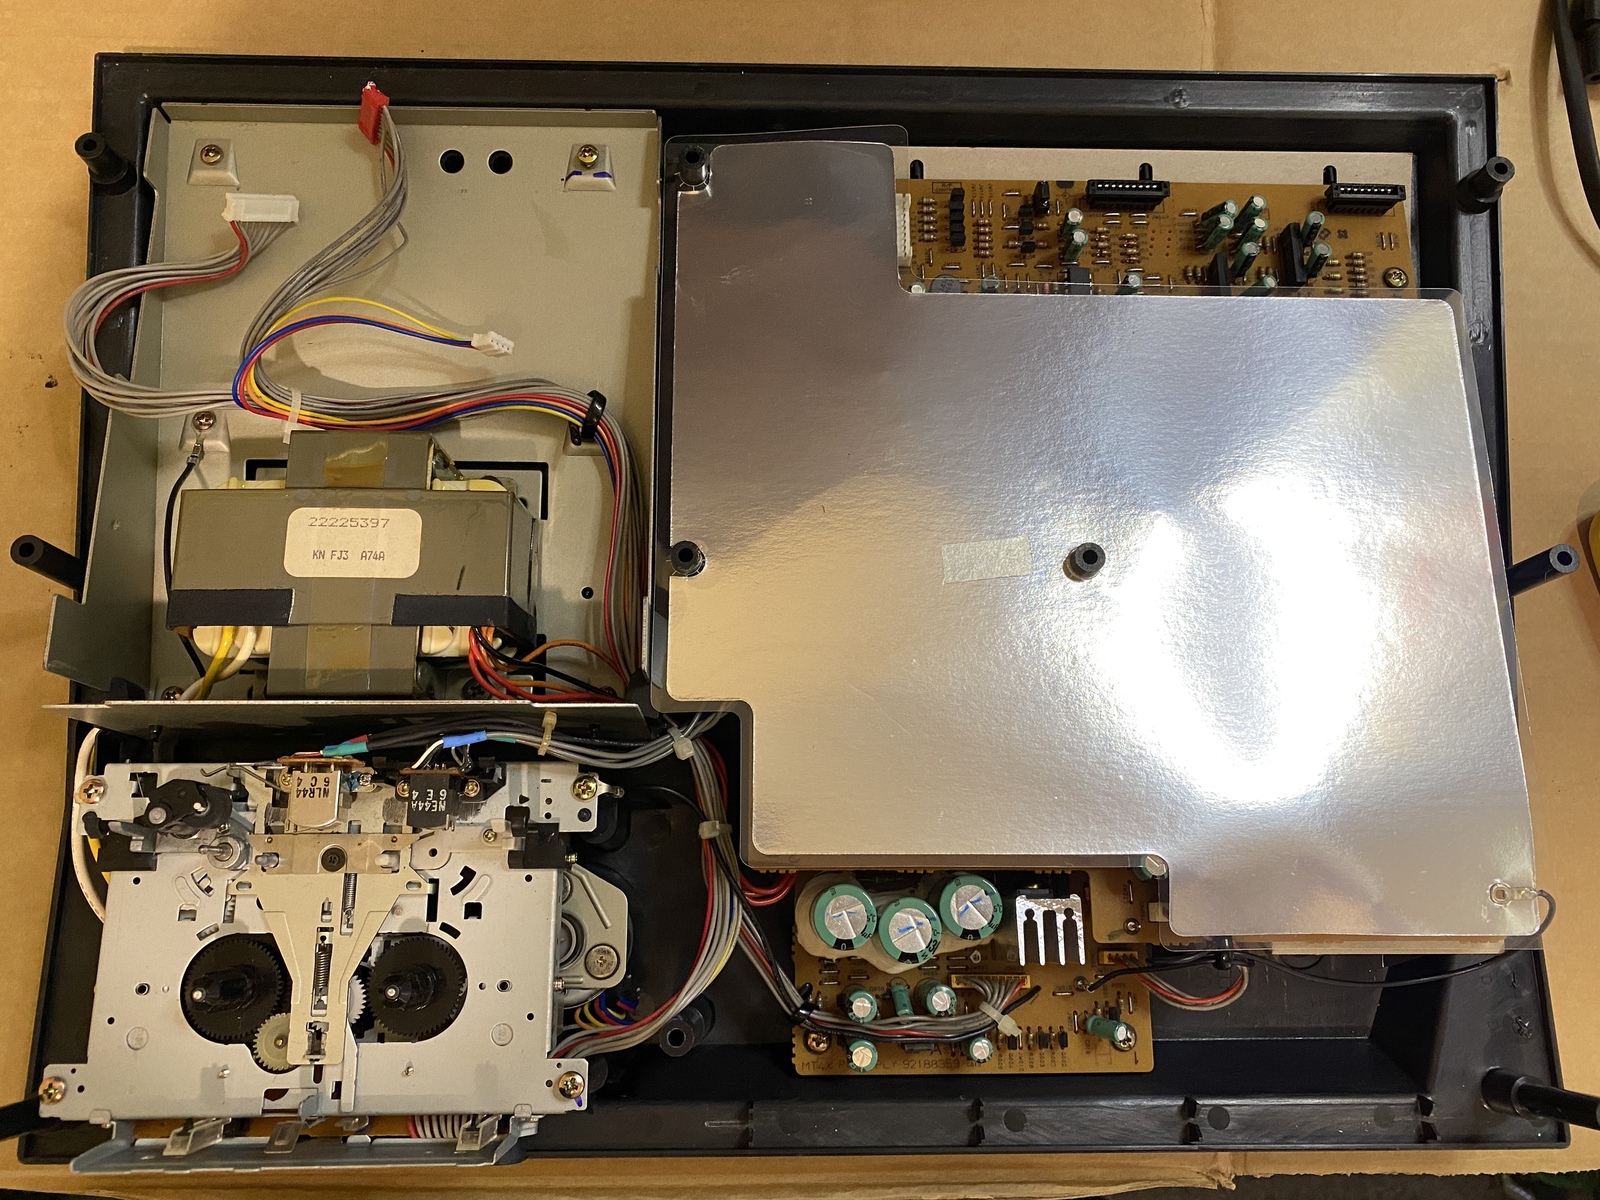 Lay the shielding back before continuing work
 mt4x fuse is located under the cassette mechanism
 A view of the mt4x heads
With a small brush and tweezers remove any dust and fluff from the cassette mechanism, taking care not to touch the heads at this stage. Once you’ve done this, remove the three remaining screws holding the mechanism in place.
 Remove the three corner screws from the cassette machanism
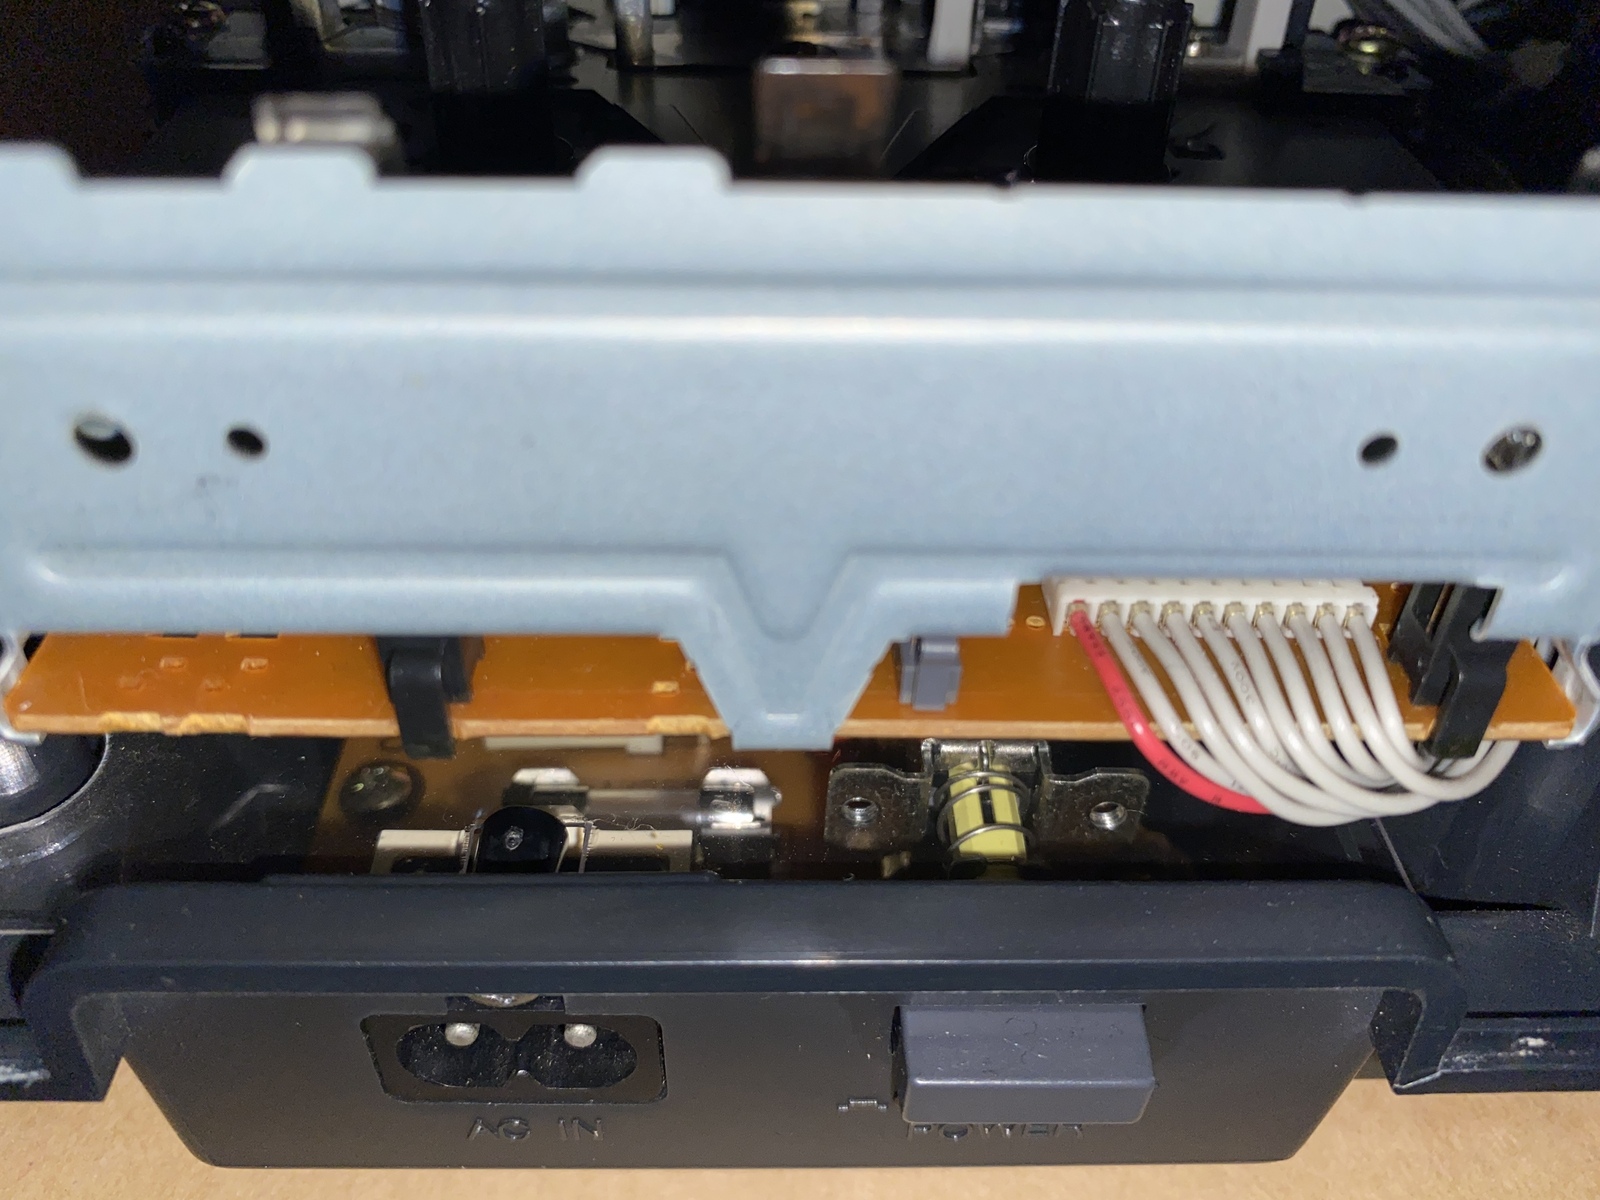
Gently flip the mechanism over to the right, resting it upon the shielding.
From here we have access to the fuse. If it needs replacing, do so now. What a pain to replace a fuse huh!
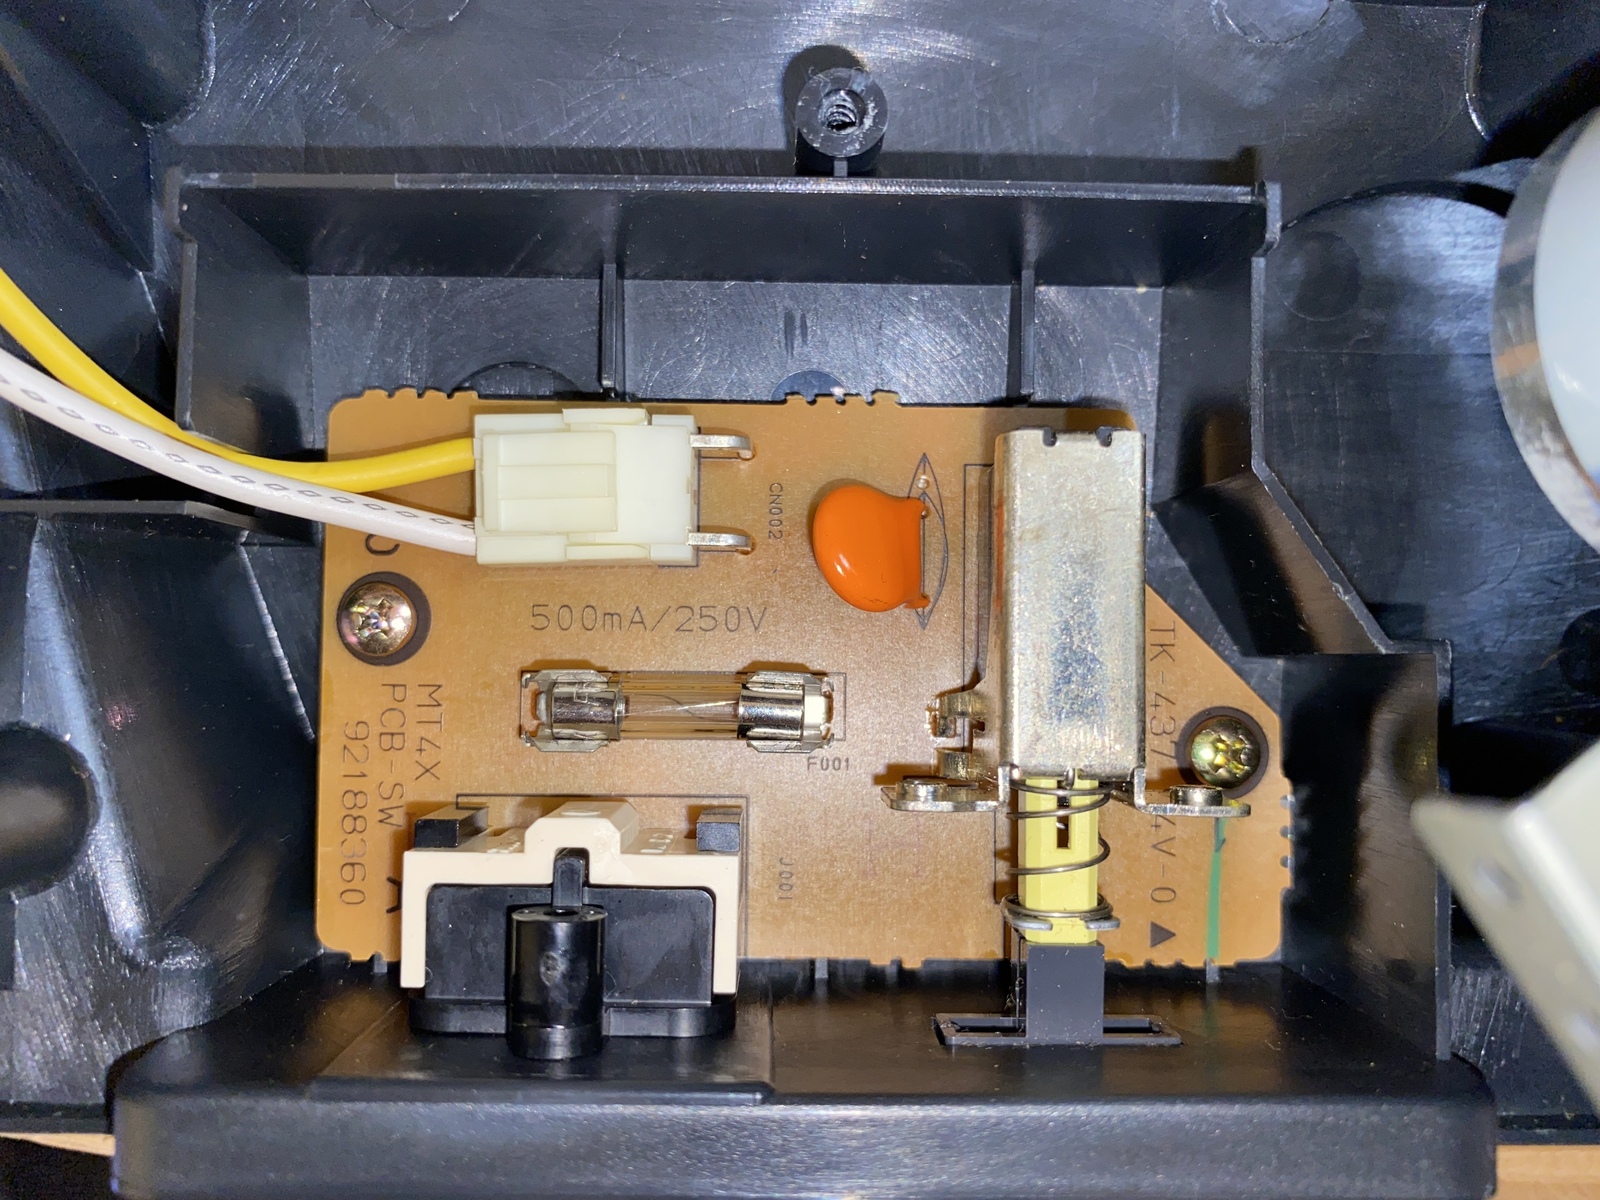 Fuse in a 100v model
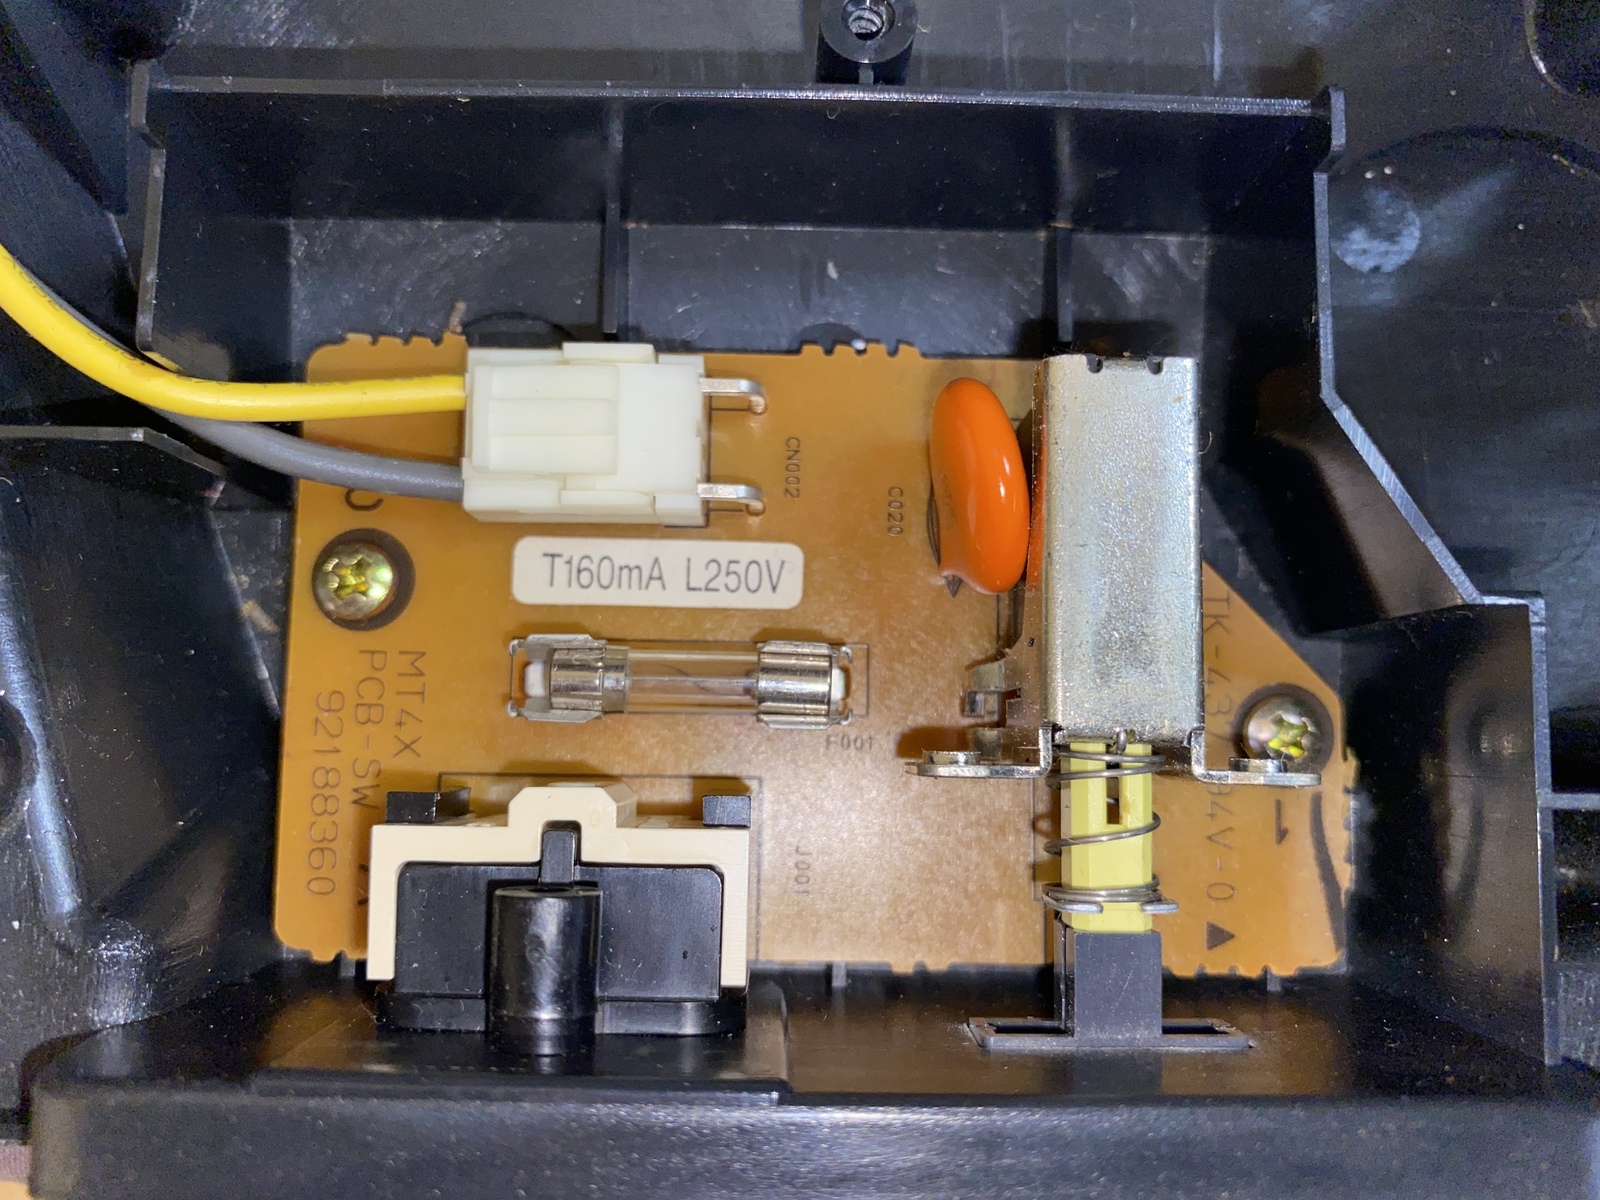 Fuse in a 240v model
Once again, clean out the exposed area, taking care of any electronic parts.
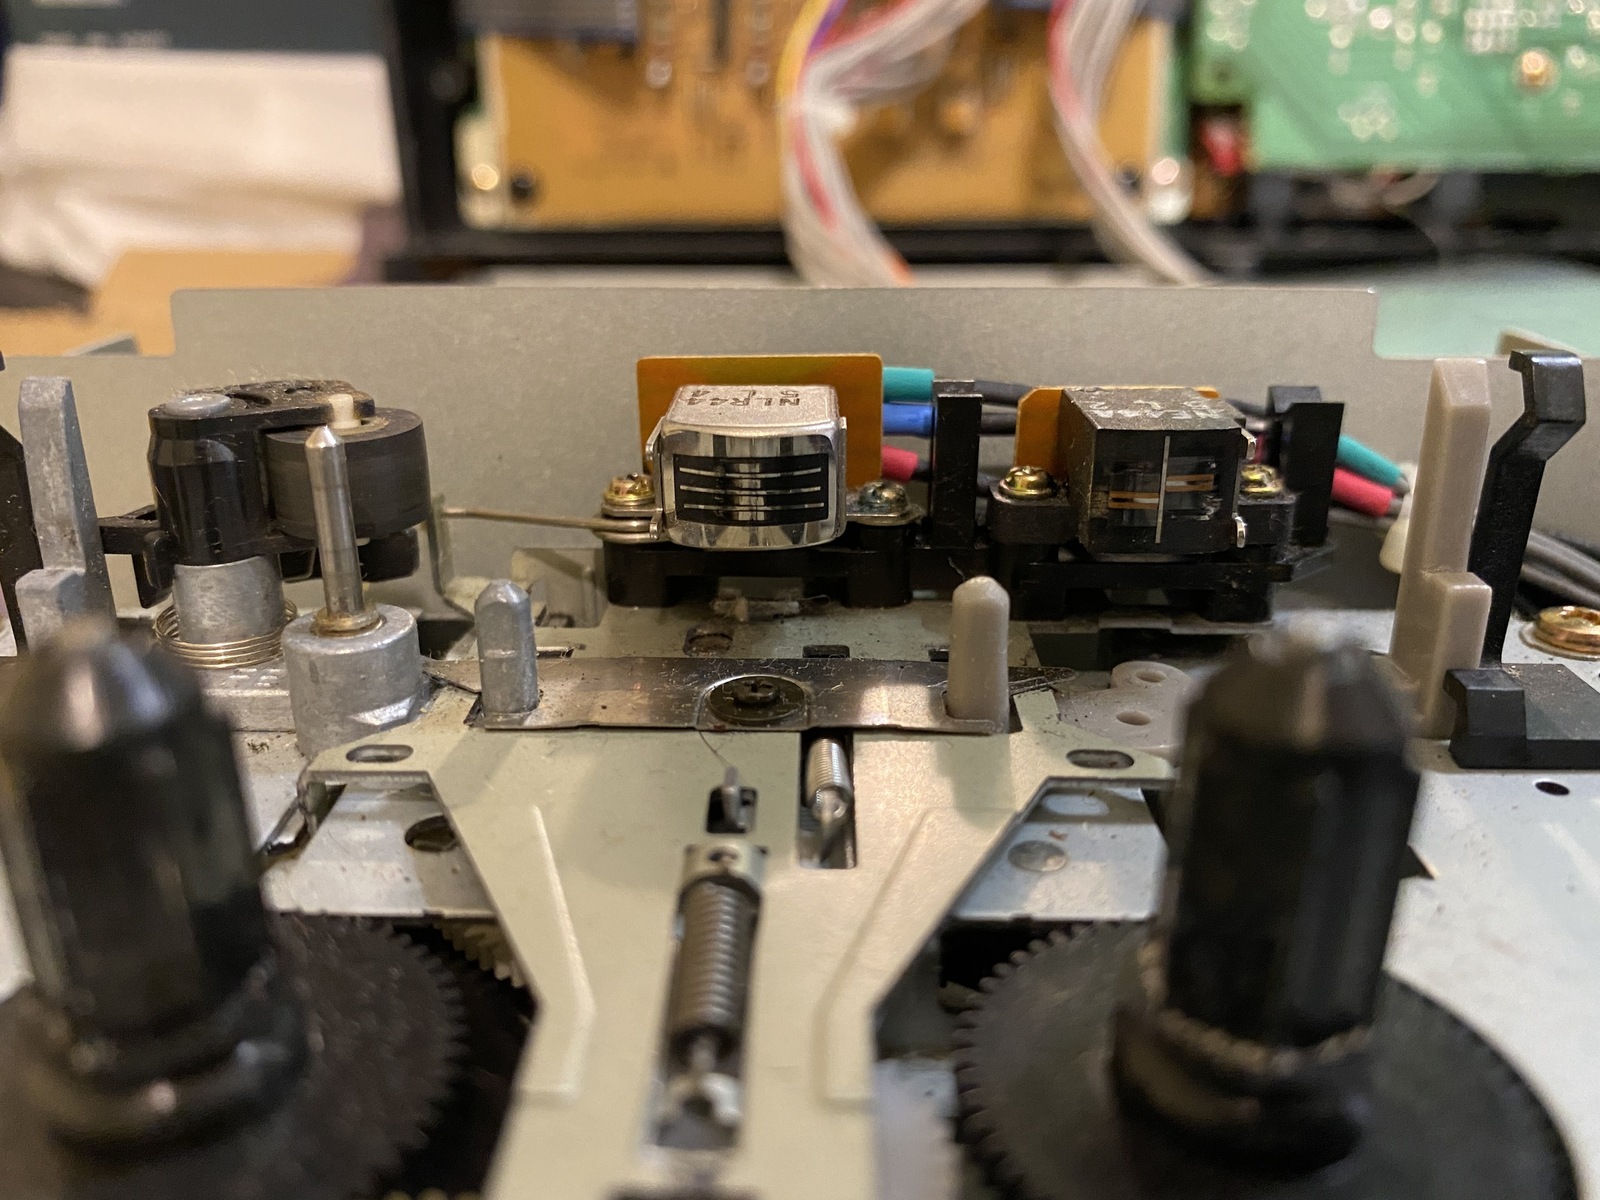
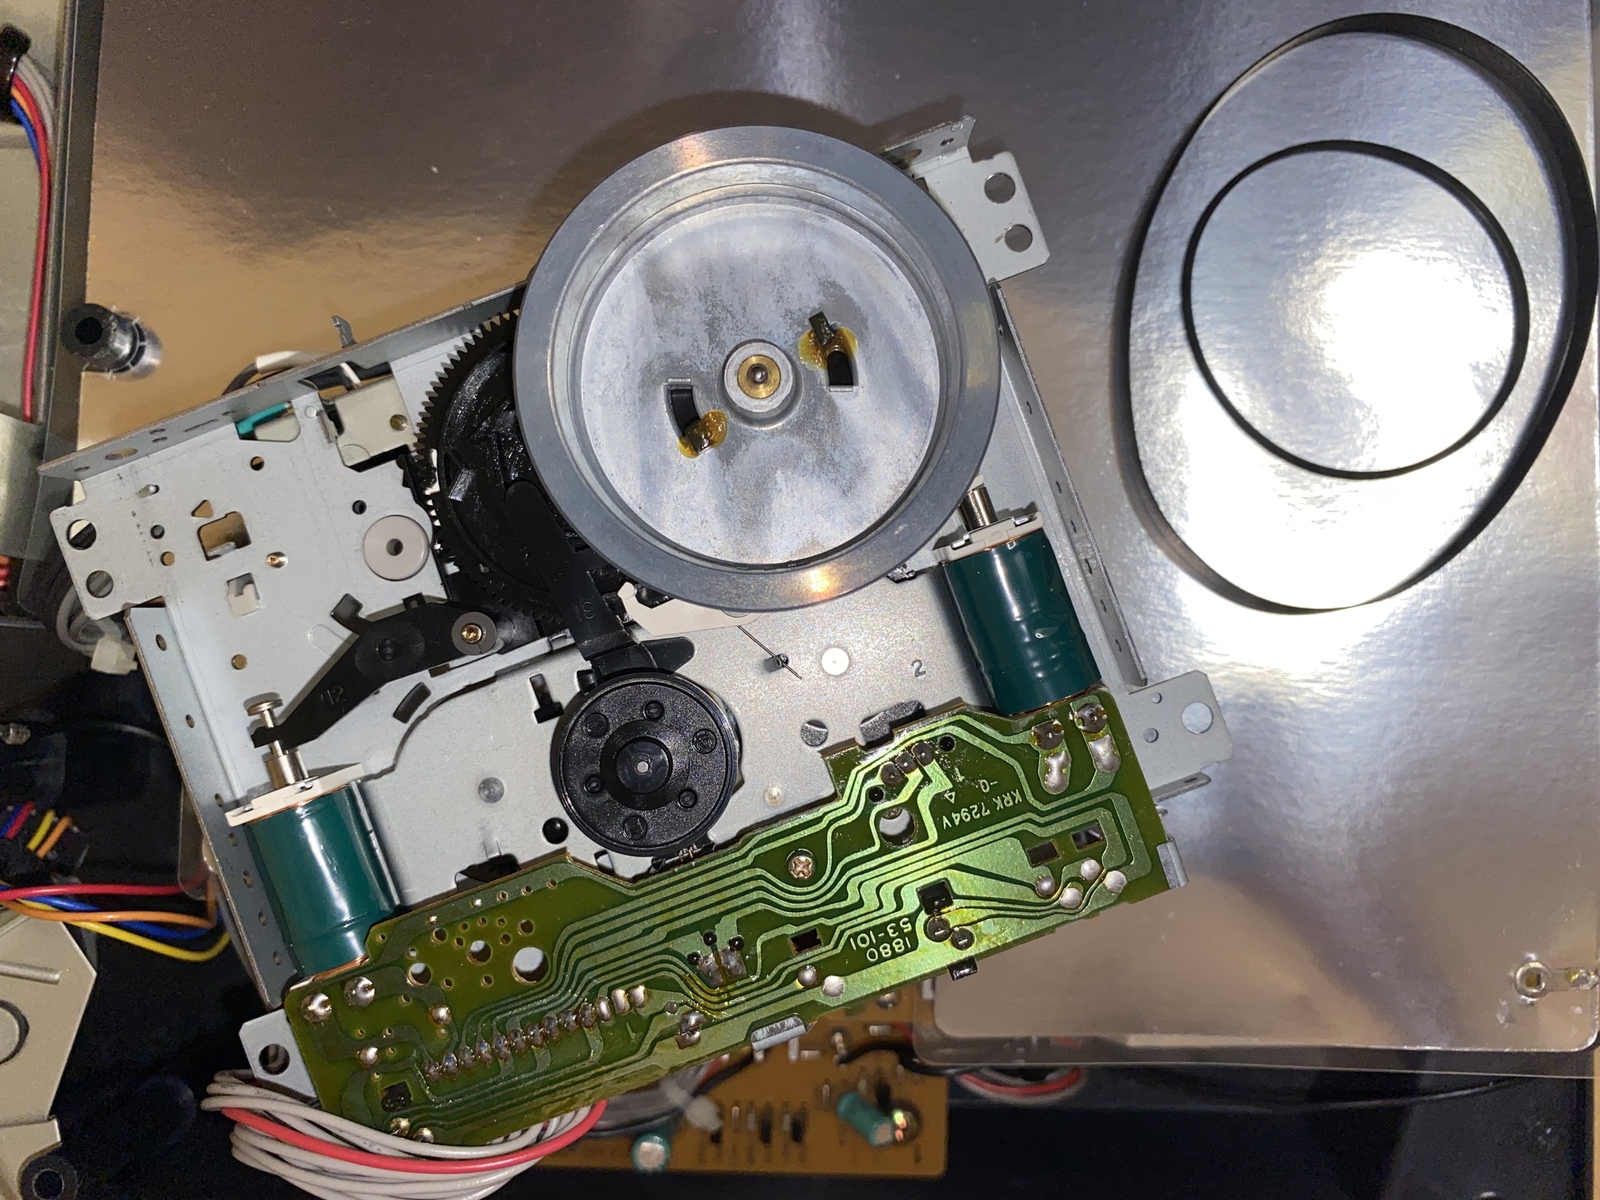
Now, there are four small screws holding the cassette mech cover in place. Remove these, carefully setting them aside and ensuring you don’t lose the two plastic latche parts. With this removed you will be able to remove the belts. If they have deteriorated you may need to clean their path in the wheels with a little warm soapy water on a q-tip.
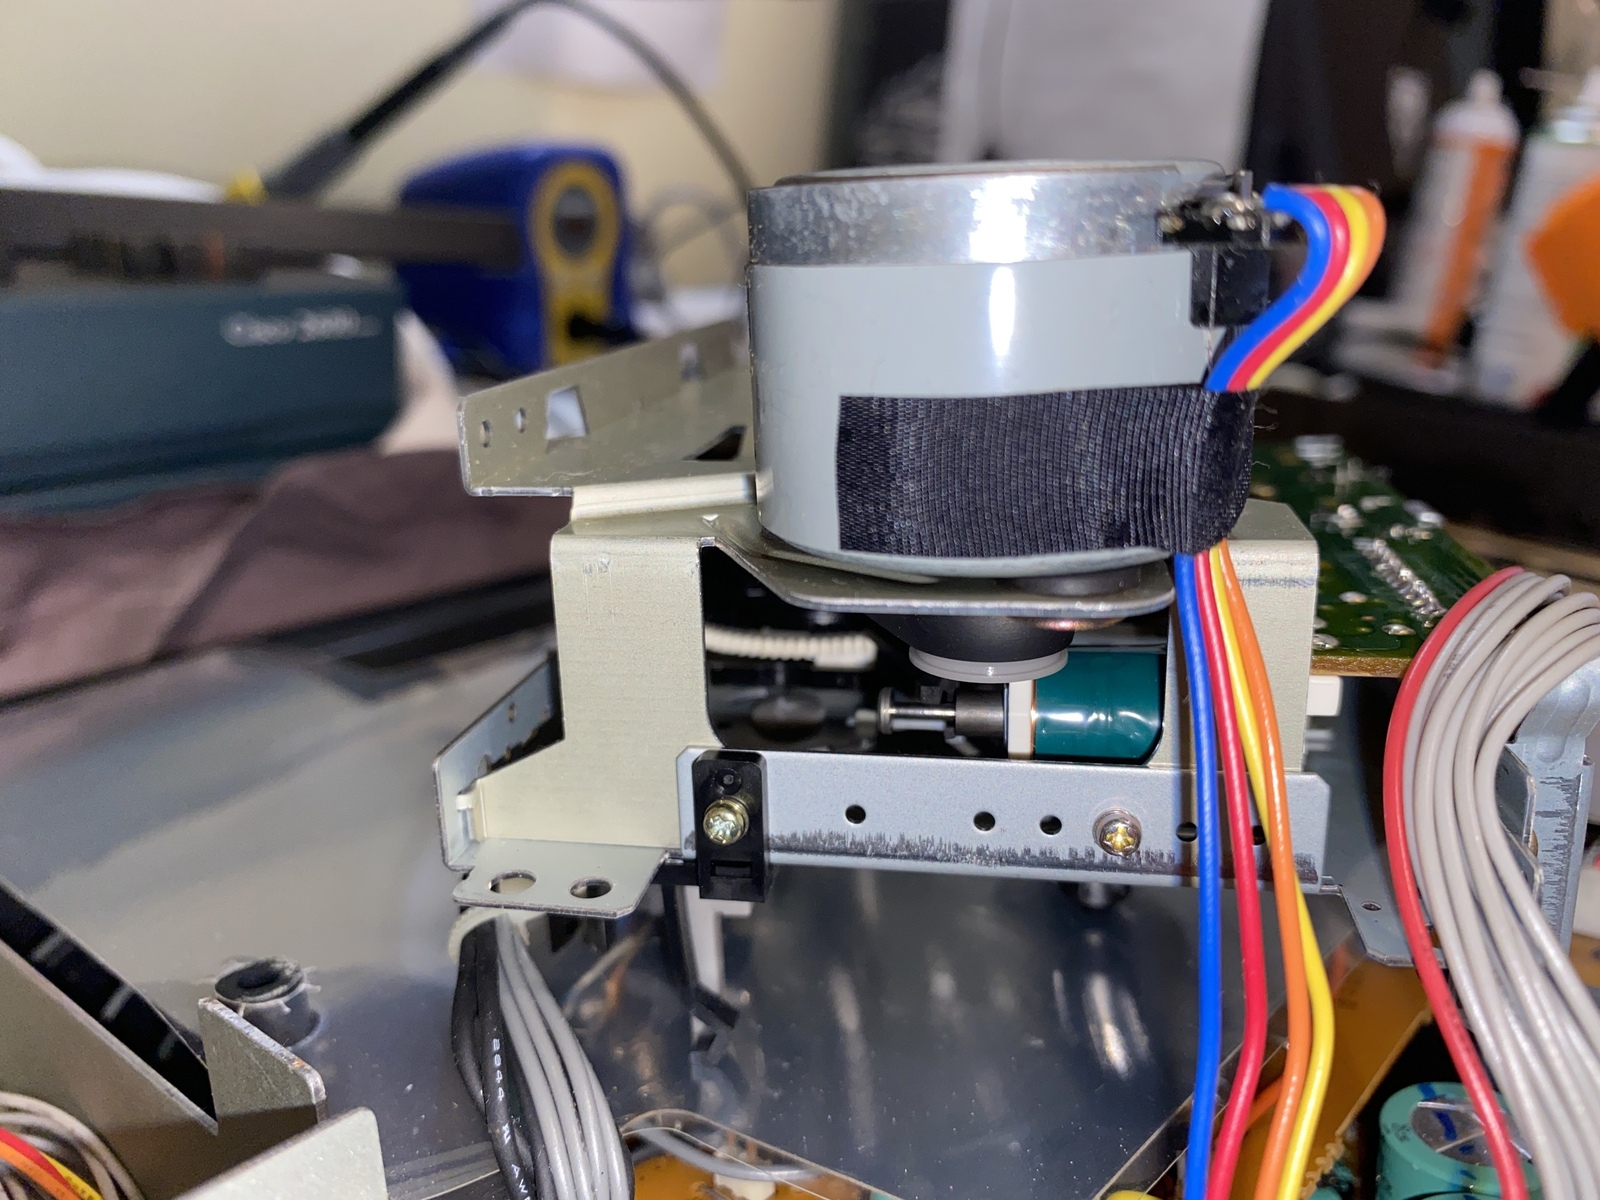
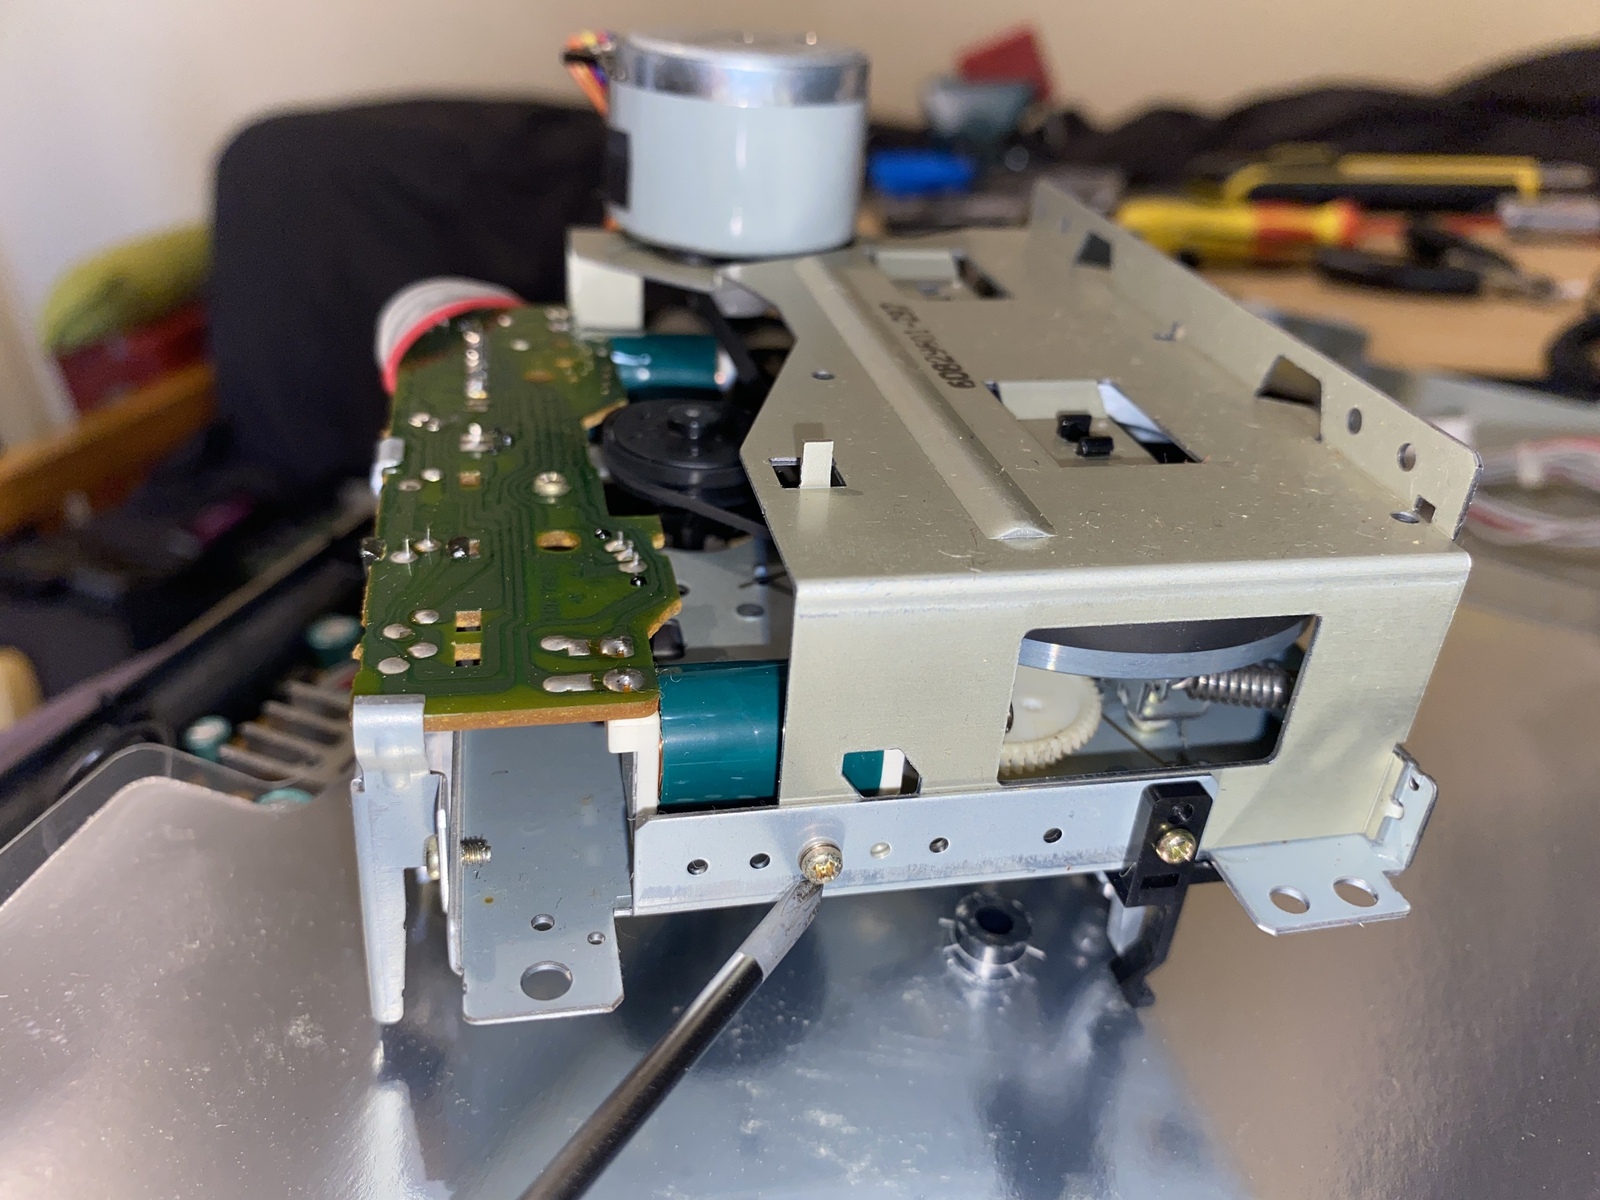
To oil the servo we need to remove it. There are three screws for this, and once it is out you’ll want to pull the plastic belt wheel off. Give this a clean, and then oil the motor. To oil the motor use a toothpick or similar device rather than trying to apply direct from an oil dispenser. Give a couple of drops into the shaft and then gently rotate it a couple of times. Clean any residue from the exposed shaft before pushing the belt wheel back on, leaving a slight gap between it and the motor body.
Refix the motor, and then replace the belts (ideally with new ones). Refix the mech cover, being careful not to break the plastic parts.
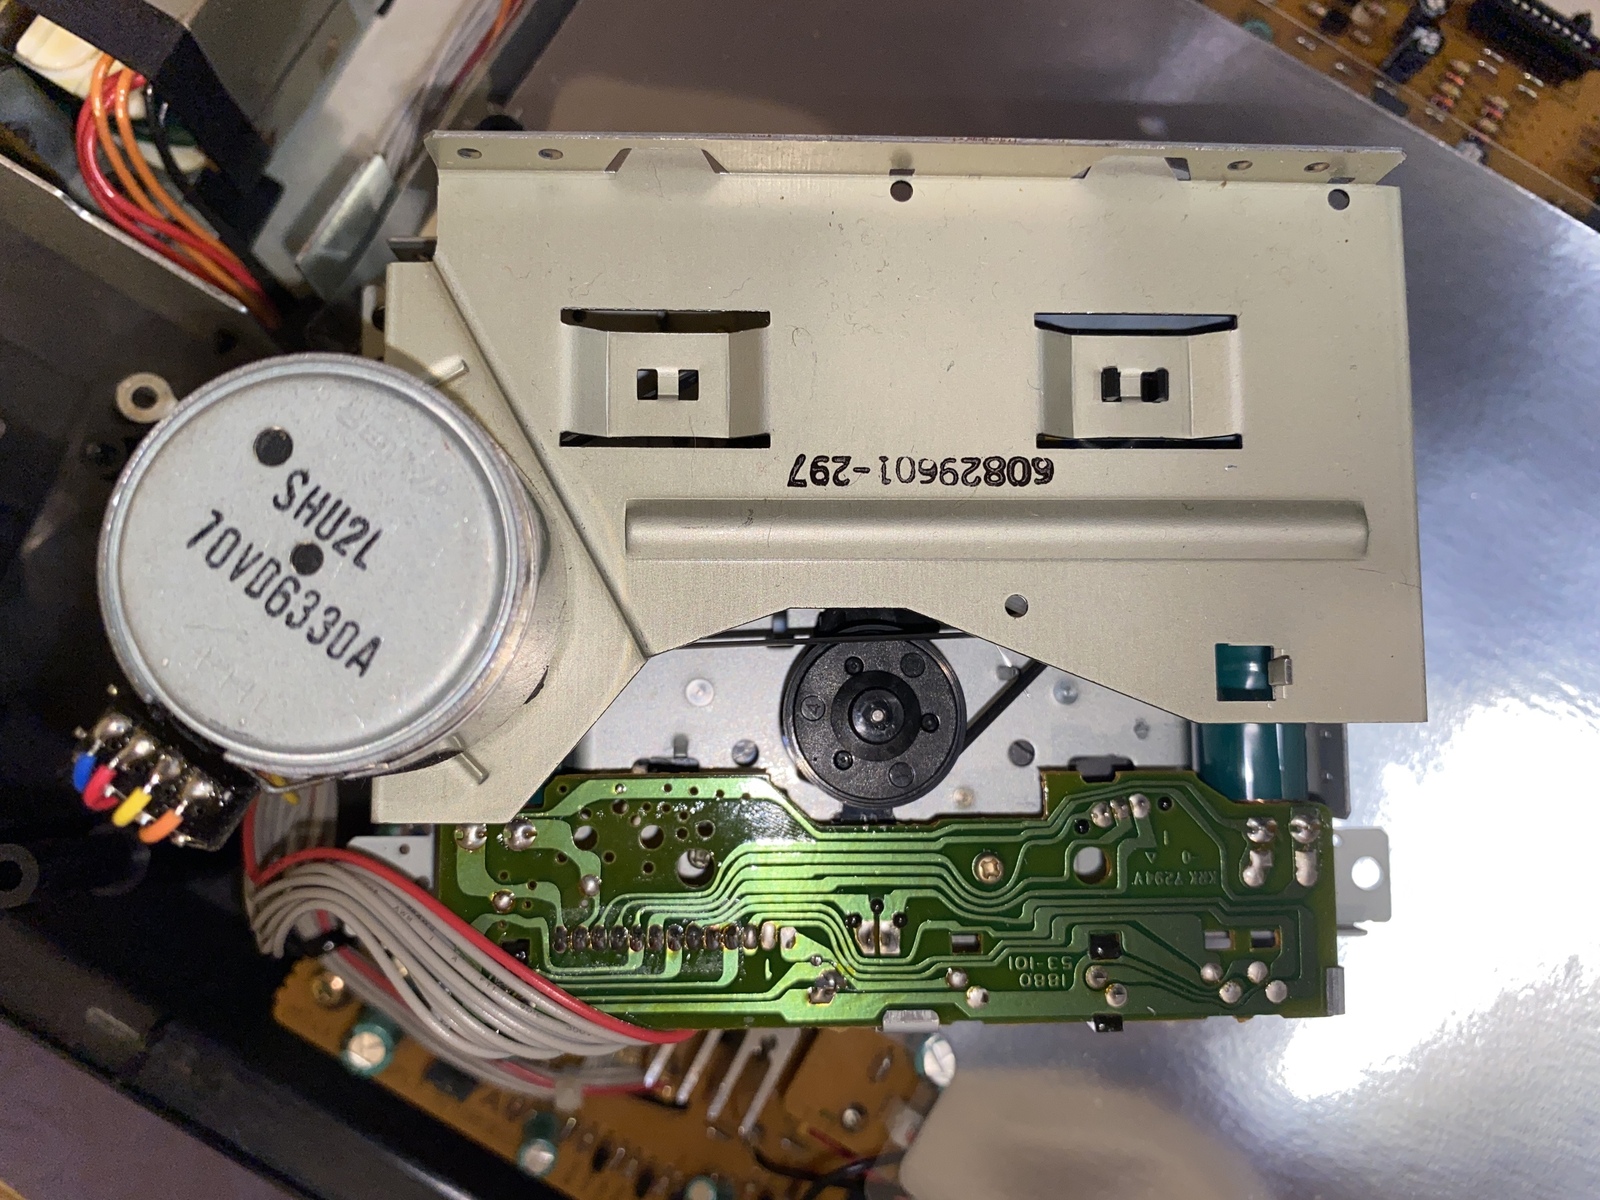 Back of cassette mechanism
 Remove these small screws to expose the belts
 The mt4x belts removed
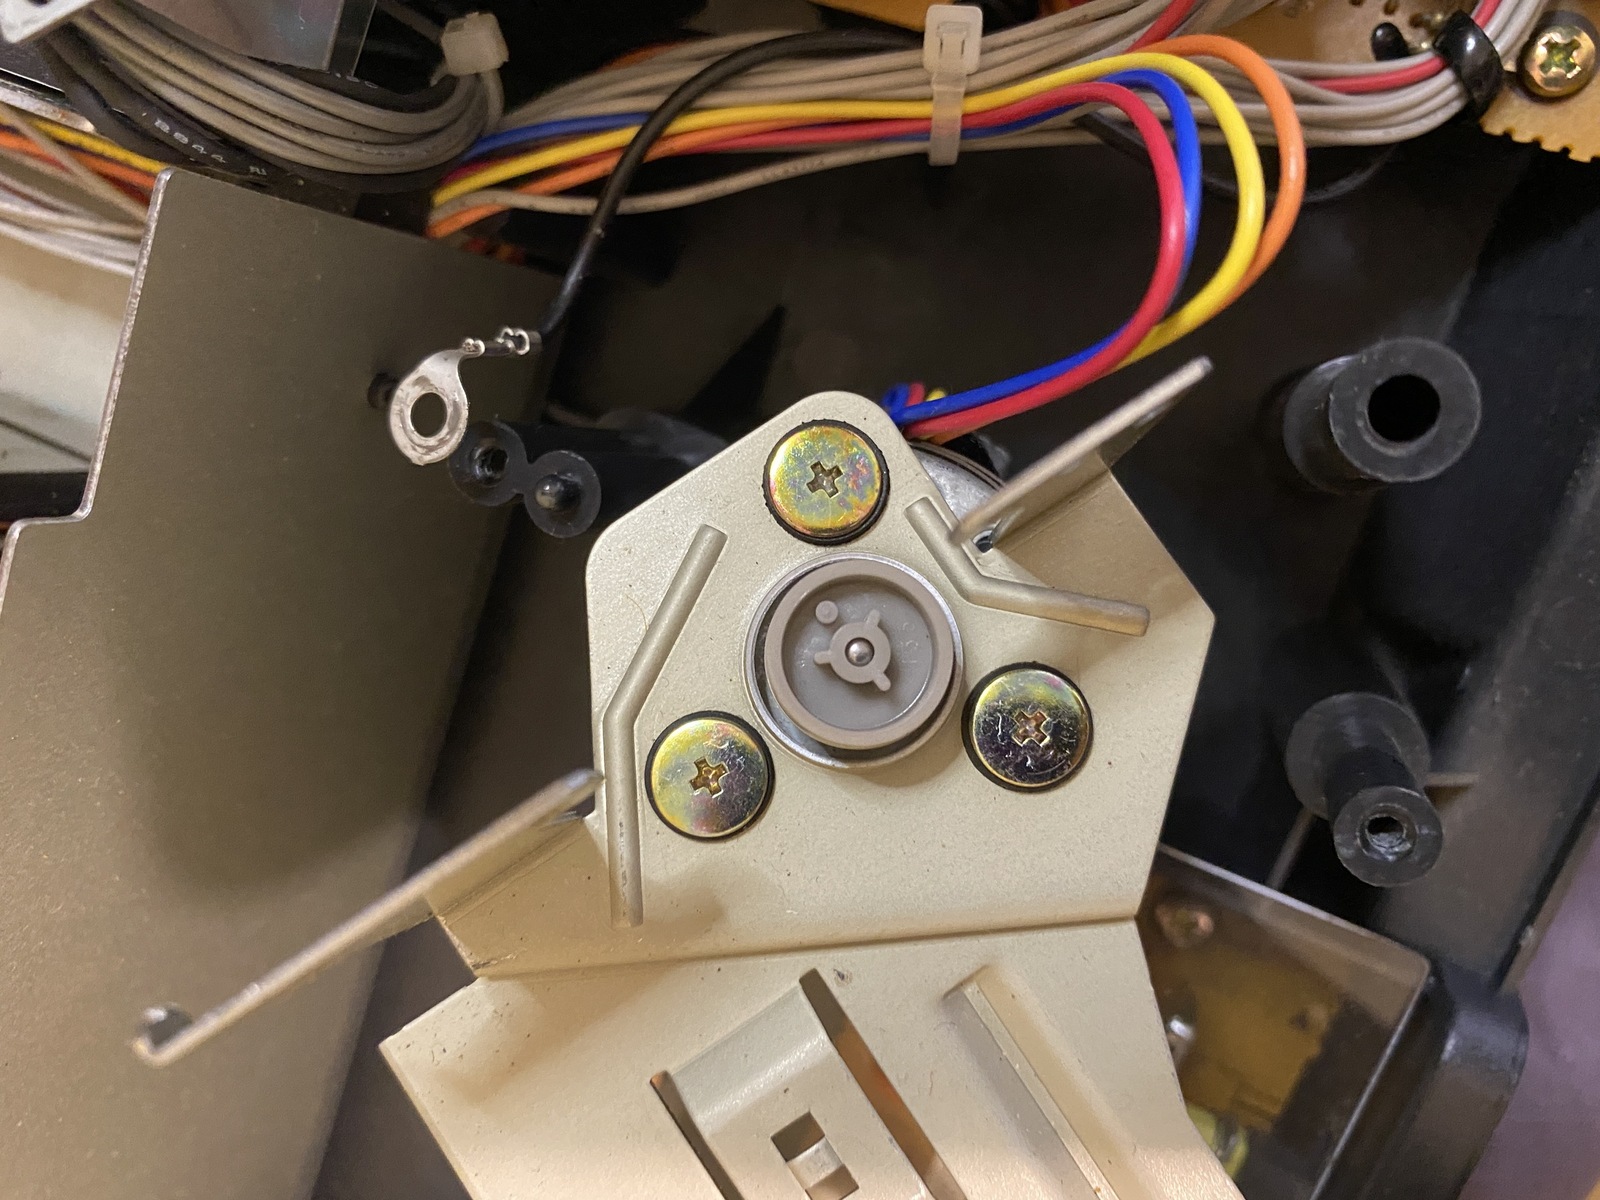 Remove these screws to remove the motor
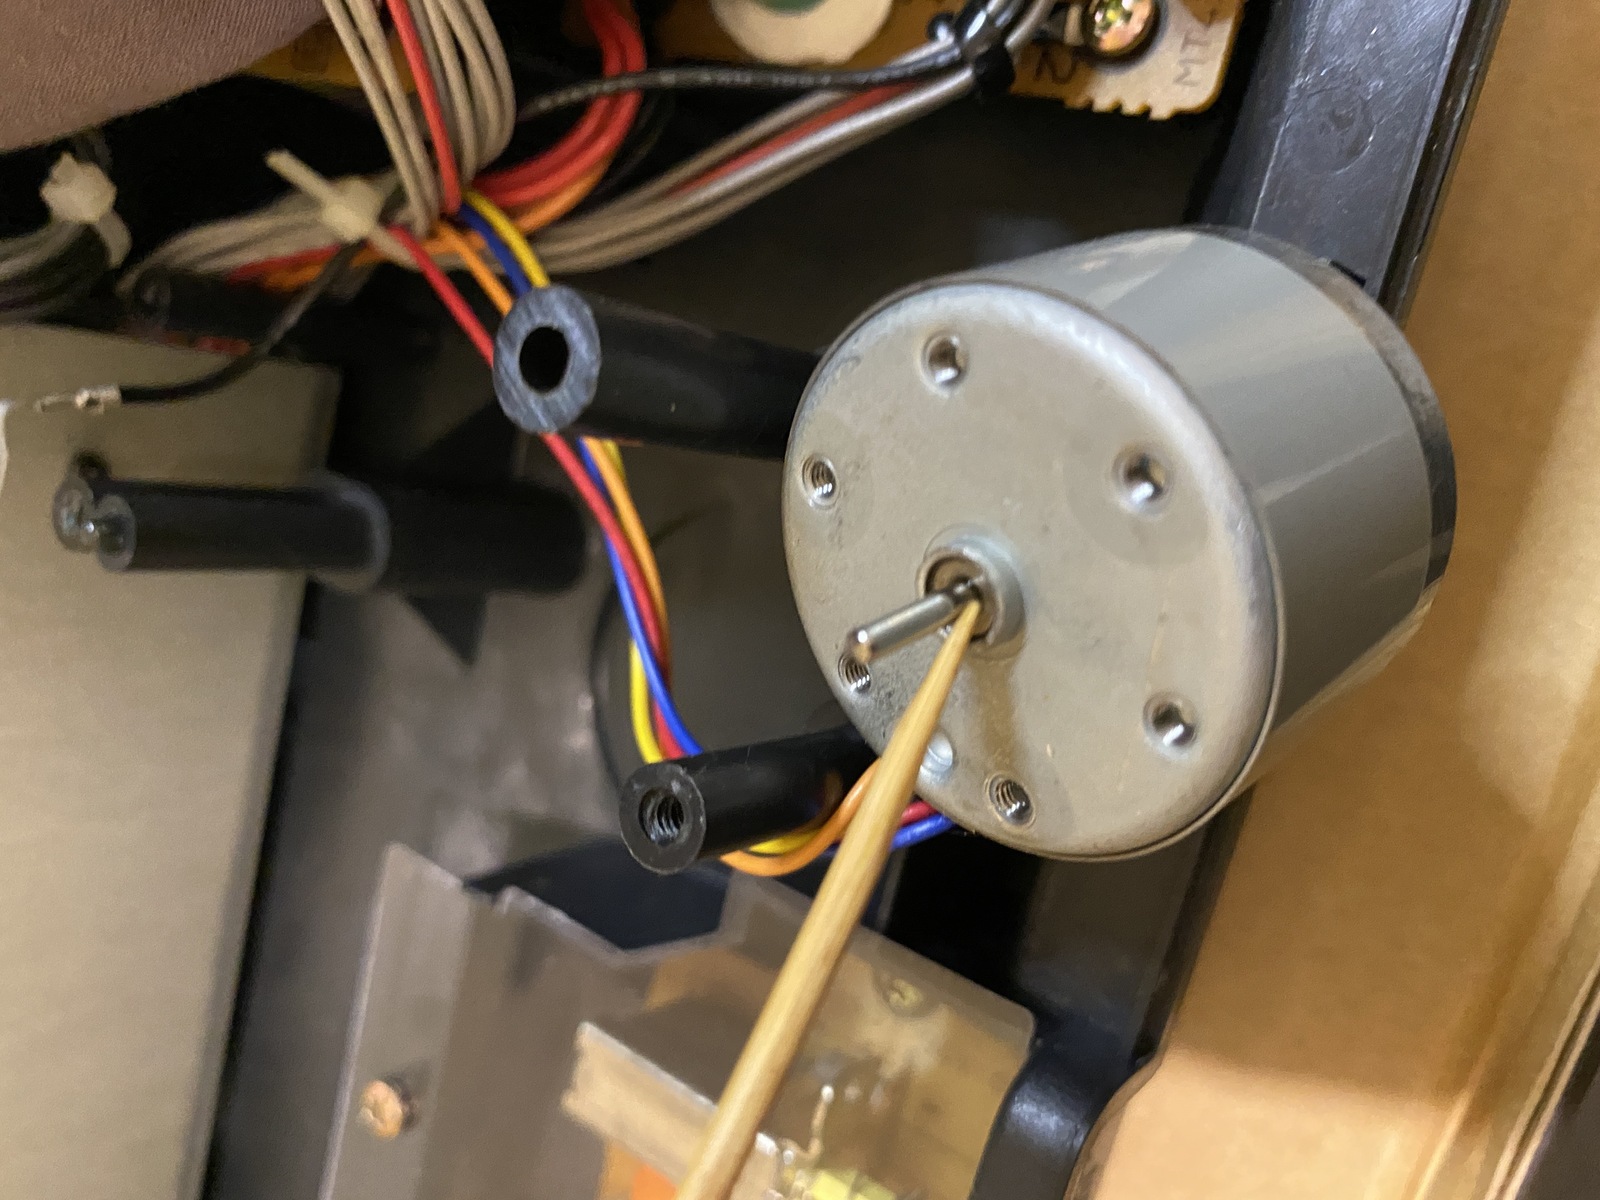 Oil the shaft
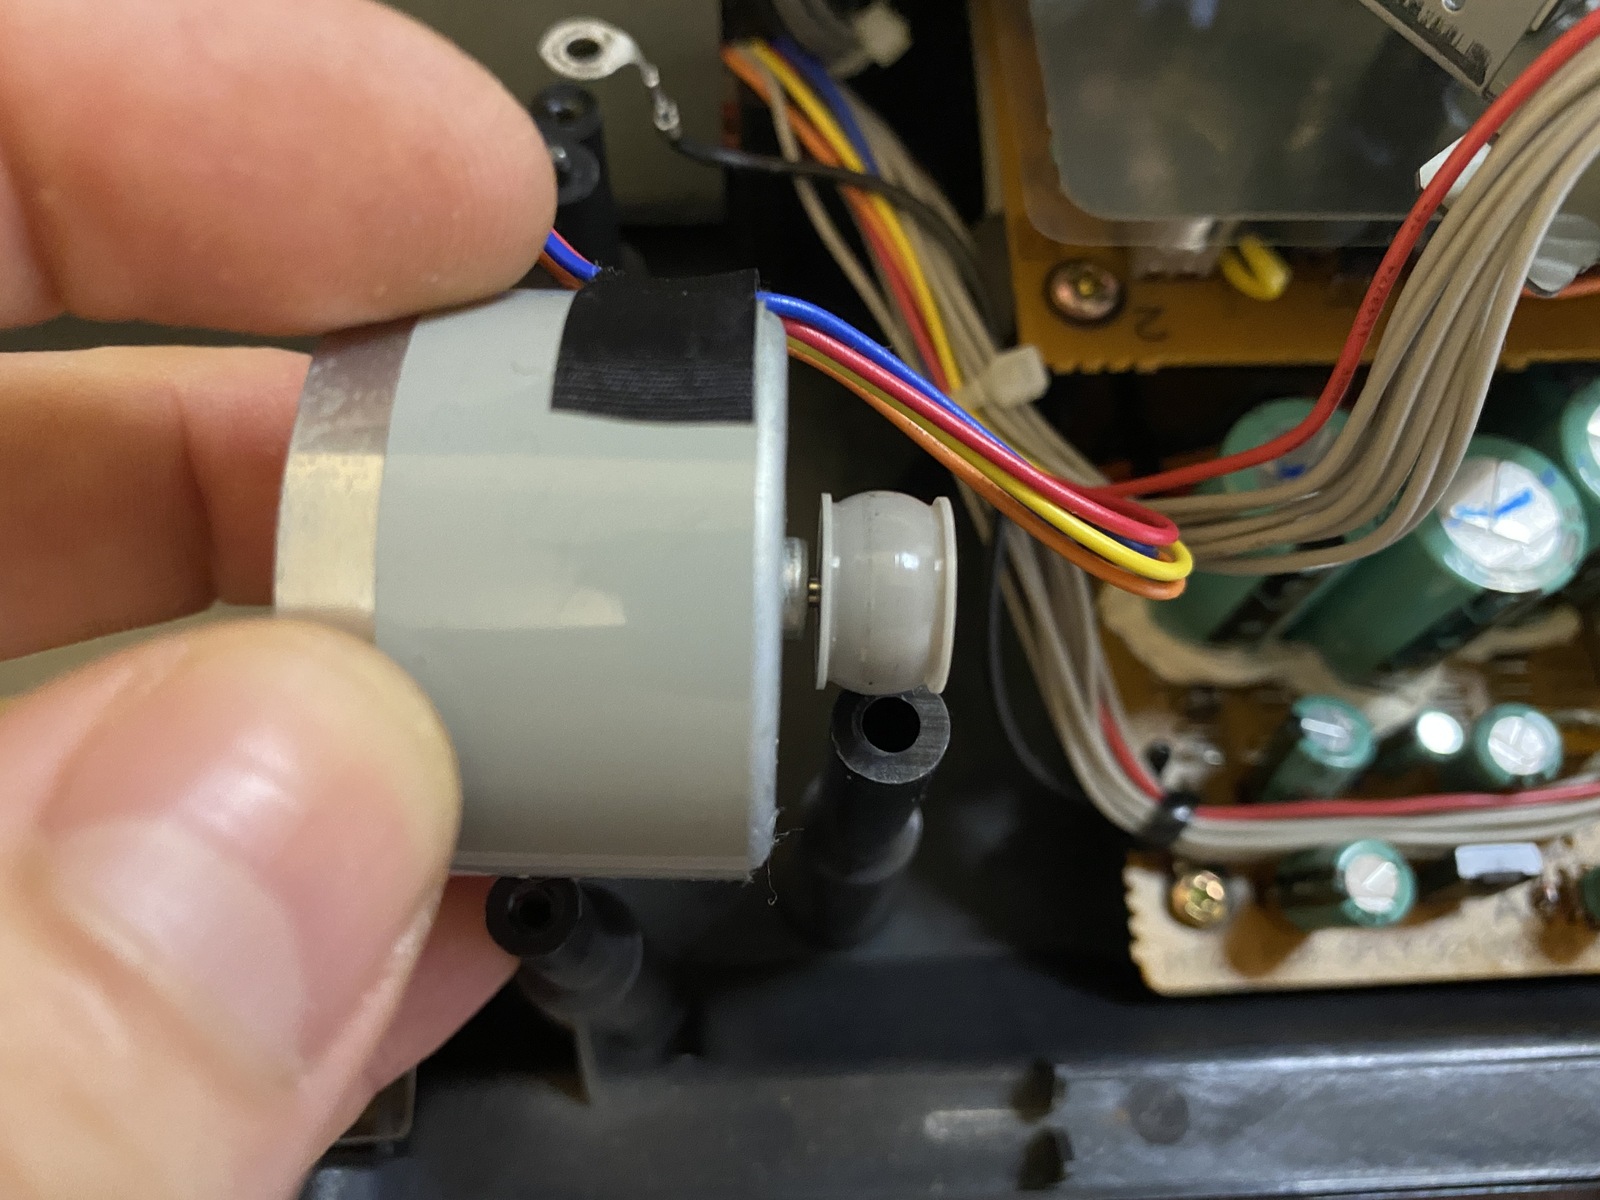 Leave a slight gap when refitting
Refix the cassette machnism in place, and now we will clean the tape heads. Pour a little isopropyl alcohol into a canister, dipping a cotton swab and then using this to gently wide across the heads. If any dirt is visible on the swab tip, flip it over and use the other end until it is clean. I also clean the steel mechanical parts with iso, and the pinch rollers with a little warm, slightly soapy water.
Now just make sure you’ve cleaned out al the dust and fluff from the base before we start on the top section.
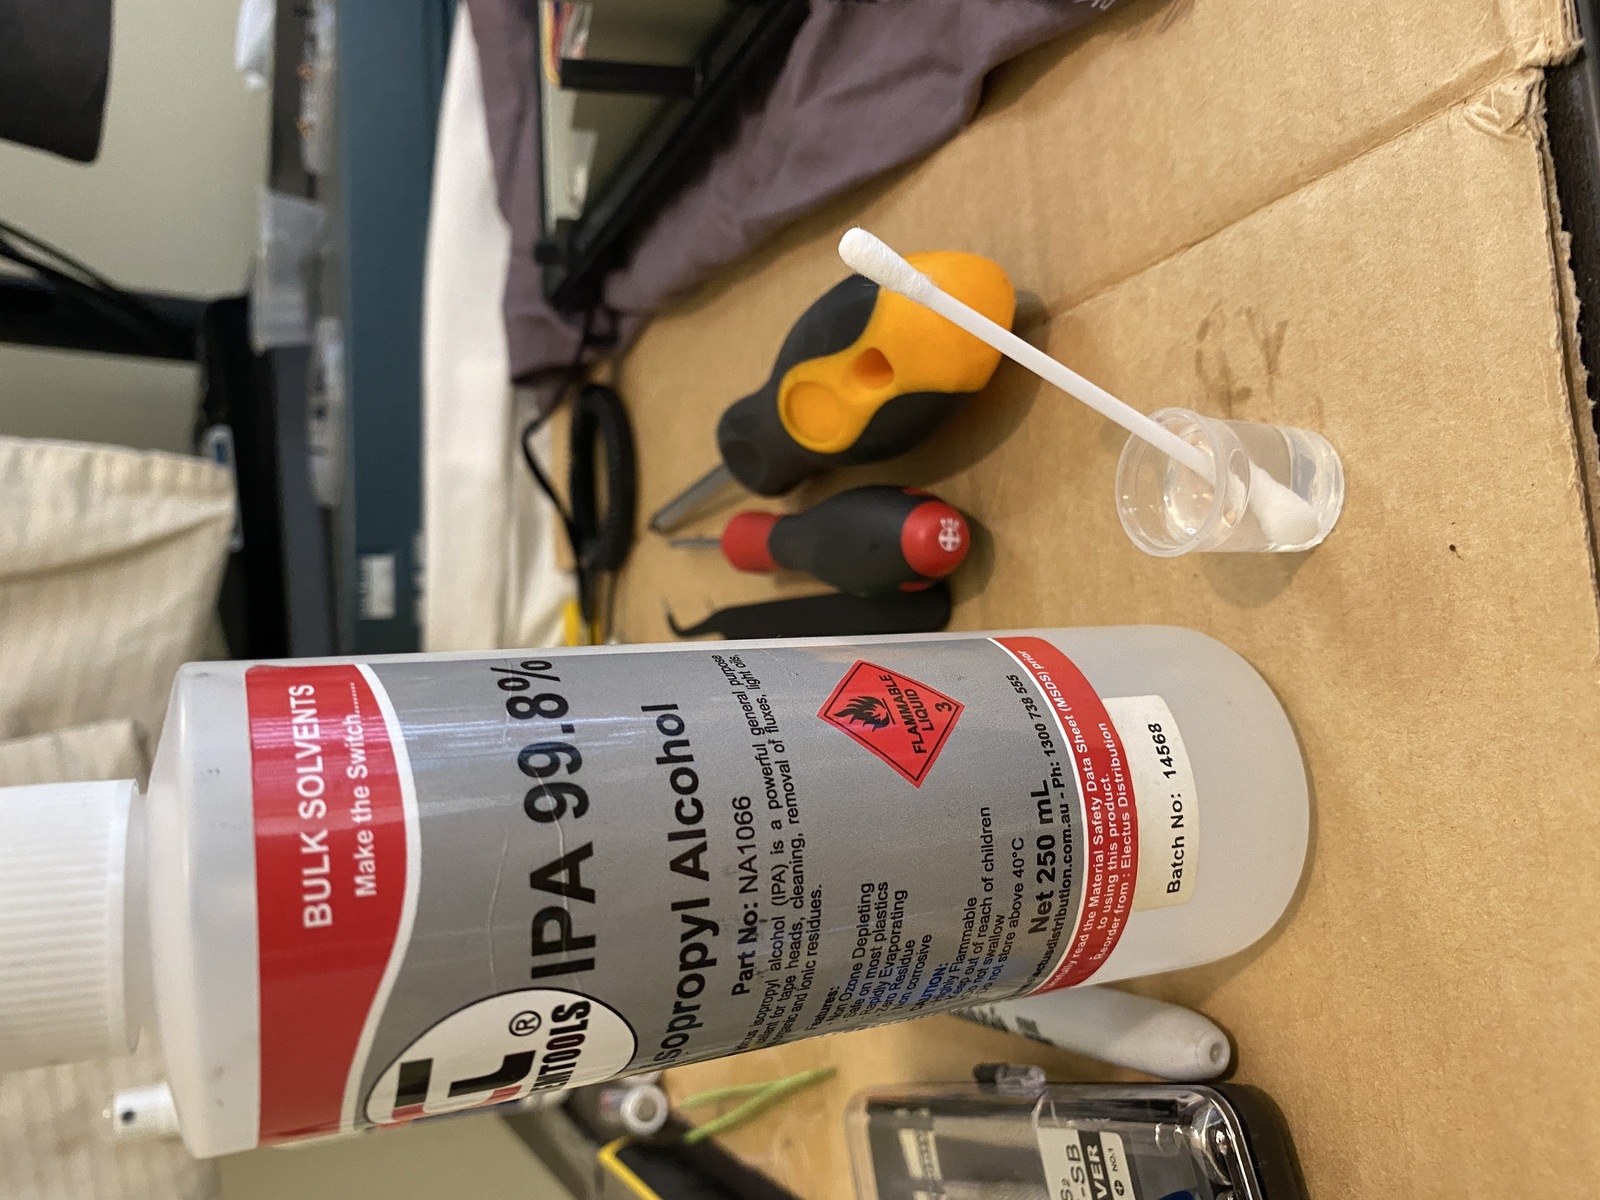 Isopropyl and cotton swab for head cleaning
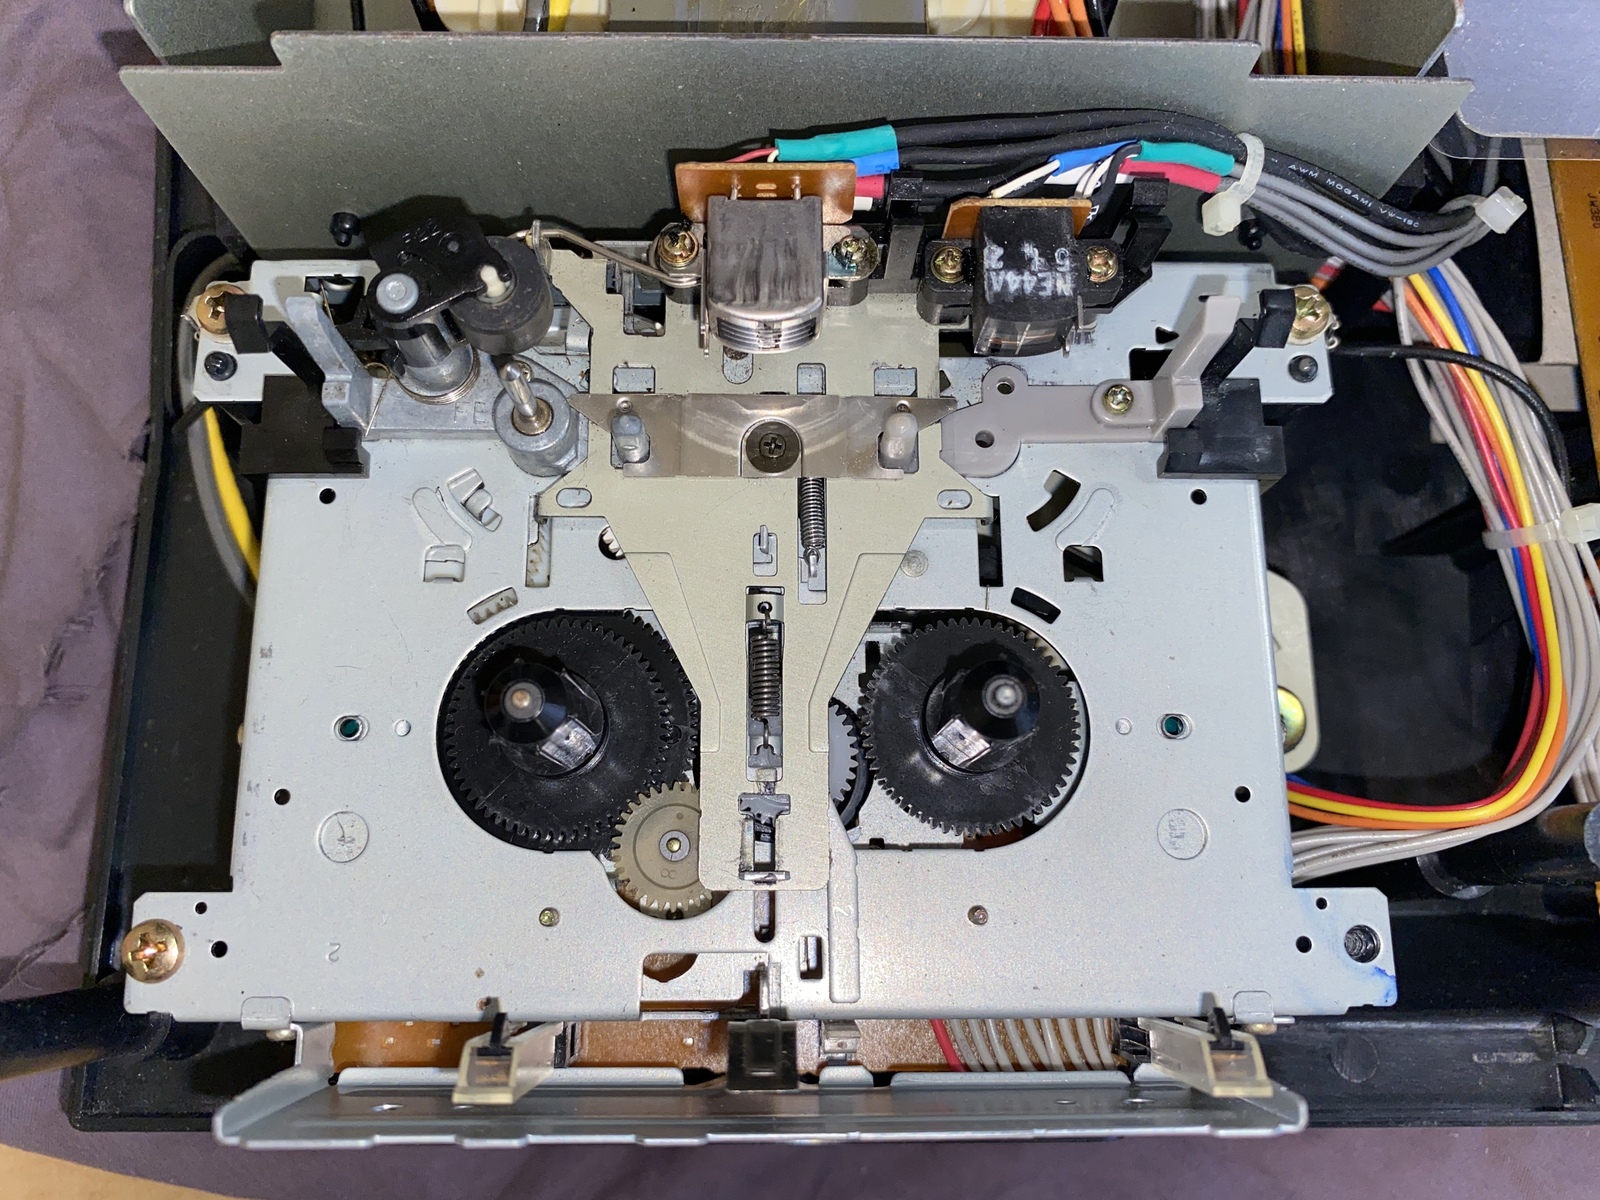 Cleaned cassette mechanism and heads
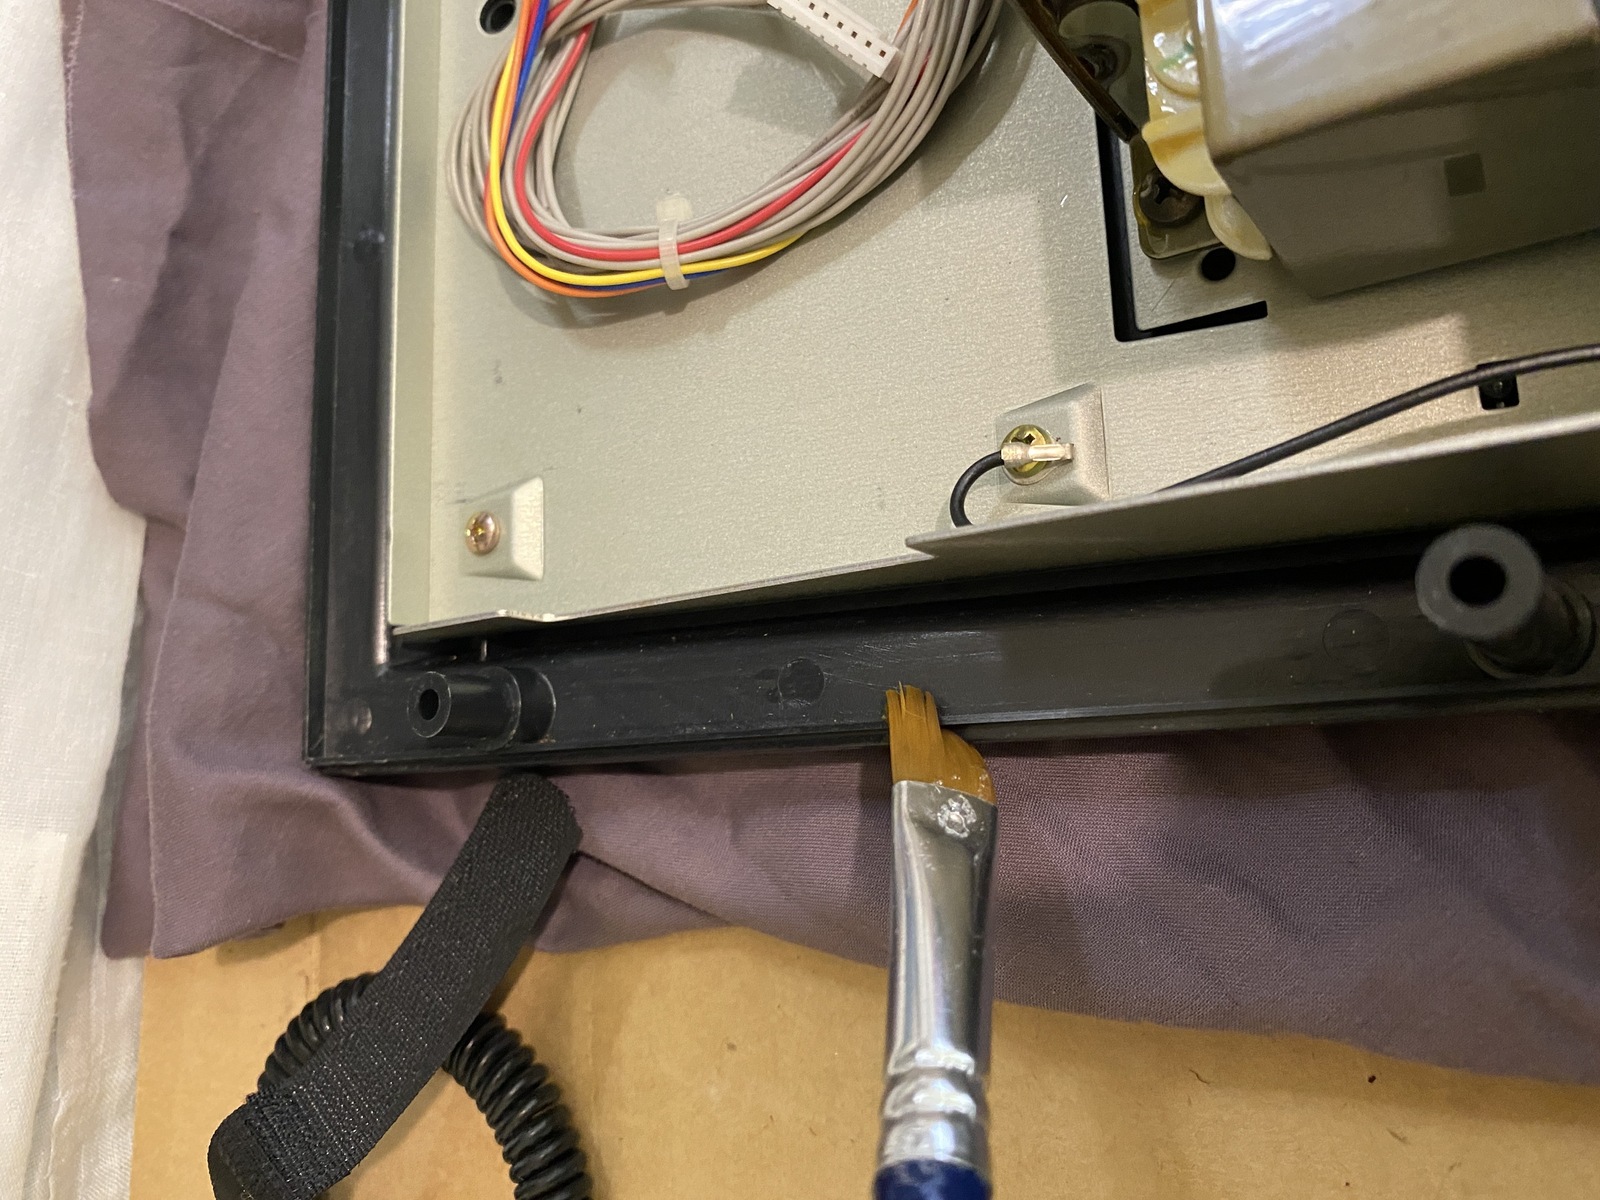 A cheap paintbrush is a great tool for cleaning
Set aside the base in a safe place, and pop the top section down in your work space, face down. Lift off the protective shield, but don’t disconnect it. We’re now going to remove all of the PCBs and empty out this section to give it all a good clean.
 Top section of the unit, ready to be worked on
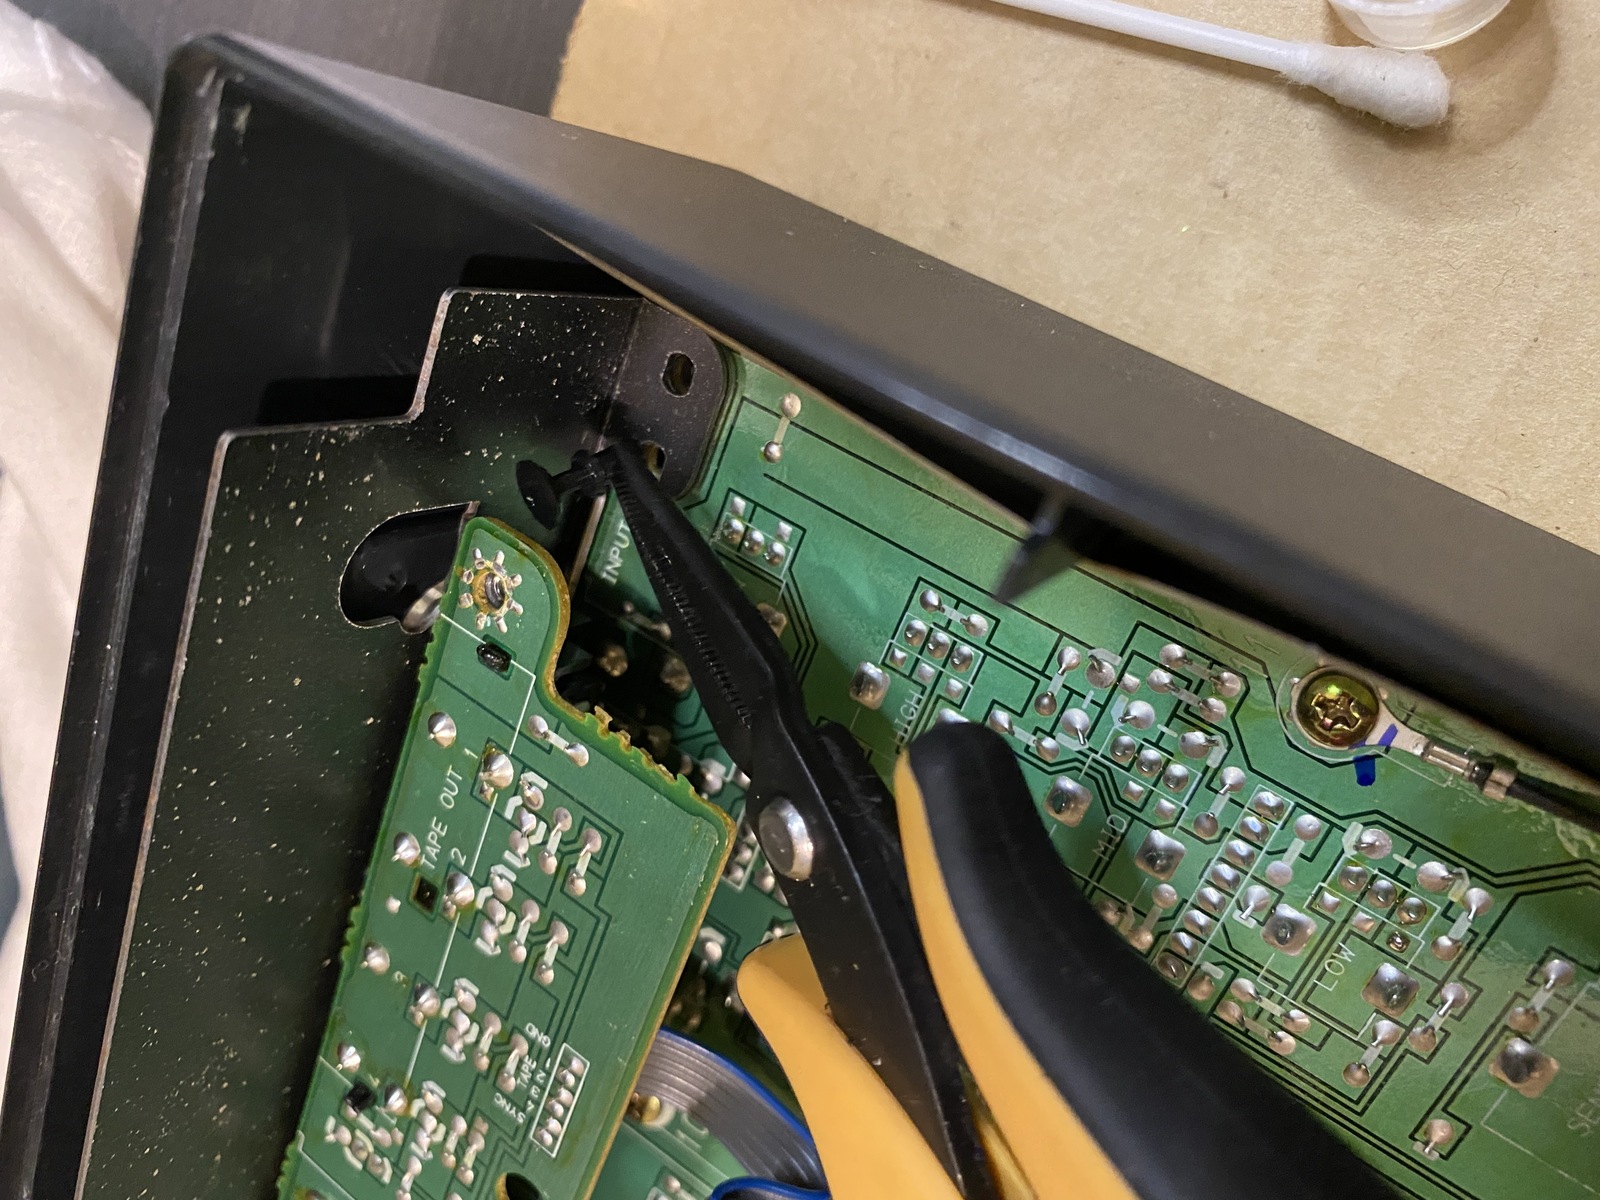
There are plastic pins holding in the 1/4” input and RCA jacks. These are two on the inside, and four at the rear of the unit. For those on the rear, there are some you can get to from the inside with a small flathead screwdriver - use this to push them out a bit. From here, and for the rest, I use a plastic opening tool to gently pry these out. Be careful here not to break anything, and pull off the rear plate.
 Push the rear plastic pins out a bit using a small screwdriver
 Outer pin removal
 Inner pin removal
 One of the inner pins after removal
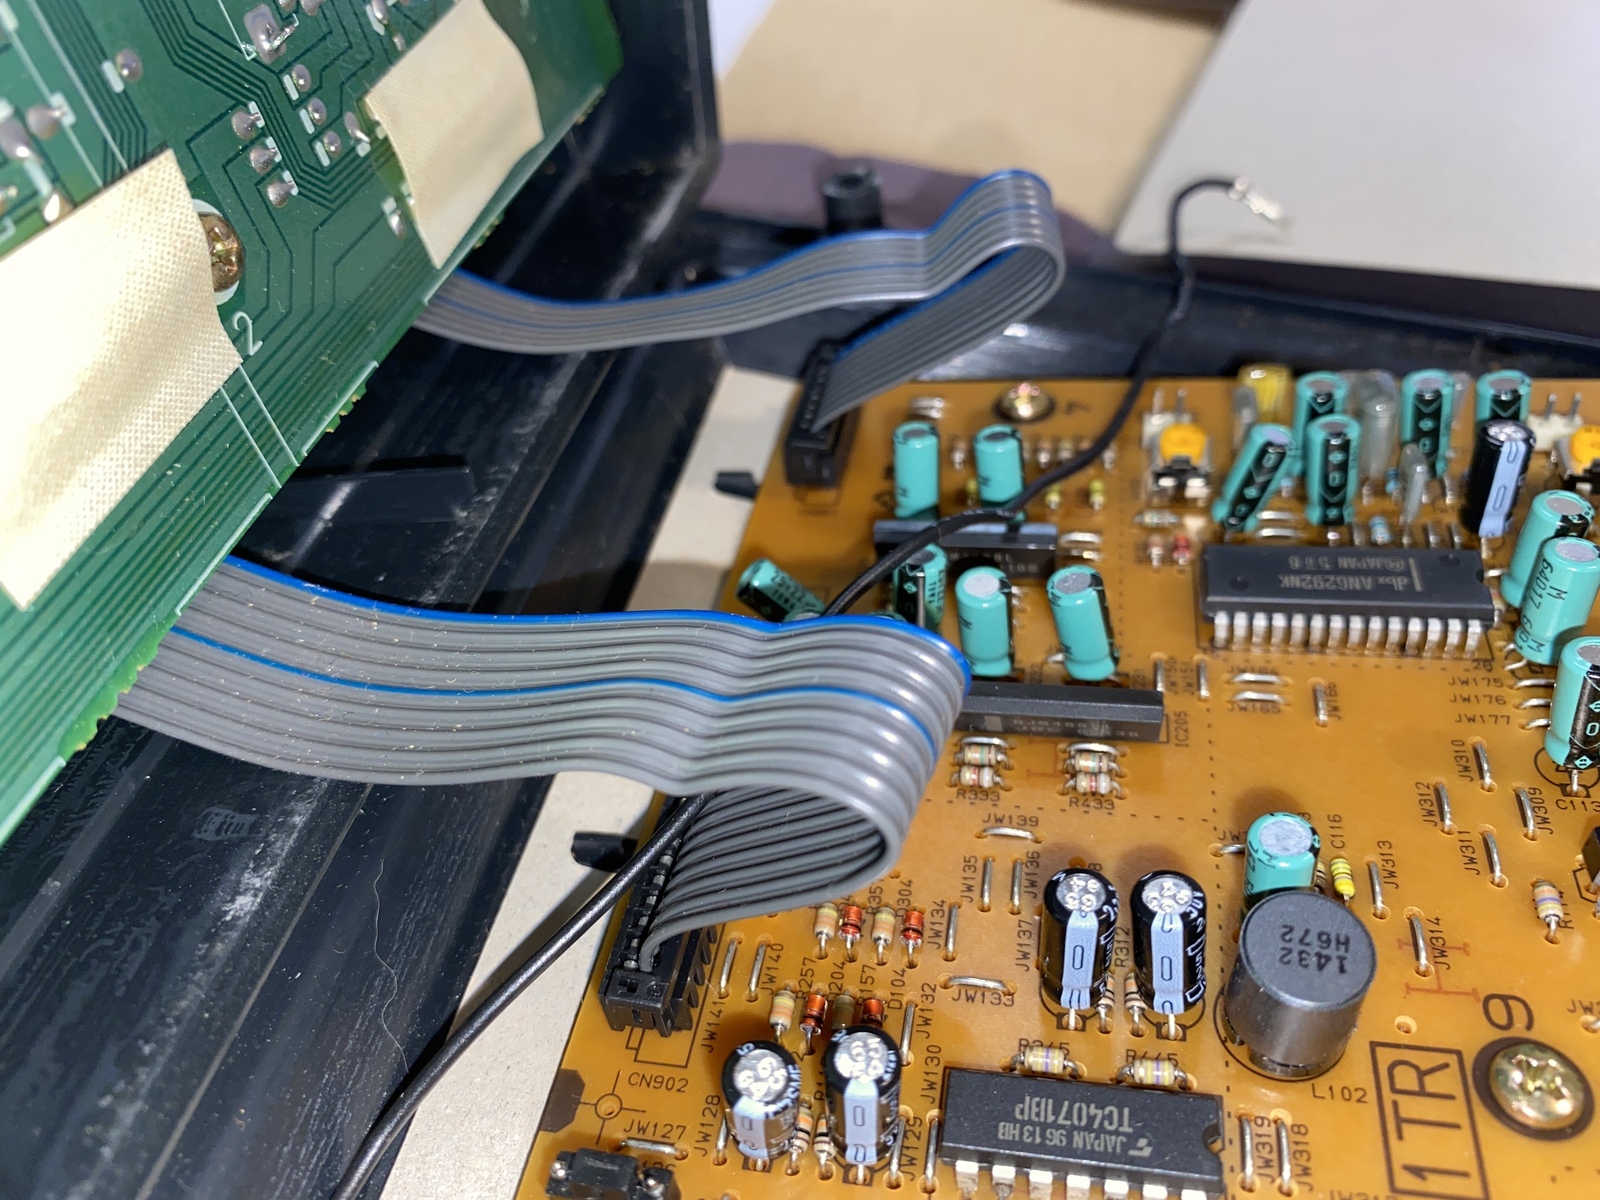
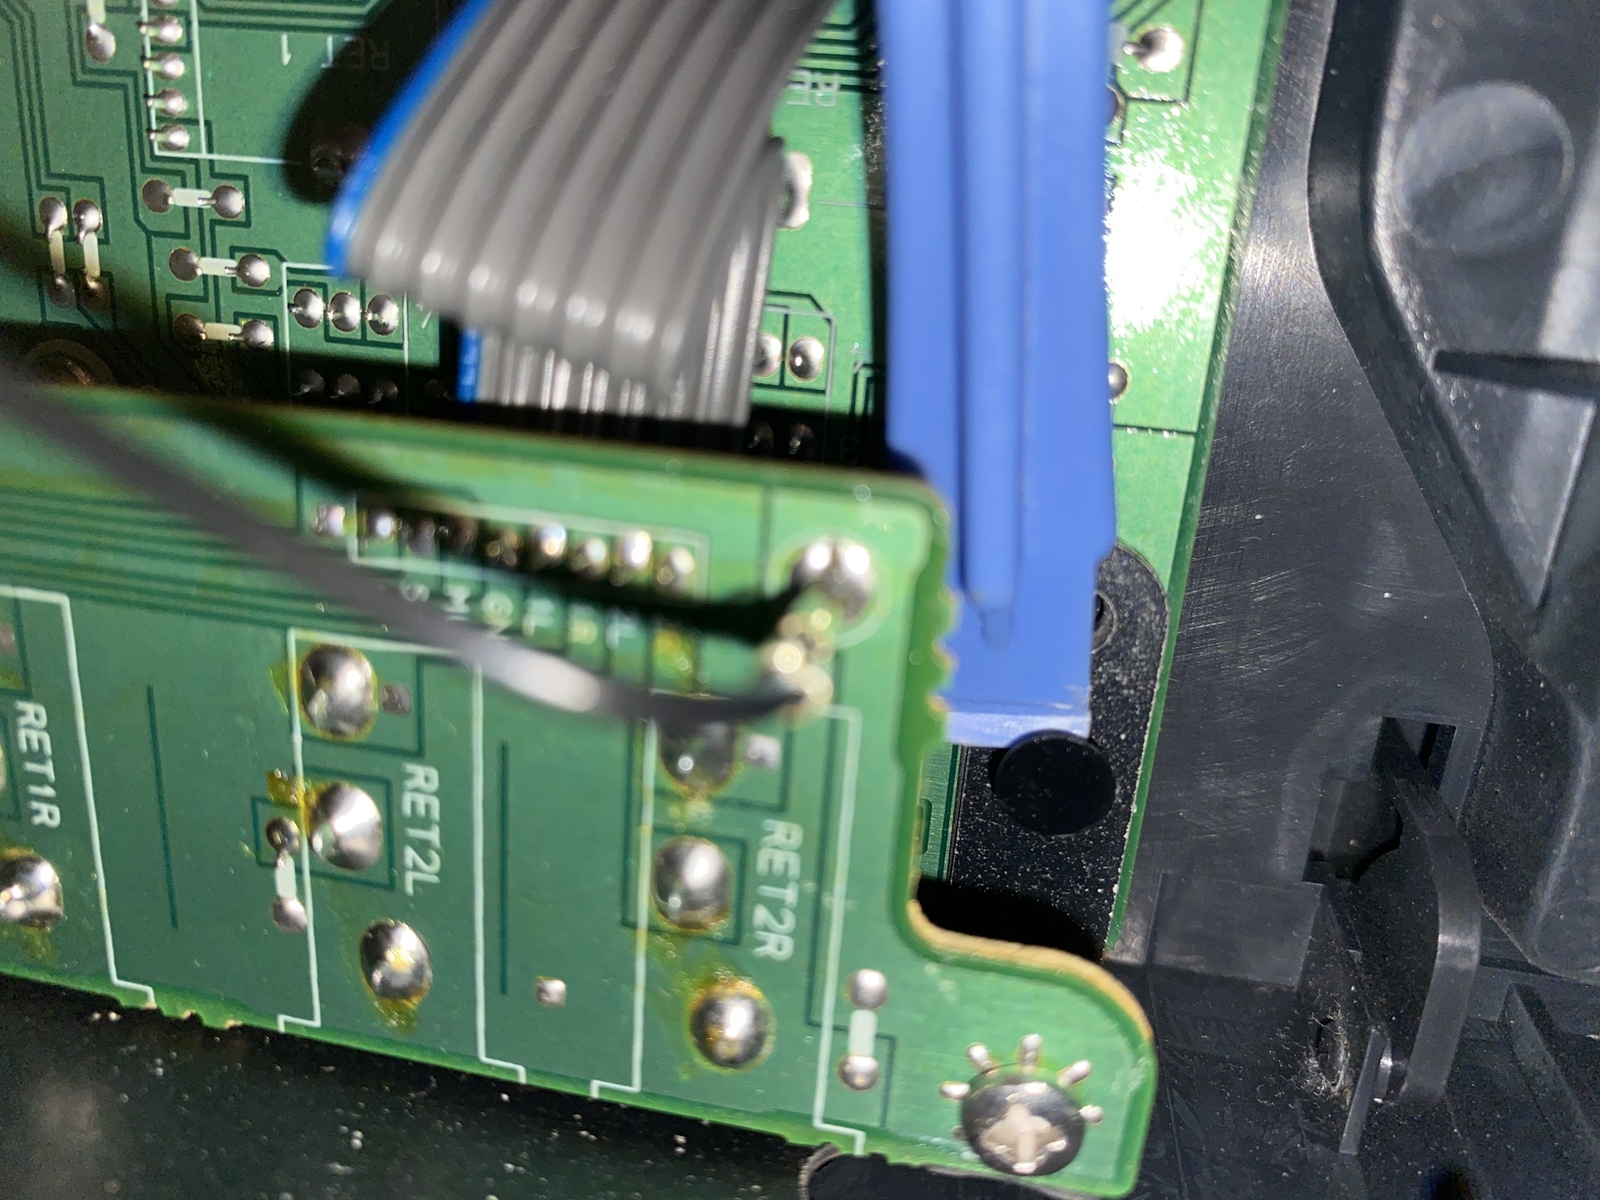
With the pins removed, pull this section out. It can be a little tricky, just work it until you find the right angle, and don’t force it. Once you’ve got it loose, disconnect the two ribbon cables. To do this, pull up the plastic outer to loosen and then lift the ribbons straight up.
 Loosen connectors and then lift ribbons straight out
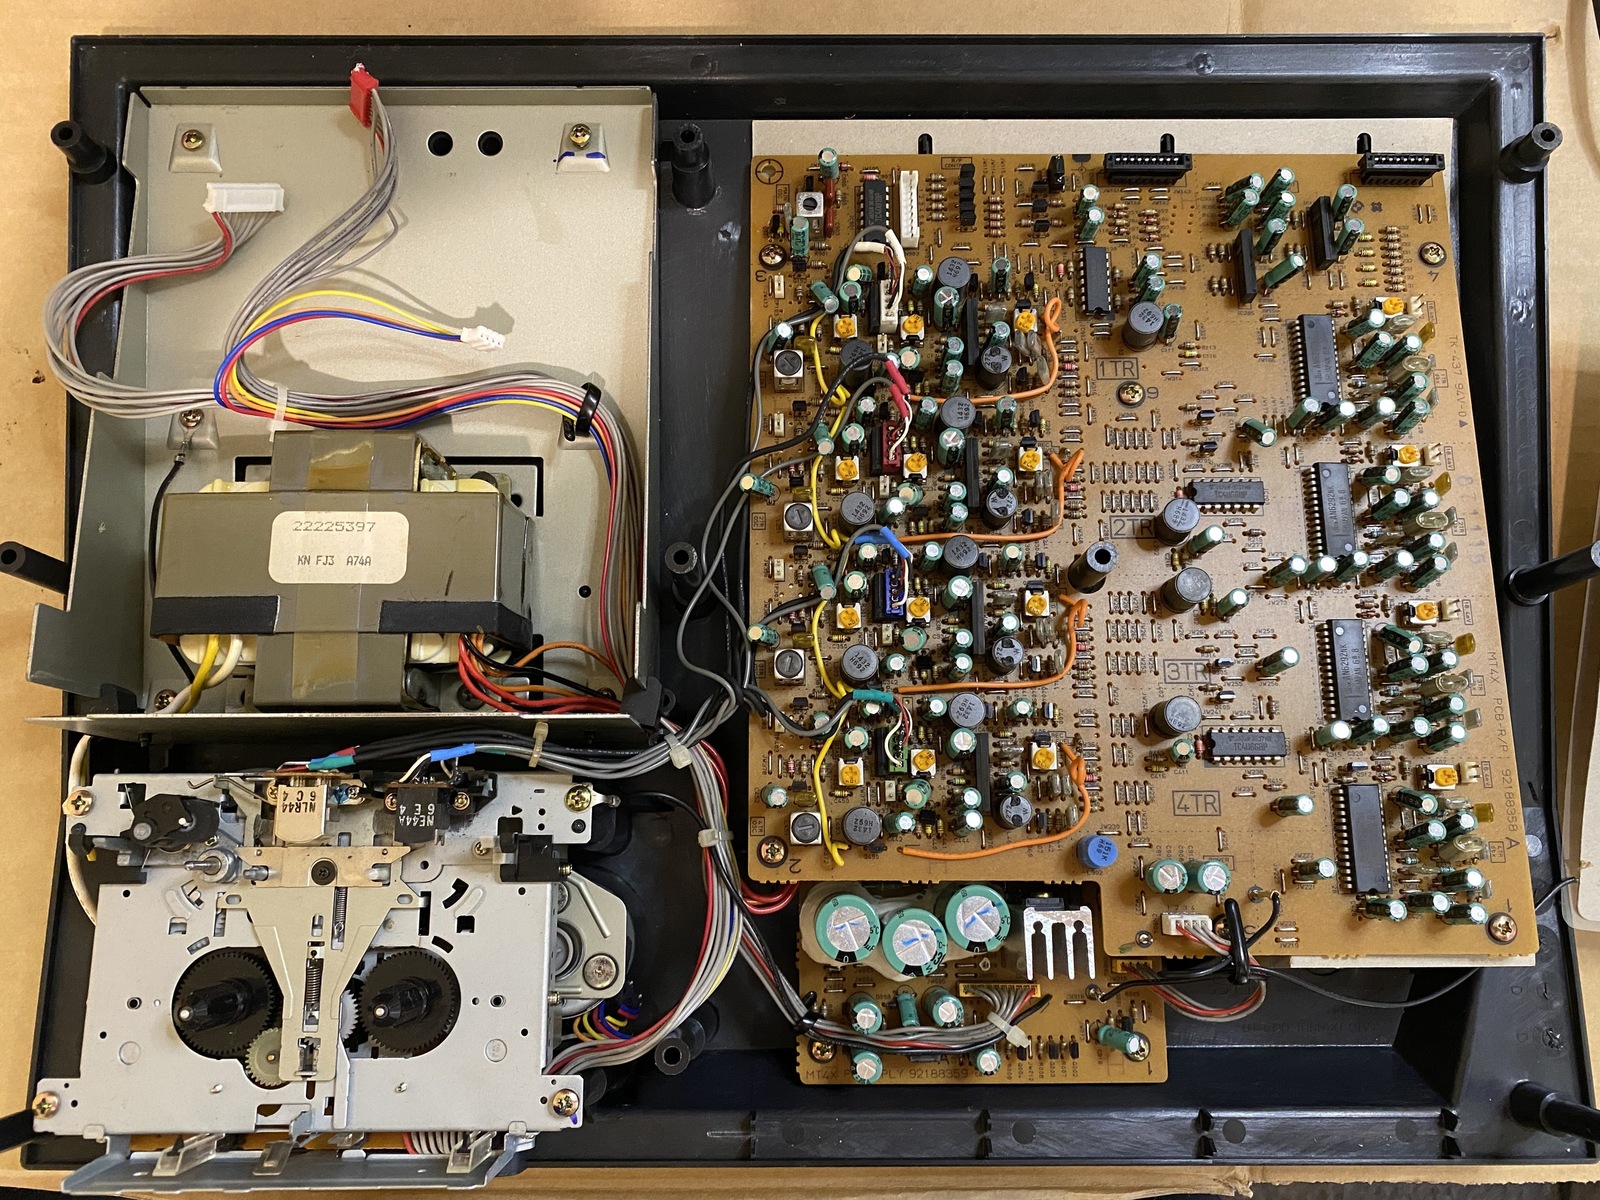
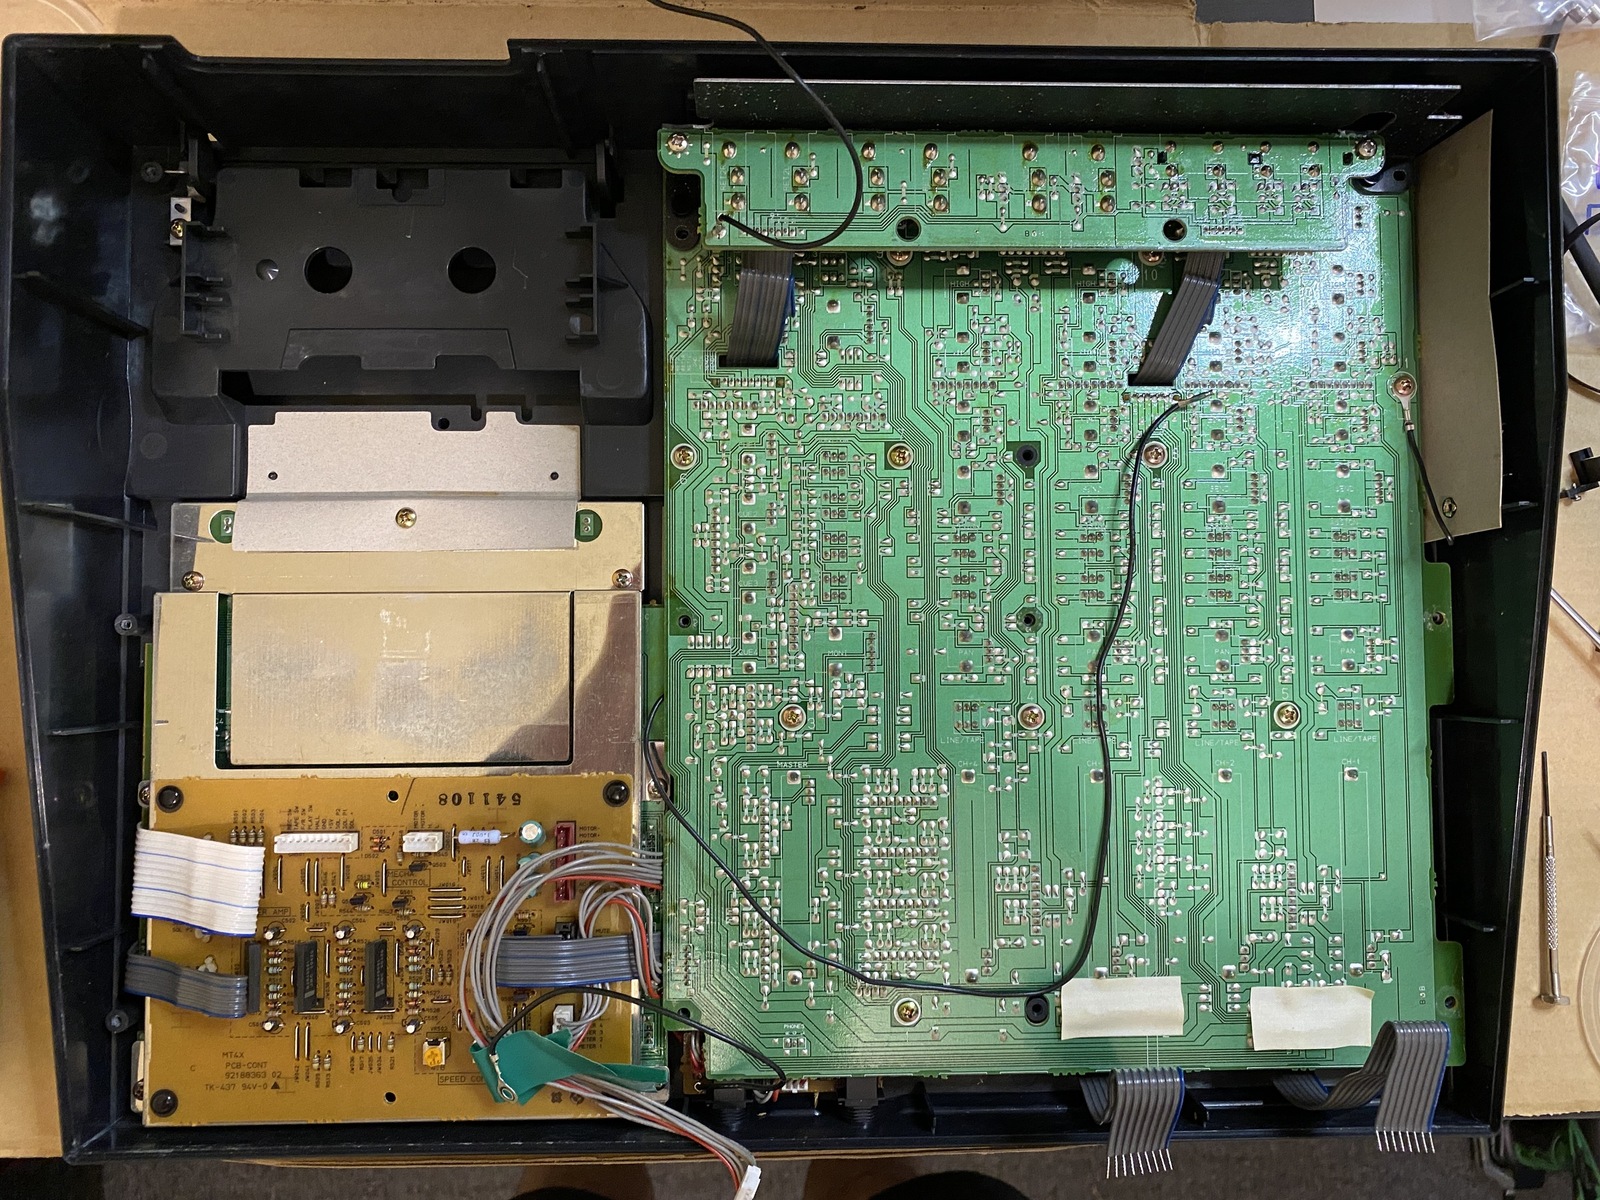
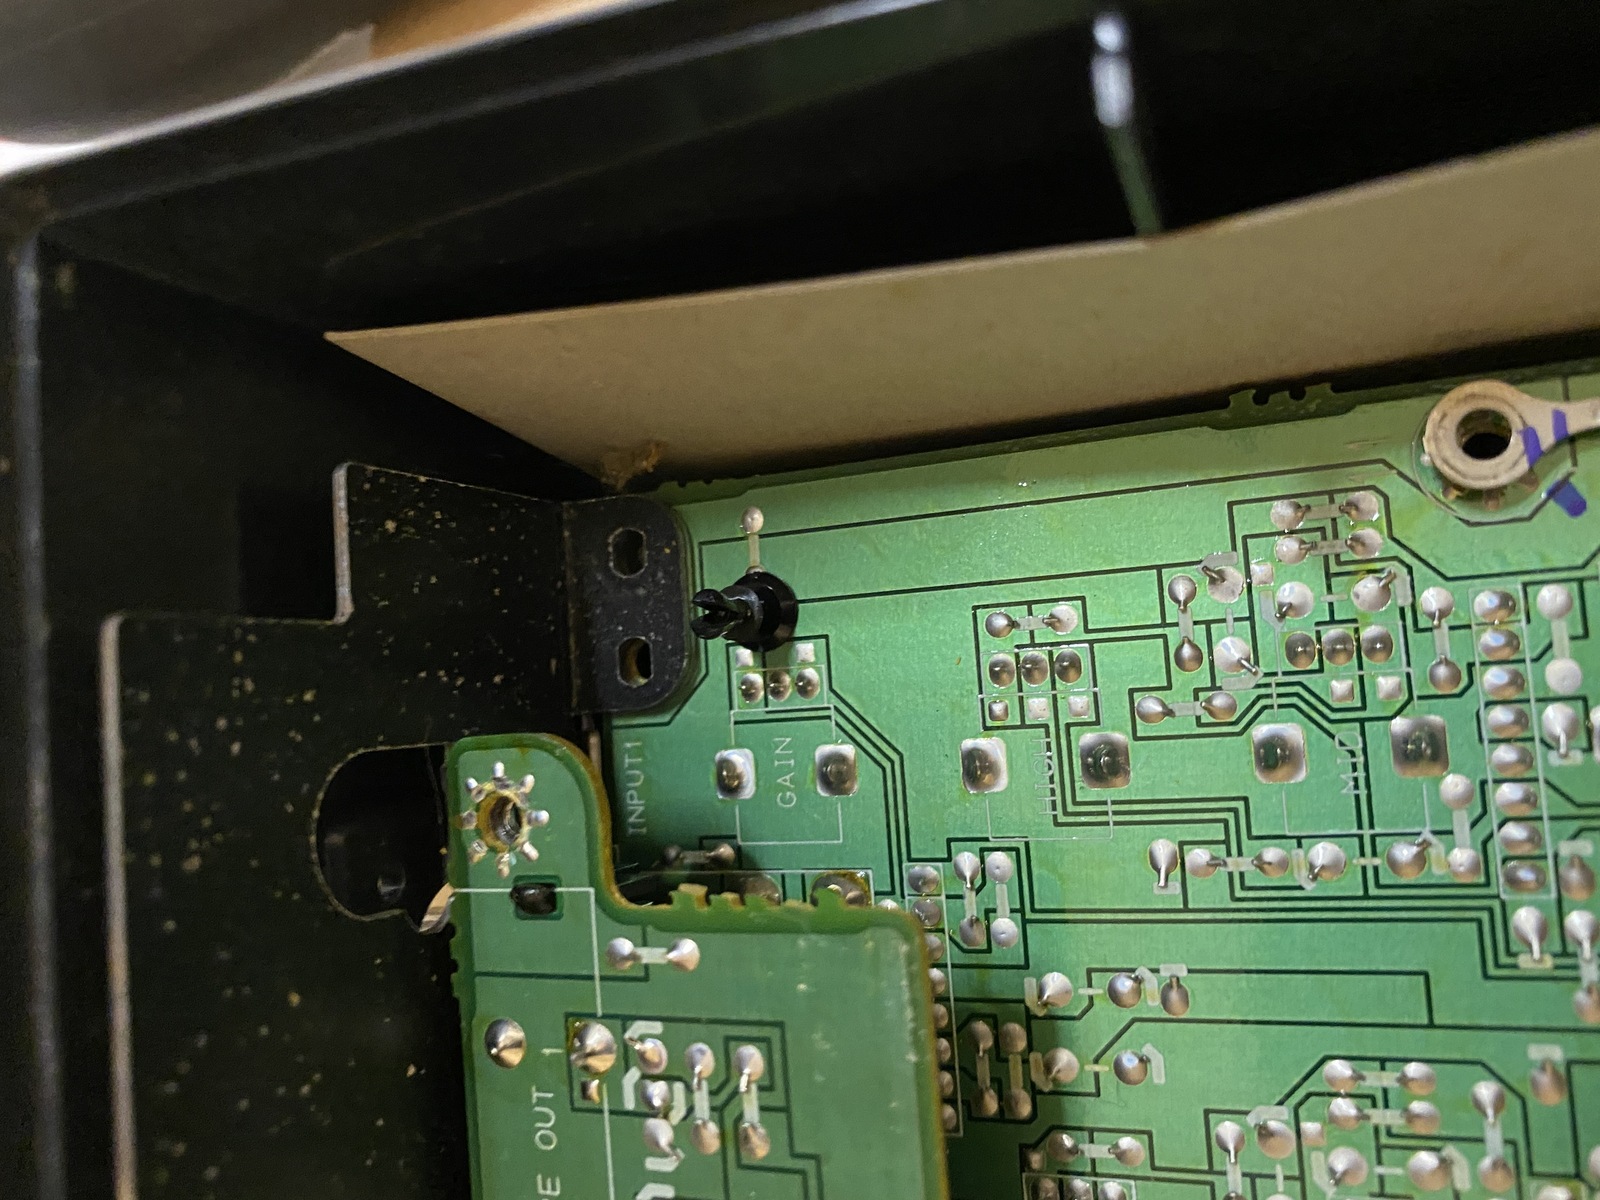
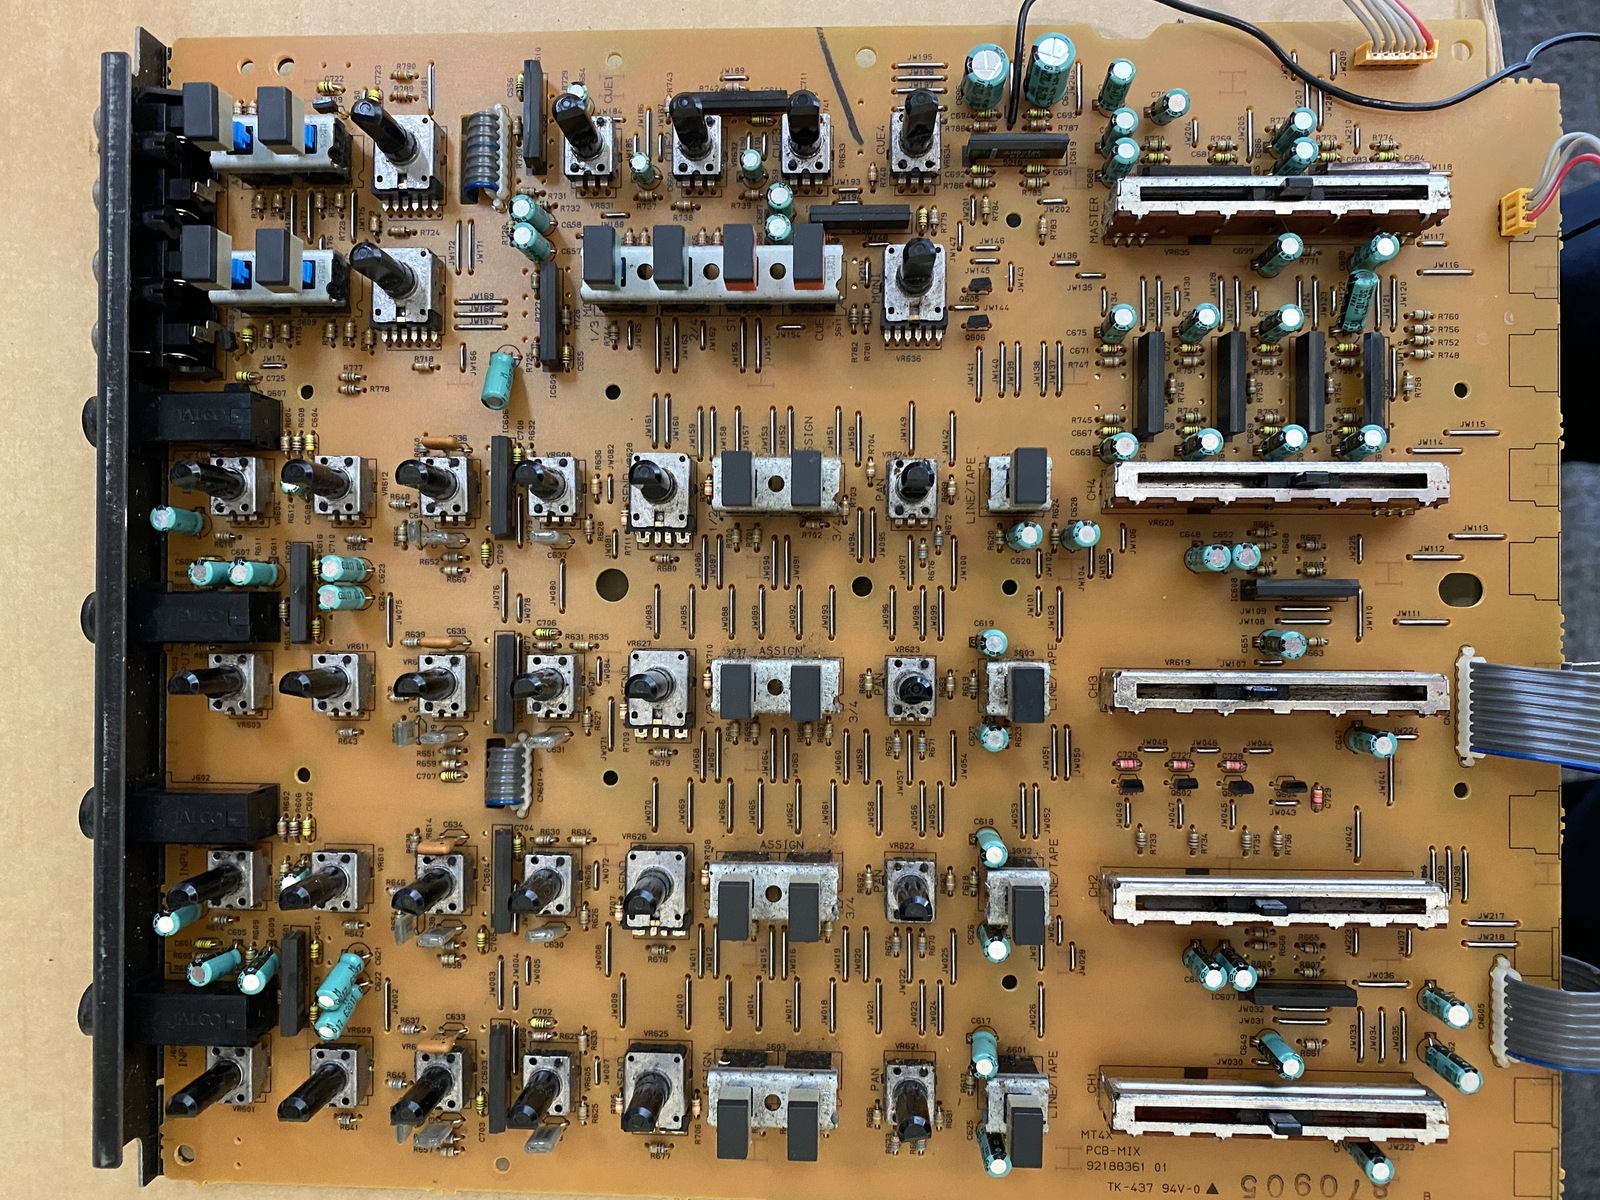
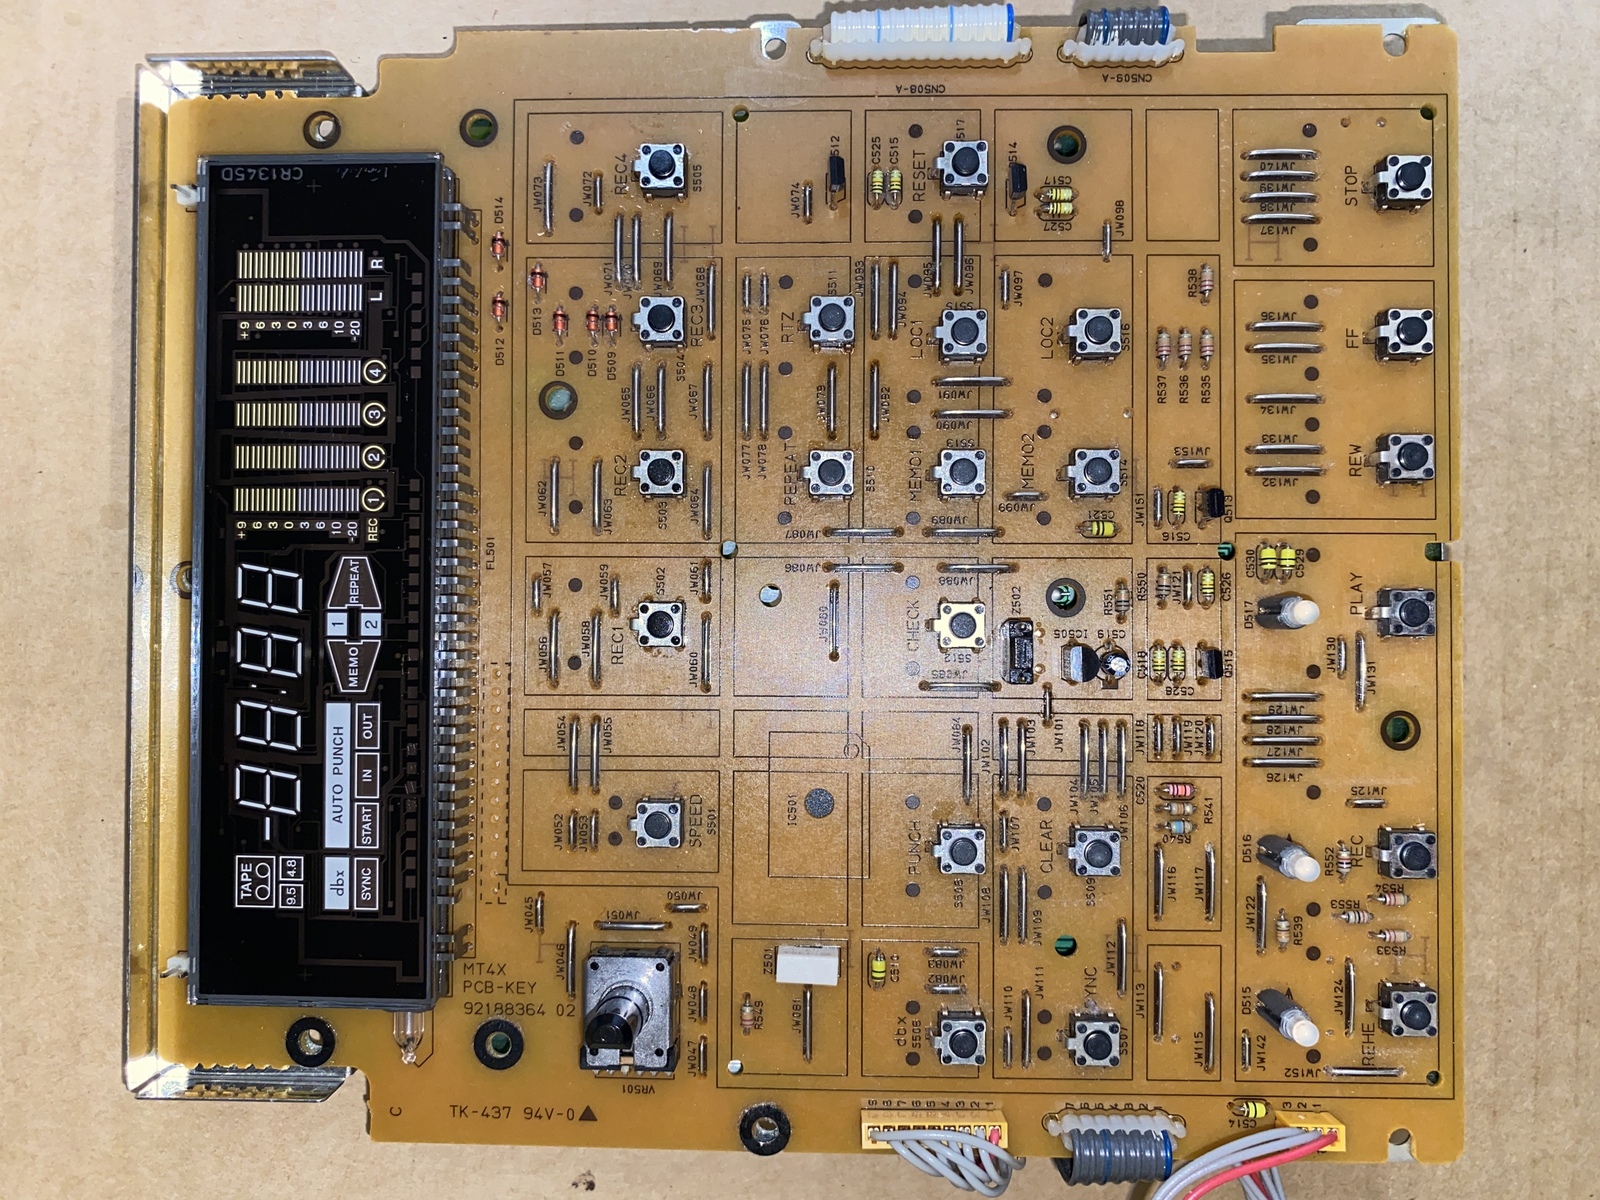
There is now a series of screws to remove to get these PCBs out. As you do so, gently remove any cables which connect things. Generally these are self-evident as to where they go when reconnecting, but you can always mark connections with a marker as we’ve done earlier. Some screws may be covered by tape. Place all PCBs in a safe place, an antistatic mat is a good choice but I generally just use a wooden dining table.
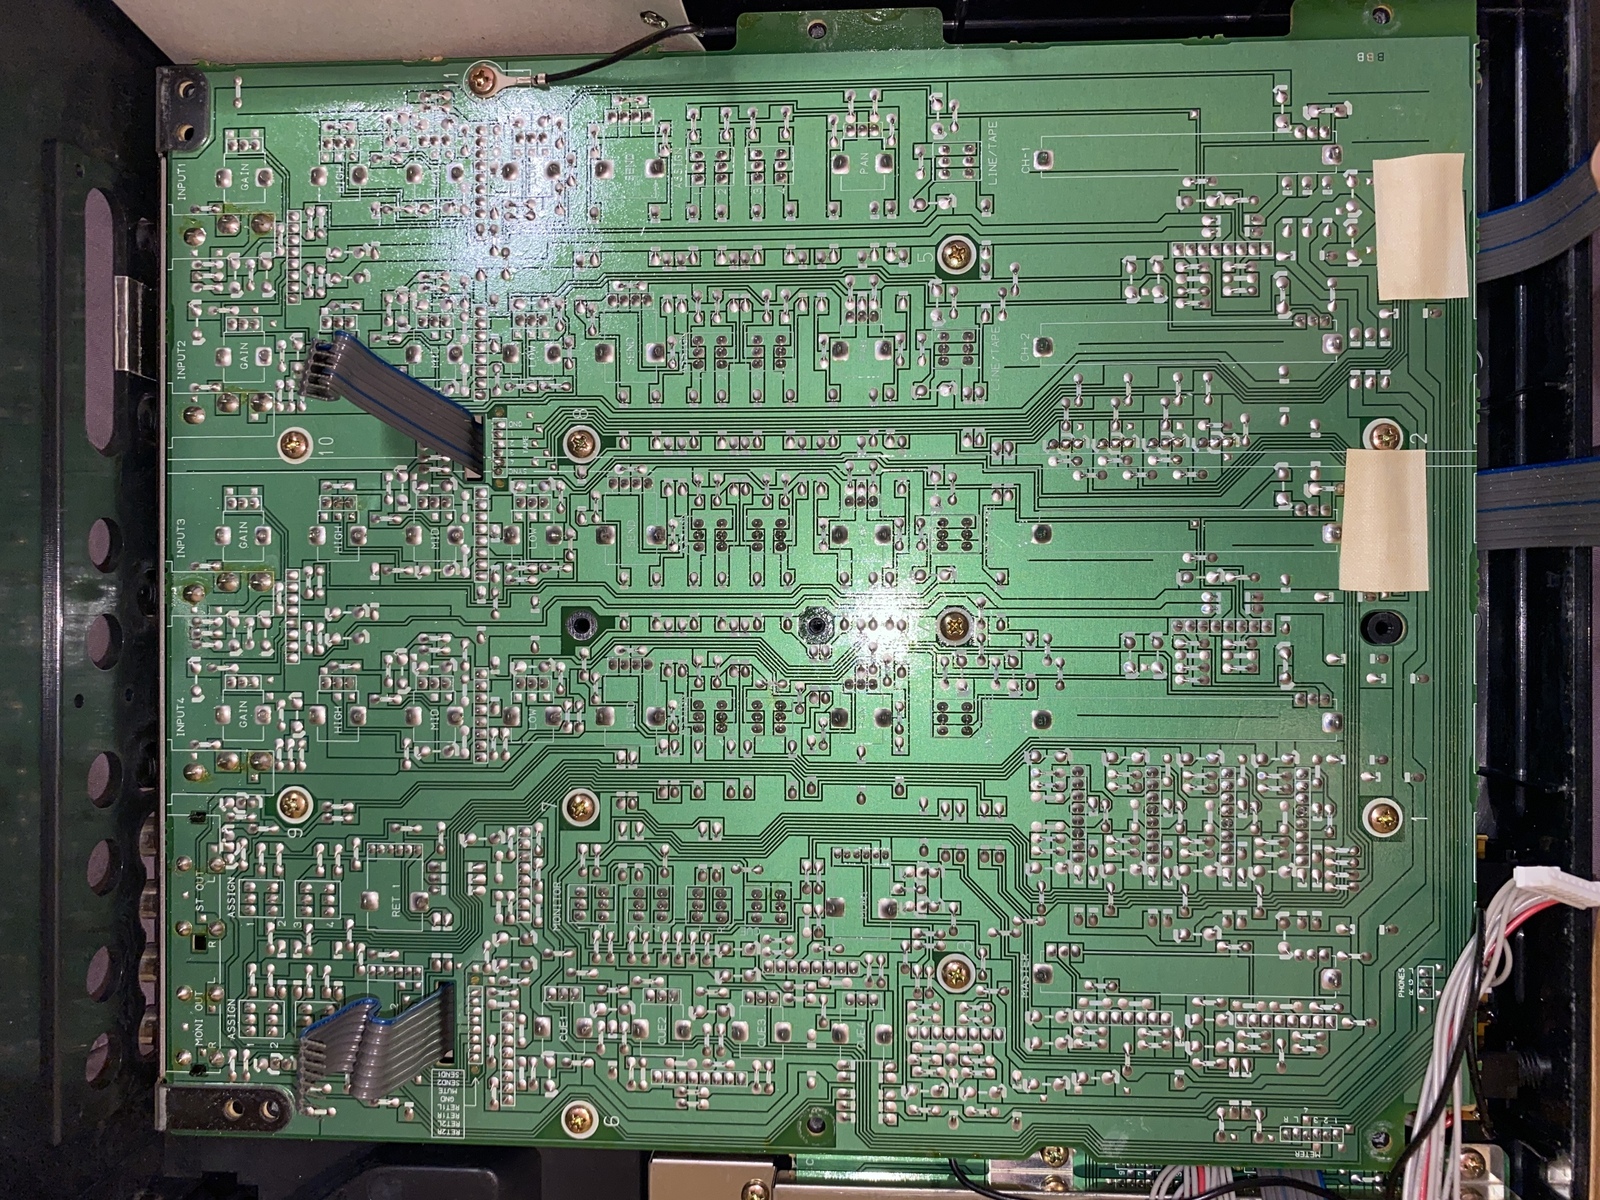
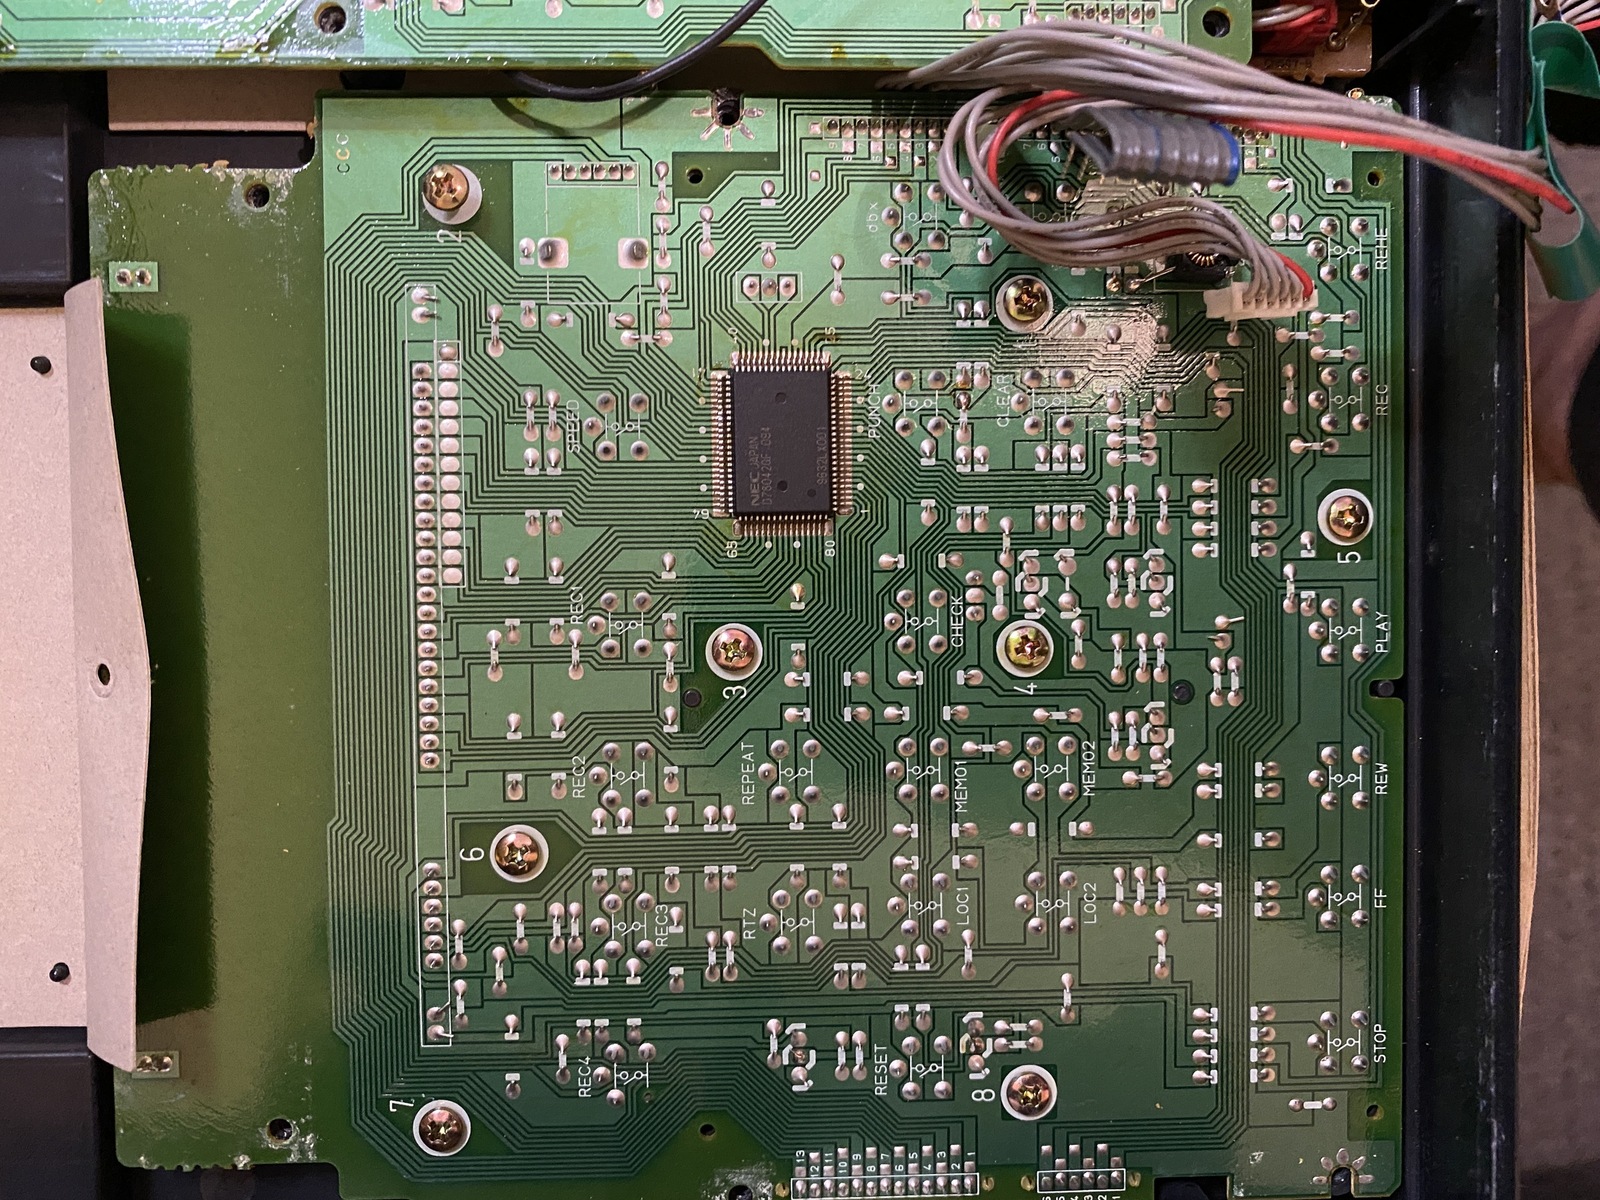 Three PCBs to remove, as shown here
Now we have an empty shell! There is card lining, leave it in. Pull out the button matrix. Give it all a brush out to remove any fluff etc.
 Empty top shell
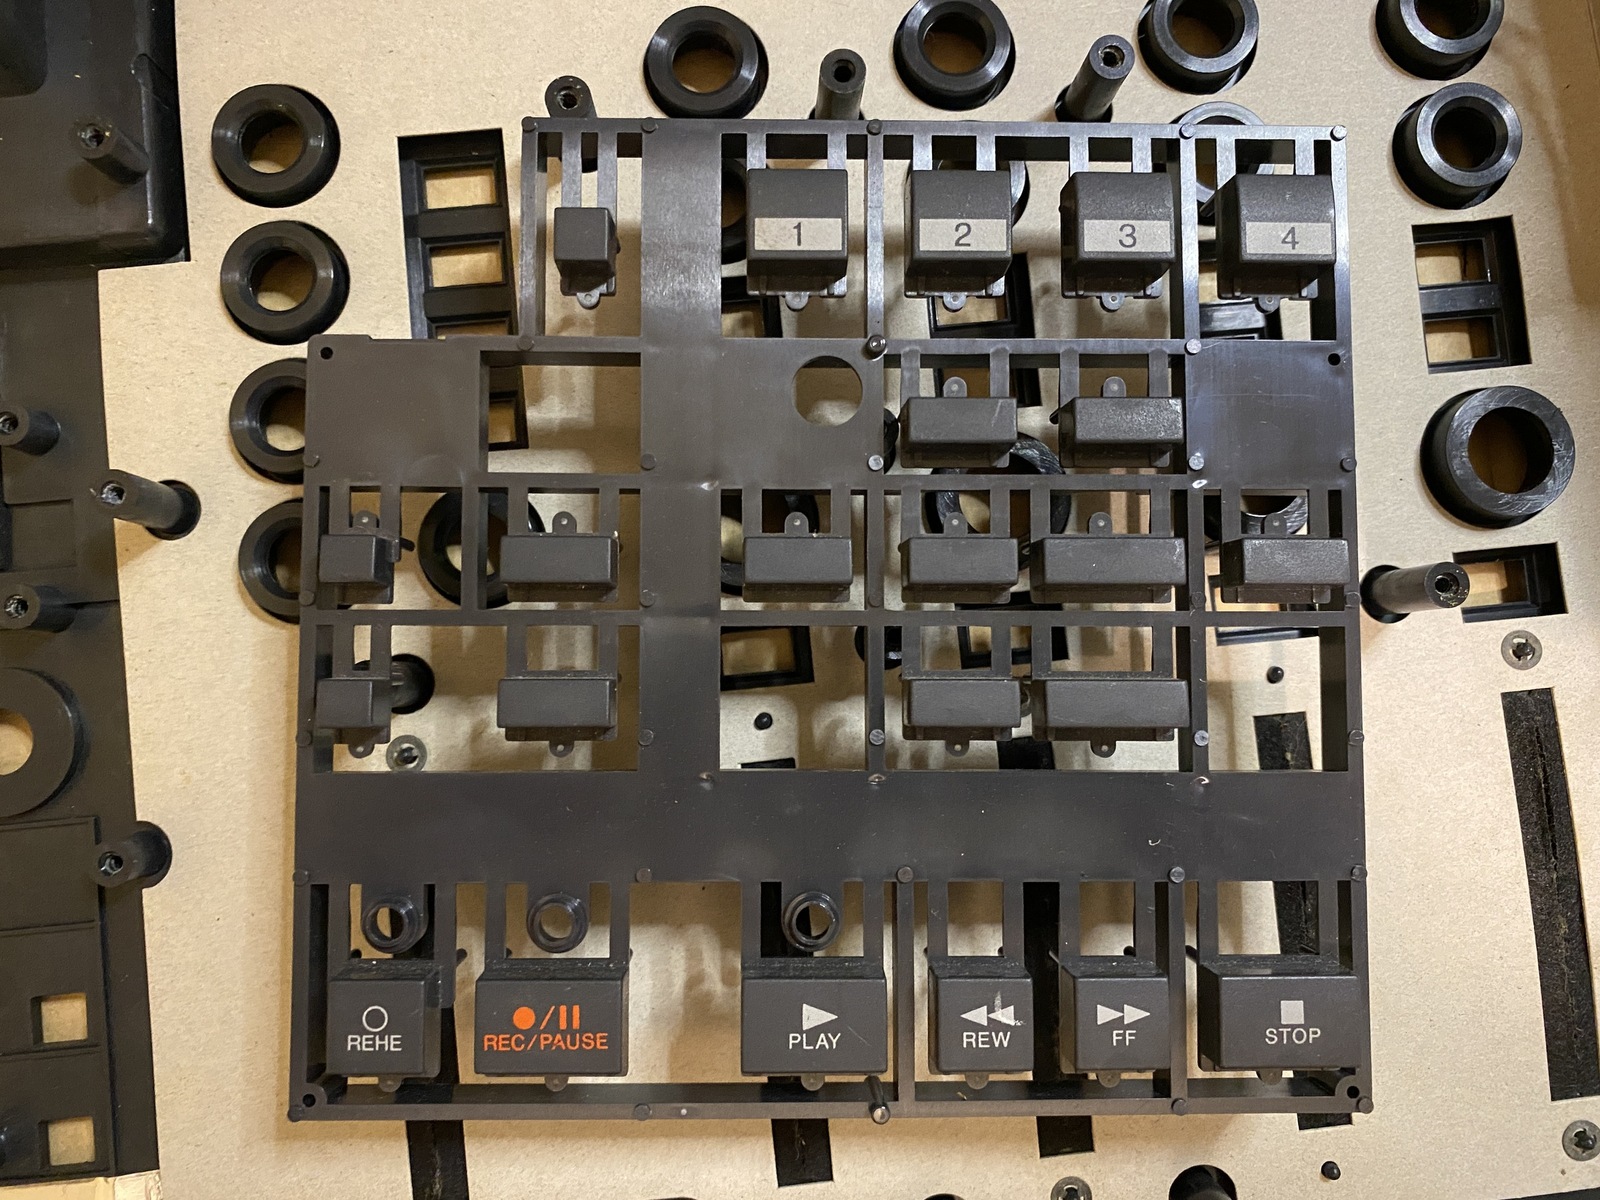 Button matrix
From here I take it to the bathroom and mix up a small amount of sugar soap with warm water. Using an old toothbrush and a cloth work your way around the unit. Don’t run it under water or get excessive wetness in inside due to the card. Once it’s all pretty clean run over it with a cloth and fresh clean water, then set aside to dry.
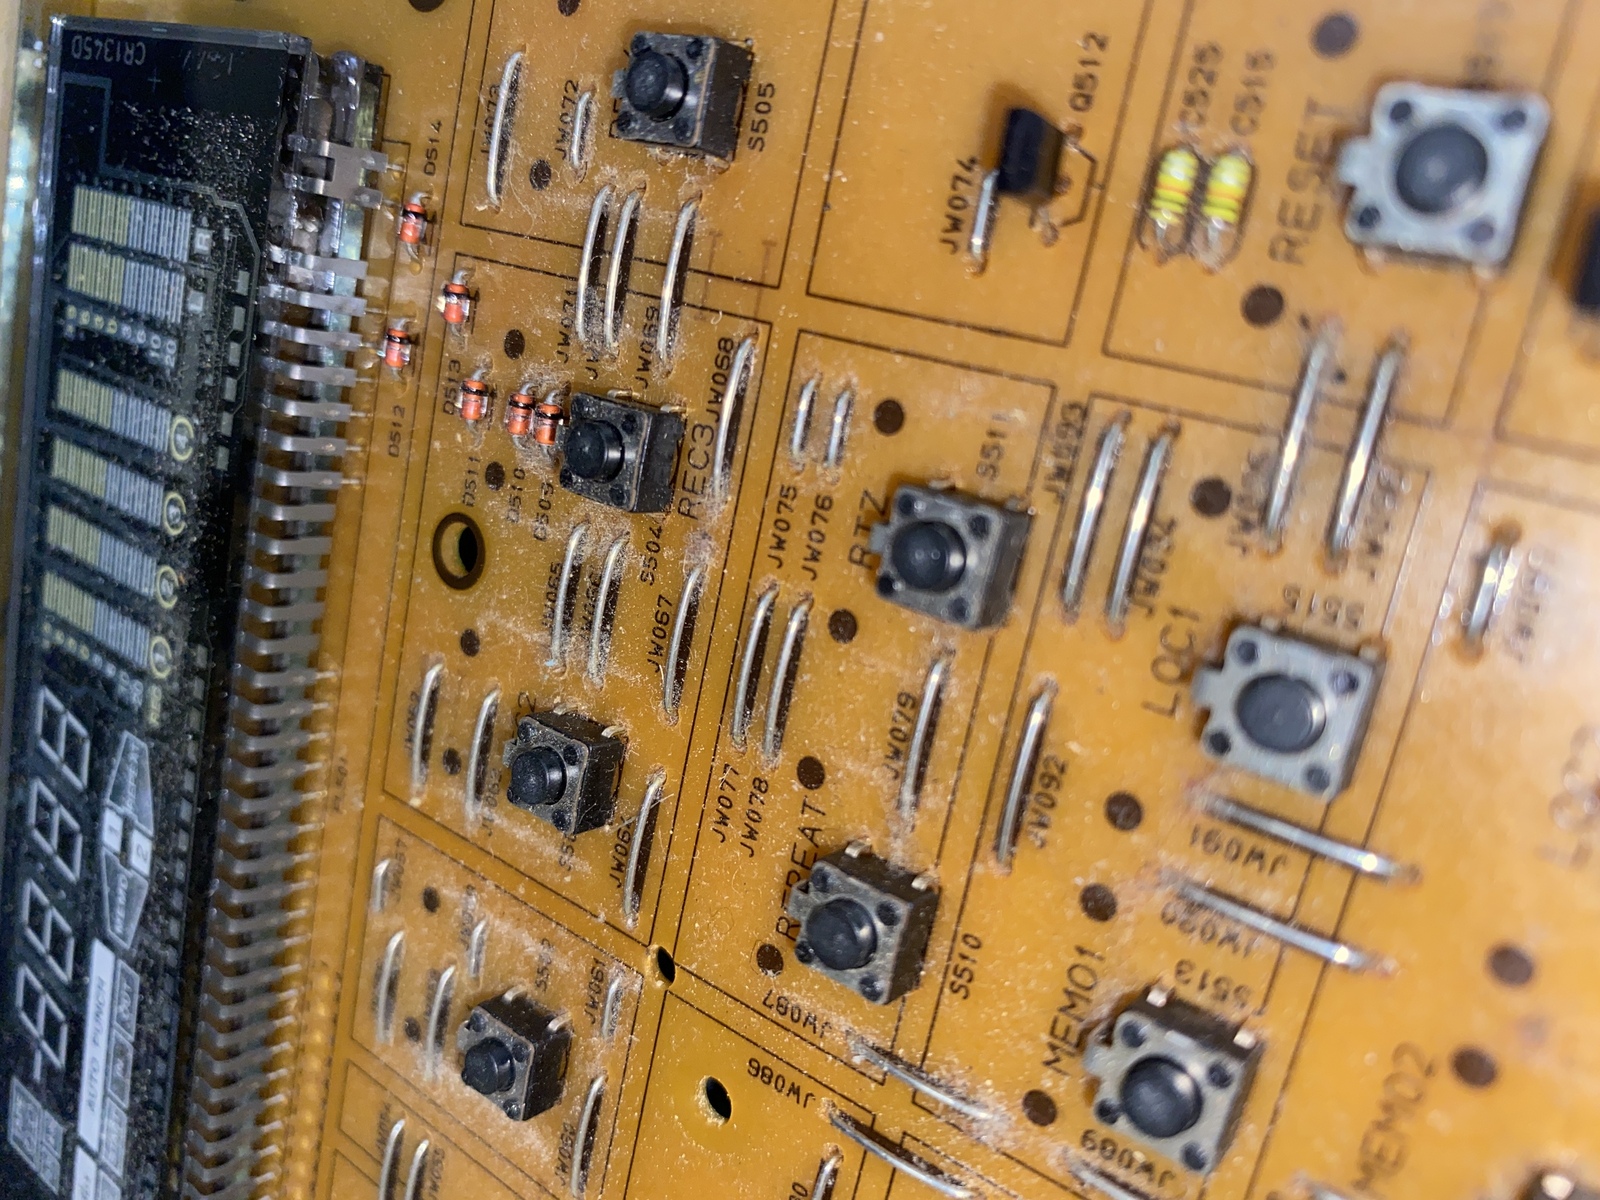
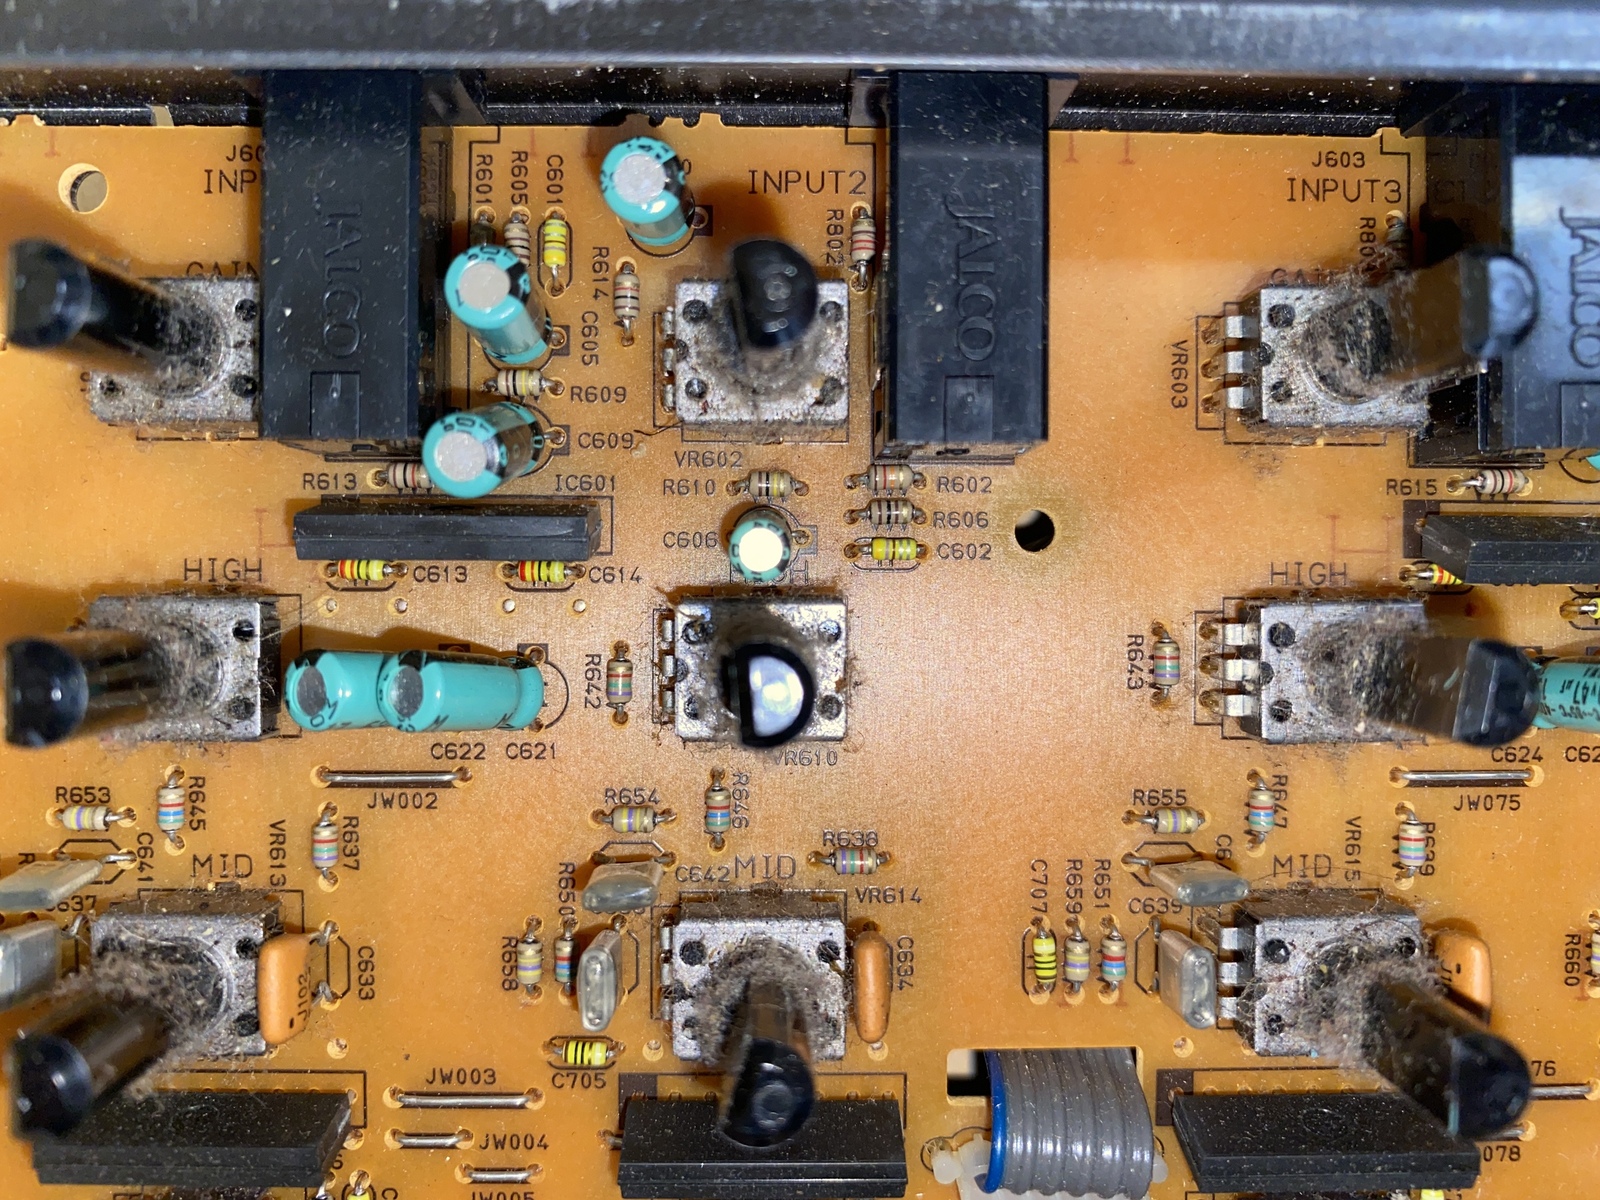
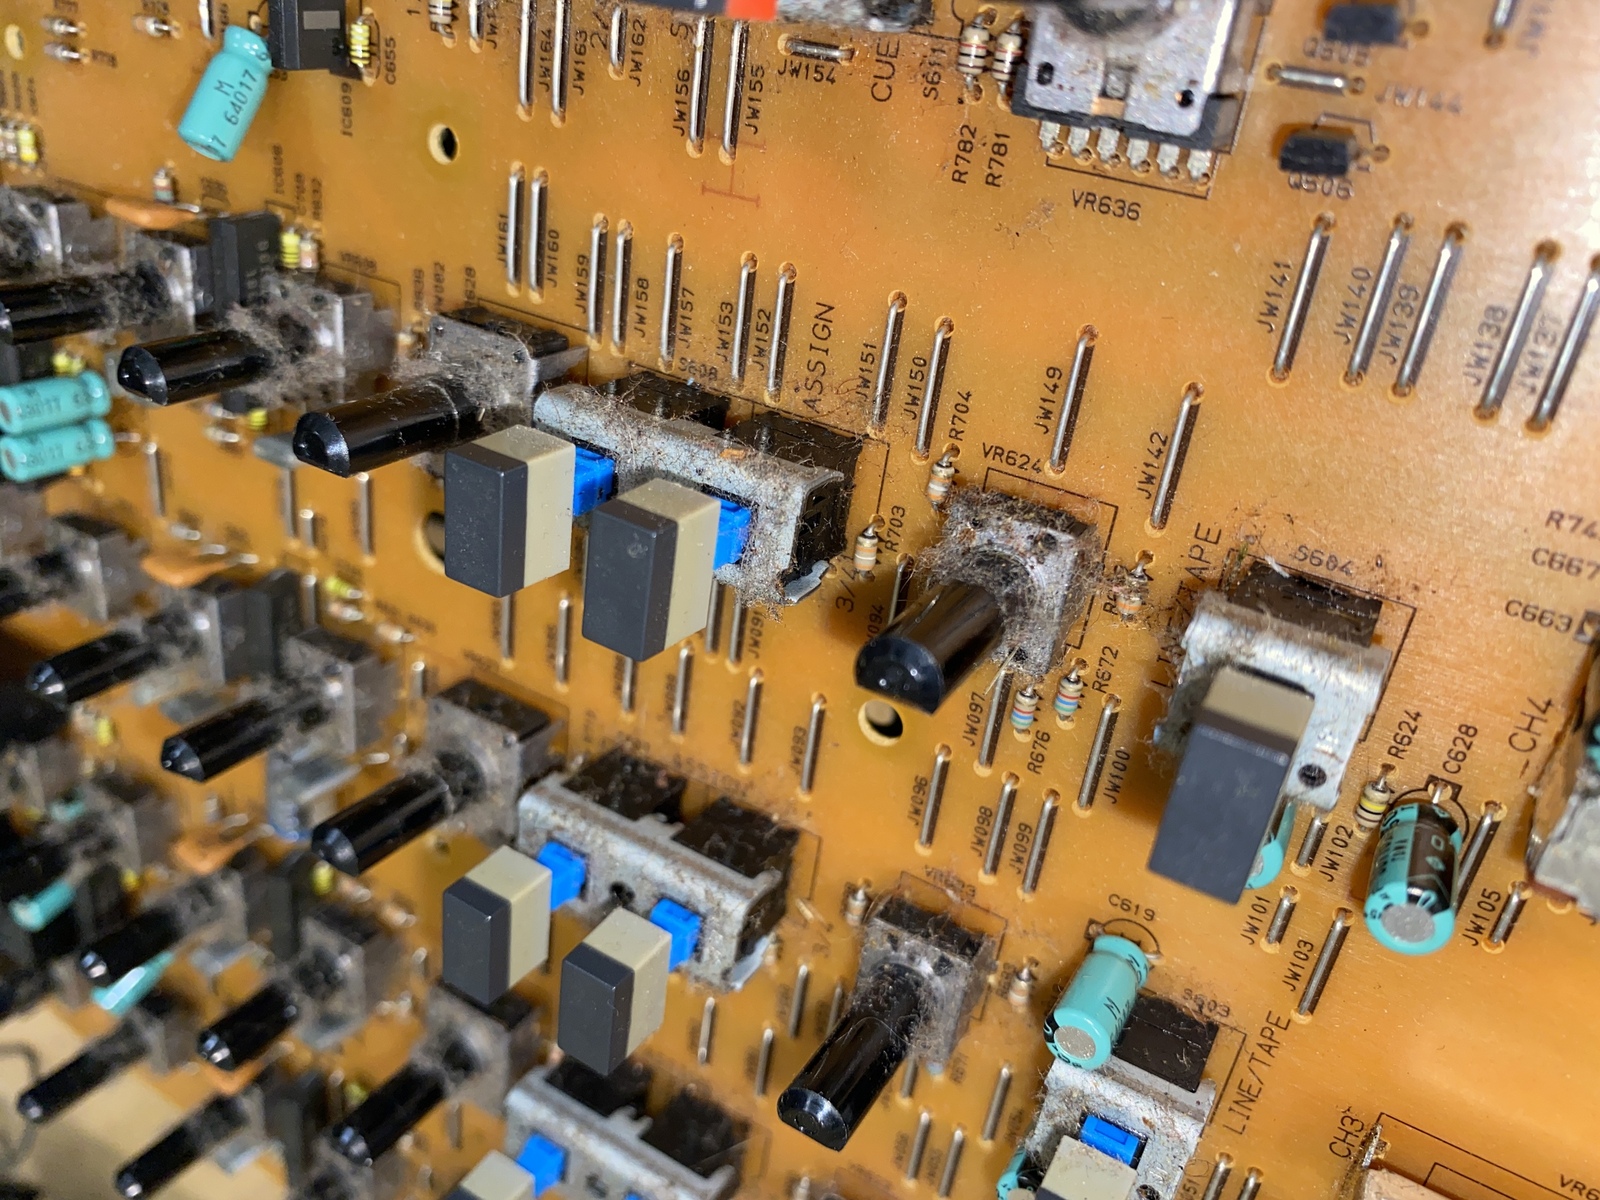
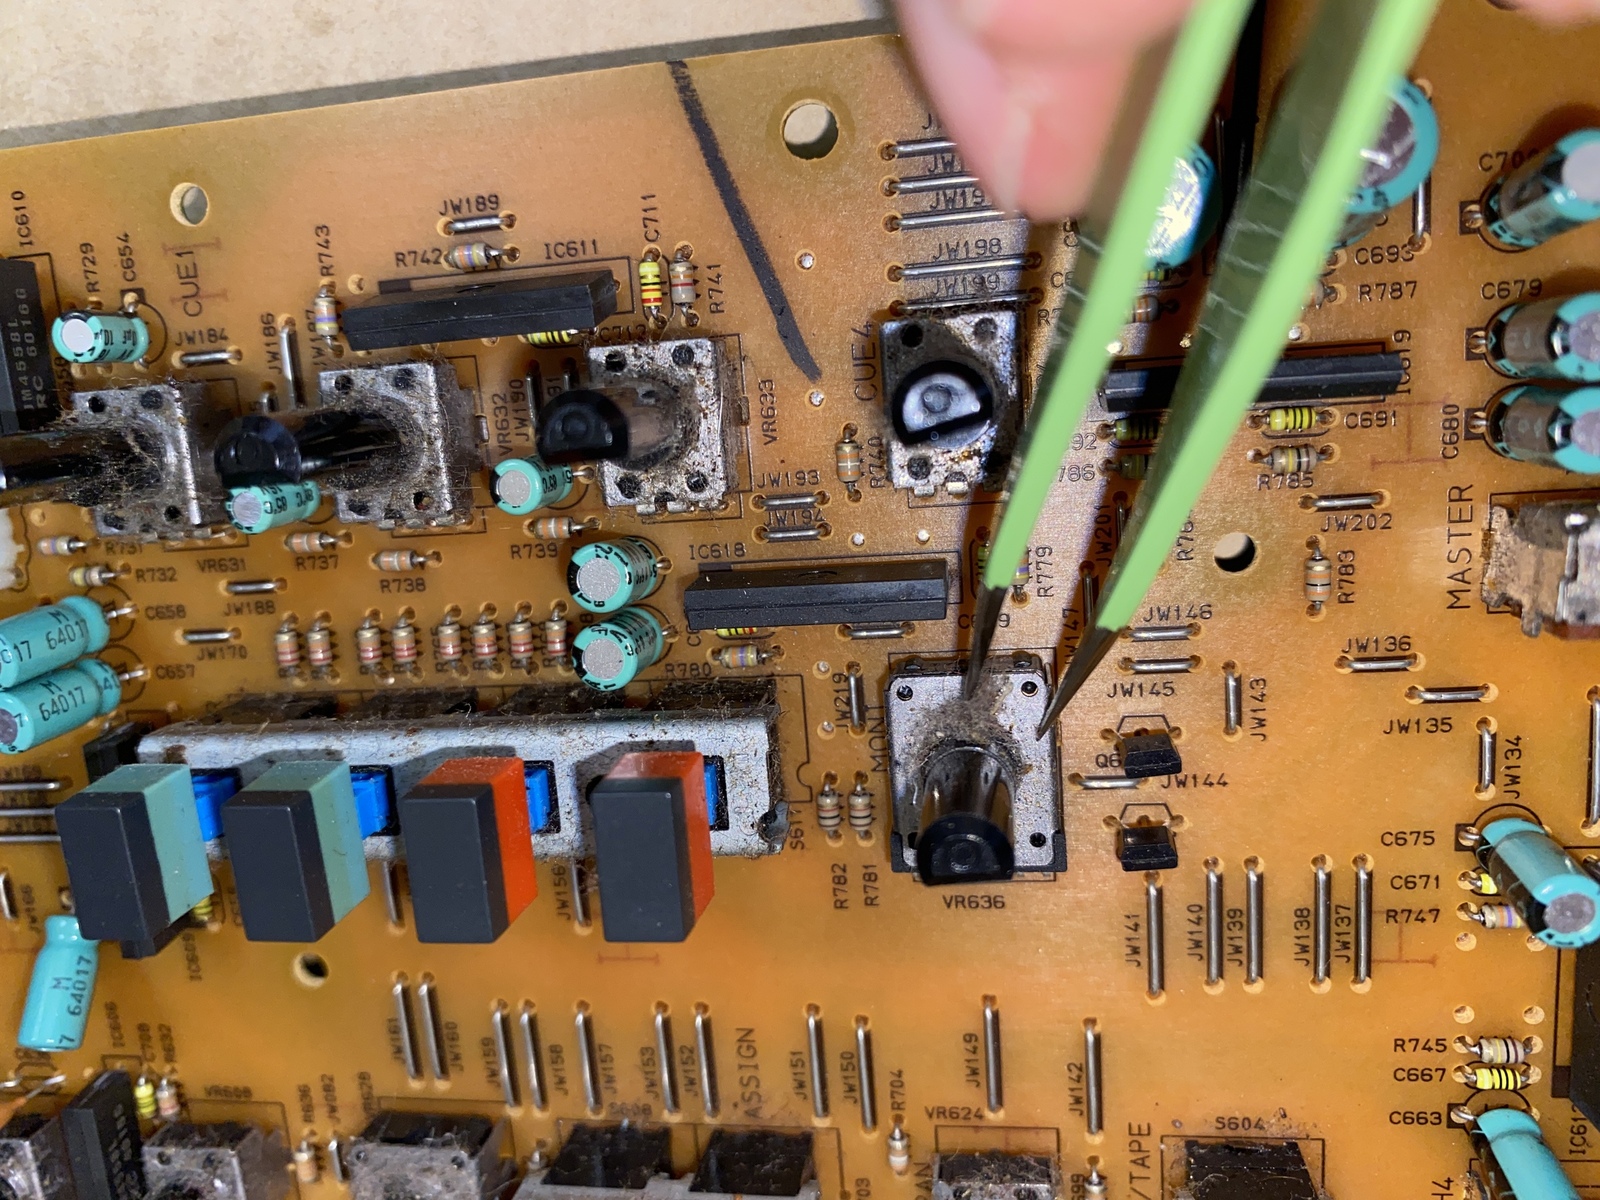
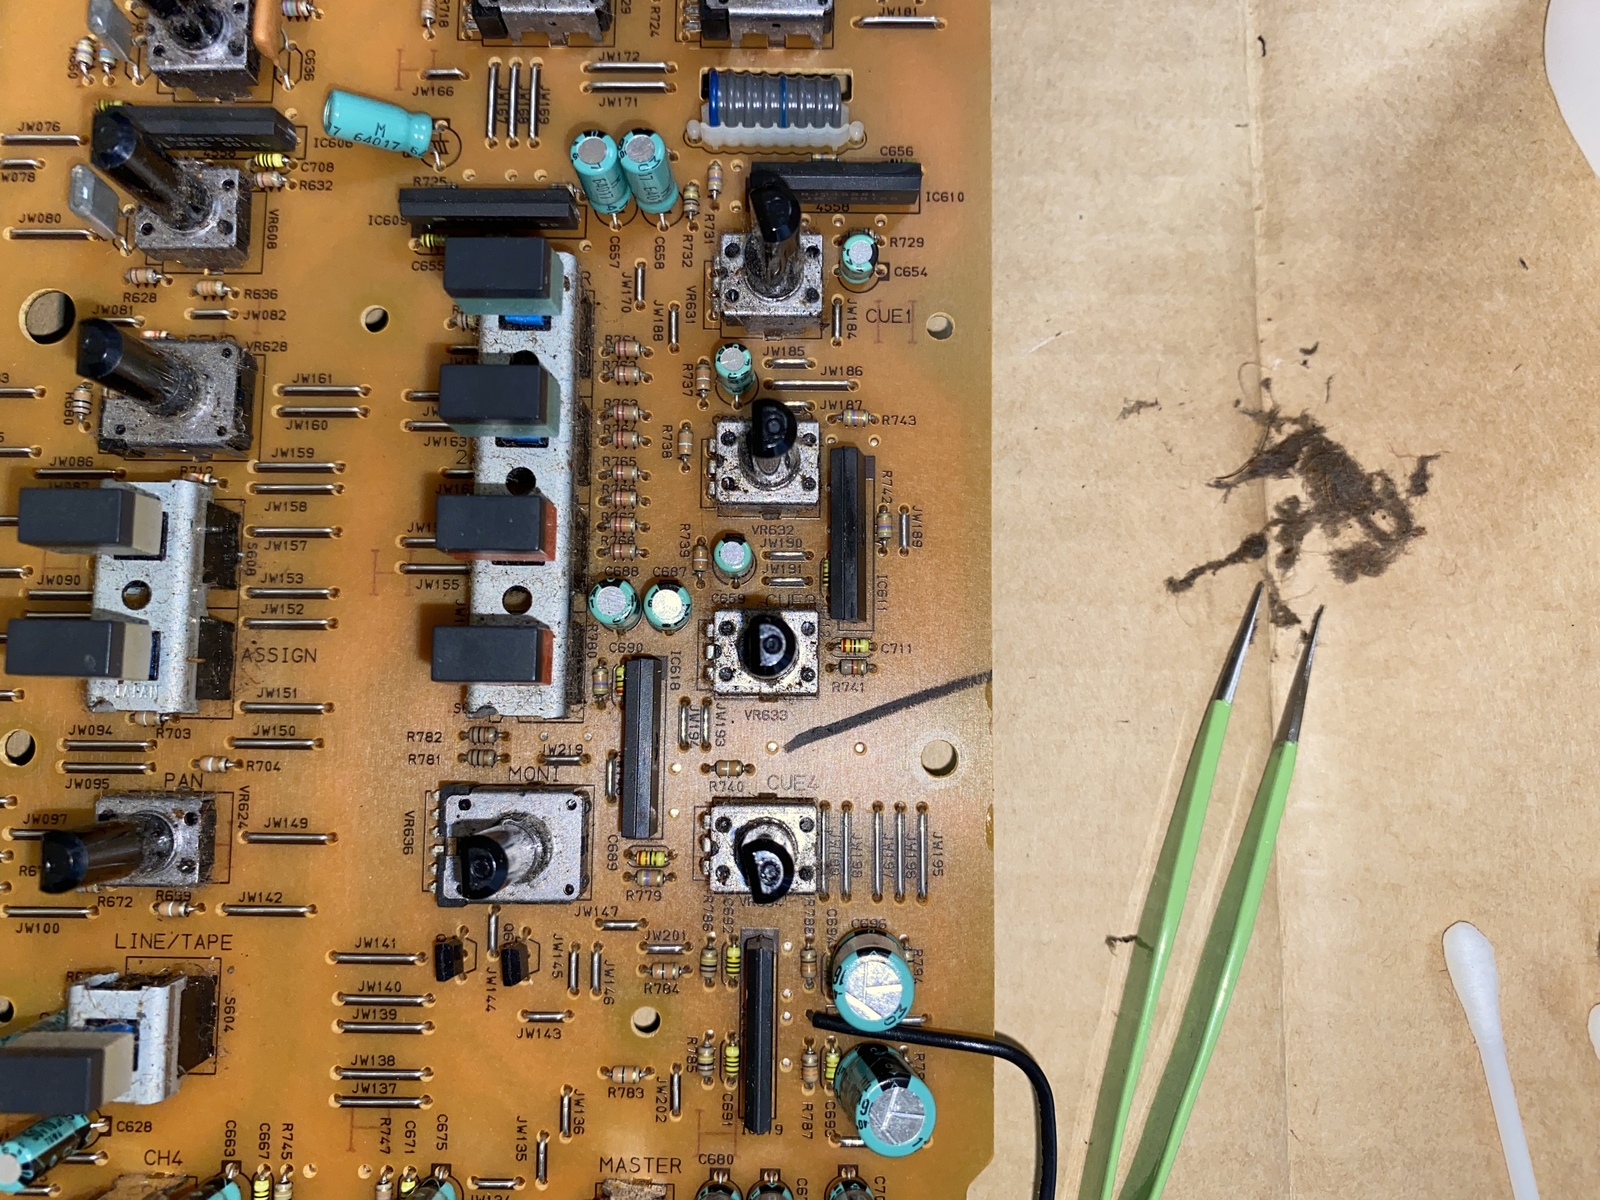
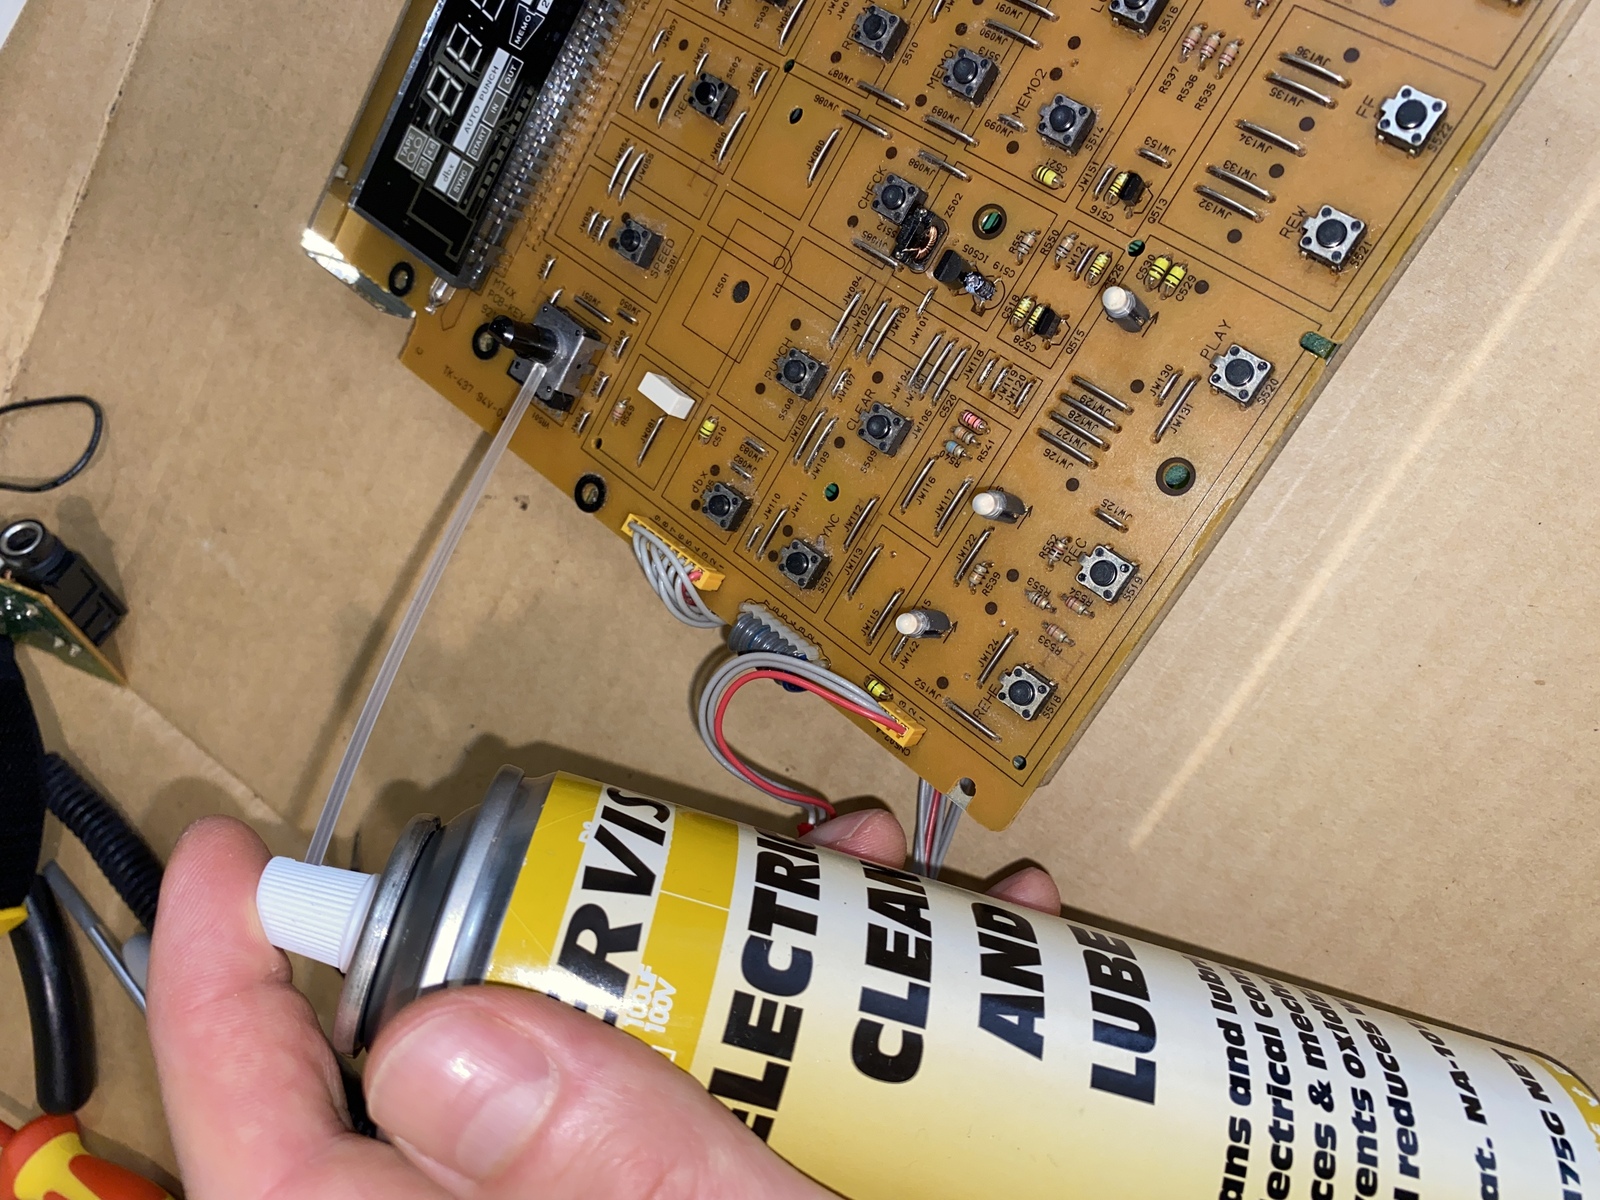
We now turn our attention to the circuit boards, with their switches and pots. My process is to first remove any large amounts of fluff etc by hand and tweezer. Then use an air can to blow off any loose dust. From here, I use a spray Electrical Clean and Lube with applicator nozzle to each pot and slider, one at a time. Spray, move through a full motion, repeat for each one. As you go through, you’ll find from turning and applying spray that more grime is able to be picked up so remove this as you go.
For the jacks I spray in some electronic cleaner (not lube) and gently insert a cotton swab to apply some friction to the contacts. Cotton swabs are probably not the best as they can leave cotton behind, but if you’re careful you can avoid this.
This can be fairly time consuming, just be slow and methodical about it. The results are worth it.
Reassembly
At this stage you will have clean boards, and a clean and dry shell. Now reverse the steps taken to remove everything to put it back together. If ribbon connector pins are a little bent, straighten these before slotting back in. When it comes to the plastic pins squeeze the ends together with some small pliers to insert back into their holes.
 Squeeze pin ends to insert
Attach the base to the top, following the order of removal and any markings you made for connectors. When joining the top and botton ensure no cables are pinched.
Once it’s all together, and before screwing the top and base together or replacing all the knobs, test the unit. Use a guitar, bass or whatever you have at hand with a 1/4” cable and record something to each channel. Then listen back, and rotate all knobs and move sliders. I use headphones. Some of the jacks I haven’t tested at this time such as tape out, but they worked before so I’m fairly happy to test them in the studio later.
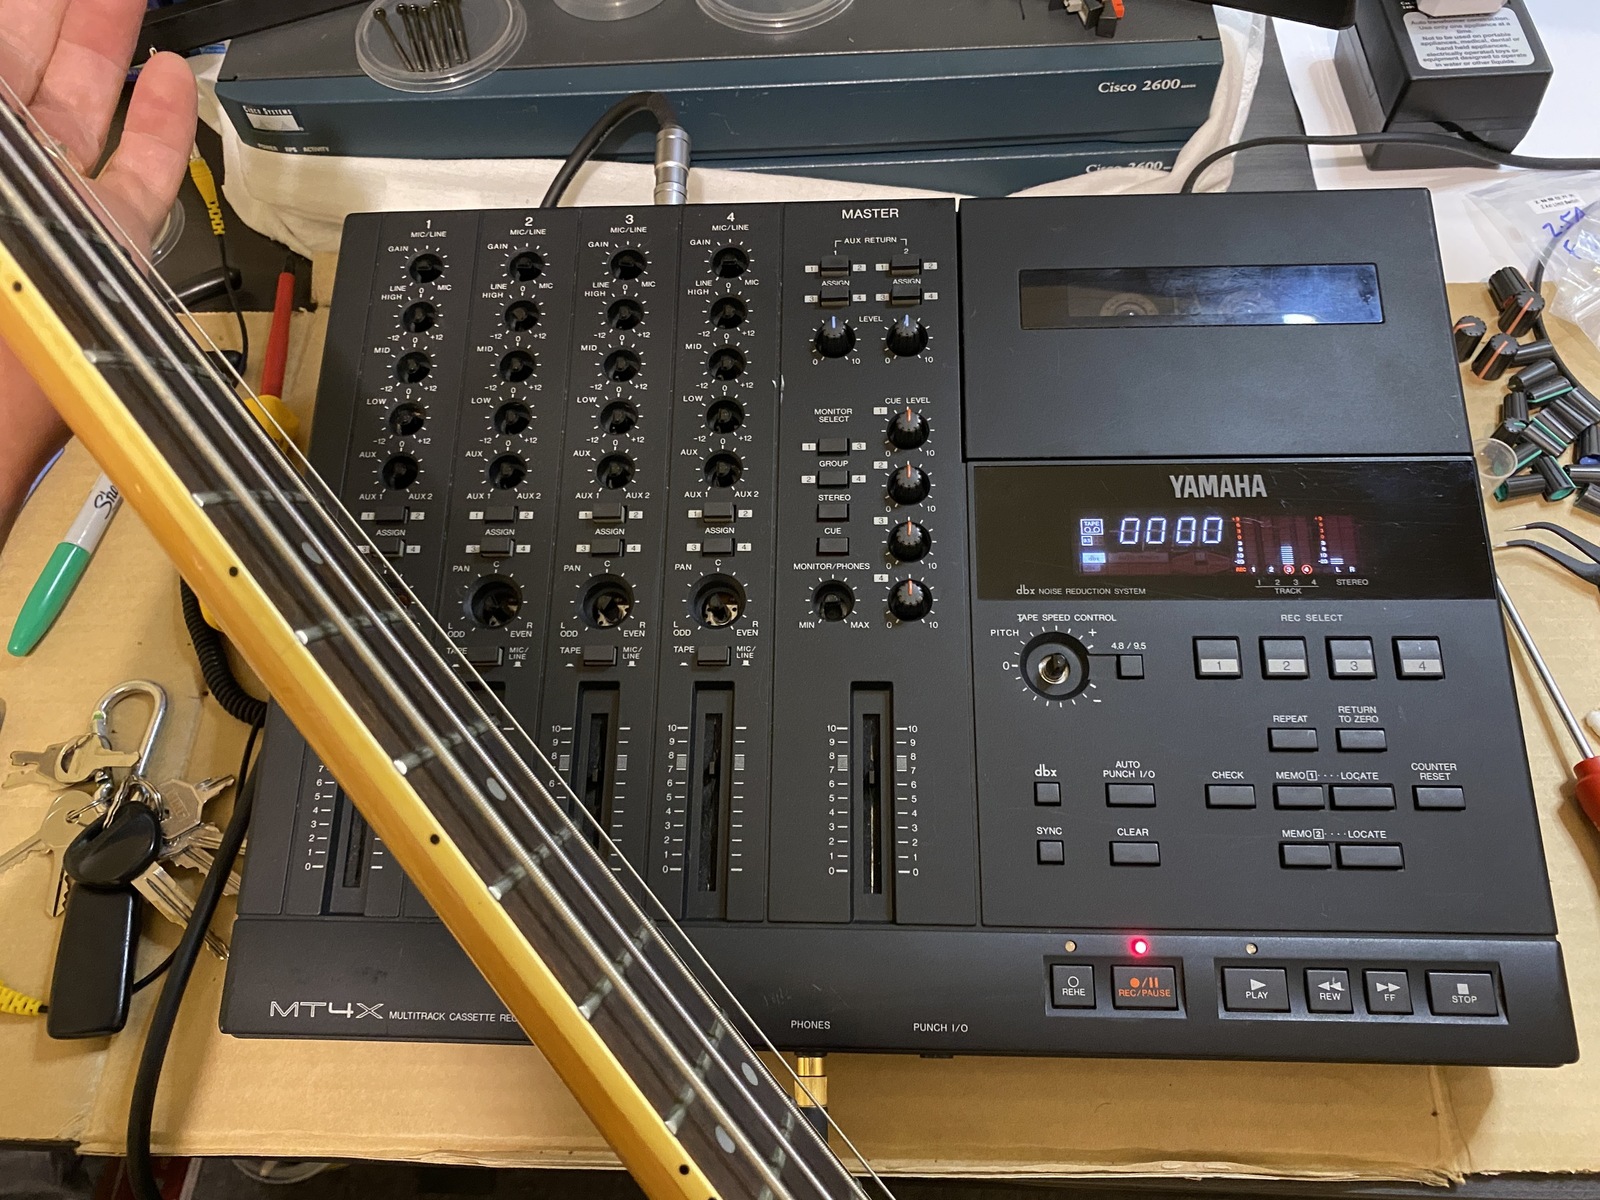 Testing the unit
Once you’re happy with it, reattach the knobs and screw the unit together. If all goes well you’ll have a shiny well functioning unit.
Hit Record
I hope this has been helpful to someone. There are various items I haven’t covered, which I hopefully will at a later date, such as demagnetising, motor speed adjustment and azumith adjustment, but these are often not necessary and a bit more advanced or require more expensive tools.
I’d love to hear from others with part numbers for these units, and any corrections, questions and ideas in the comments.
 The clean, finished unit